Paris is a beautiful city filled with so many beautiful things to see! So I decided to create a list of my favorite photo locations along with a map to guide you to them. I hope you enjoy! Comment below to tell me which location you like best!
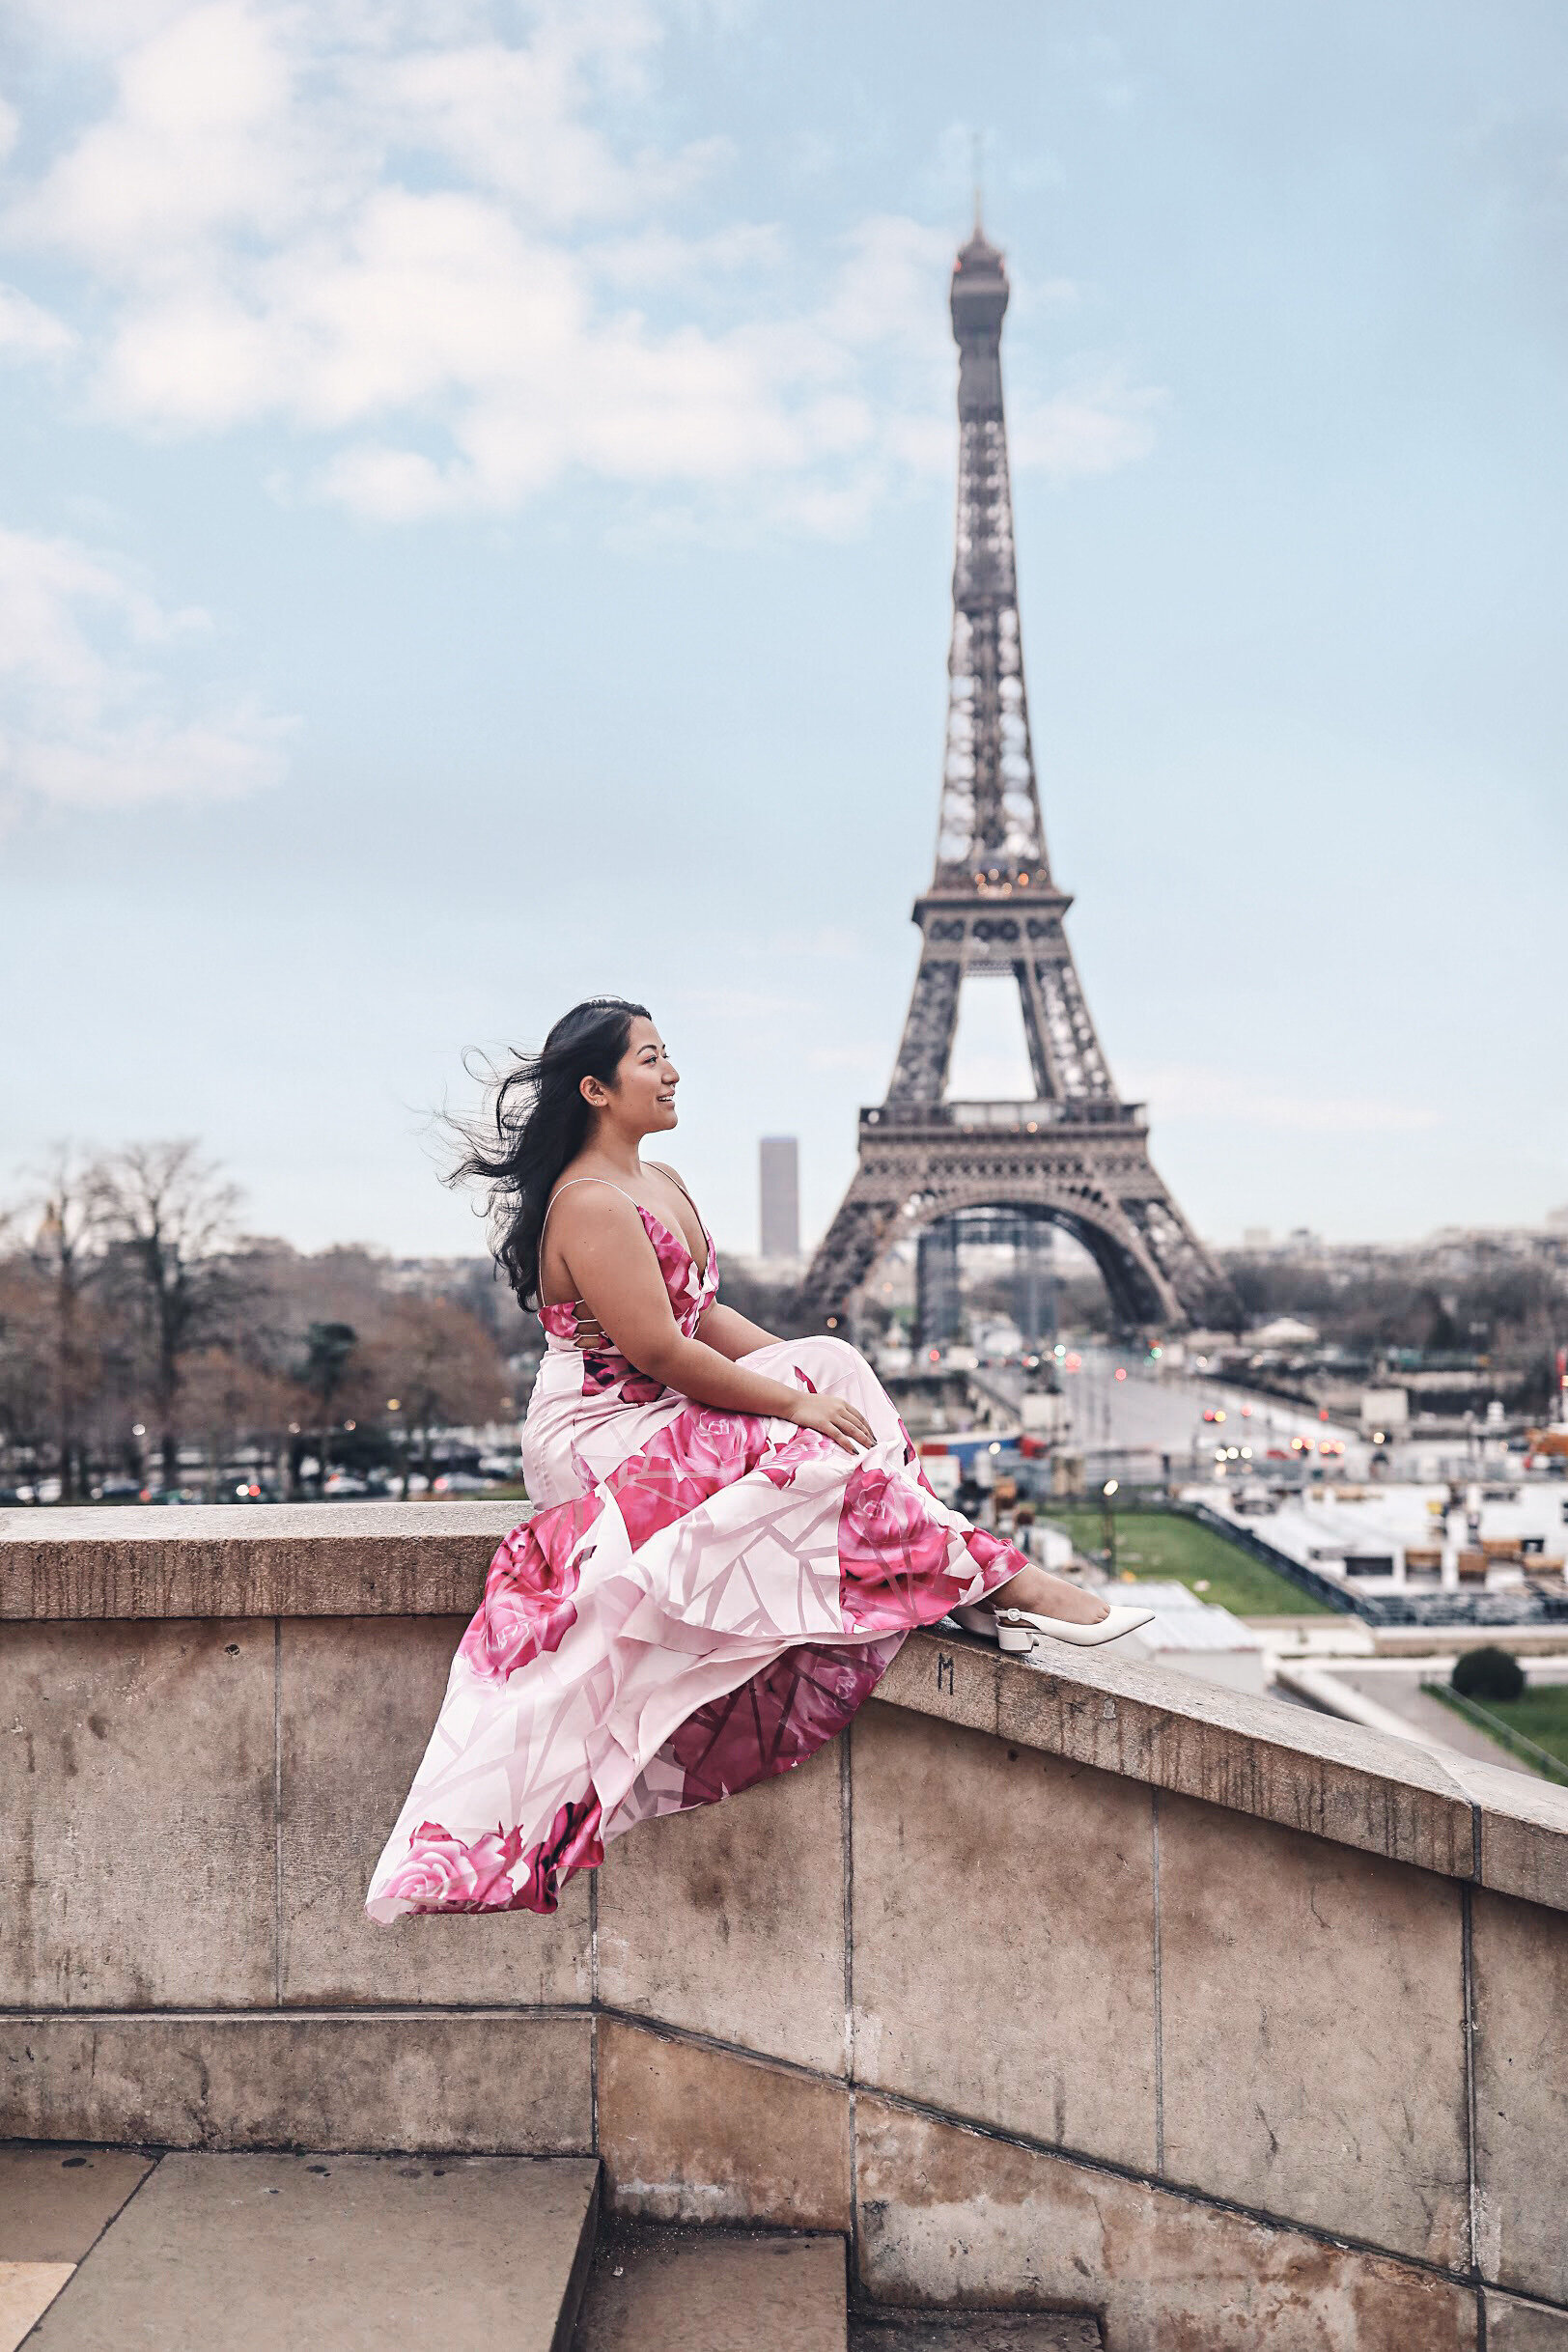
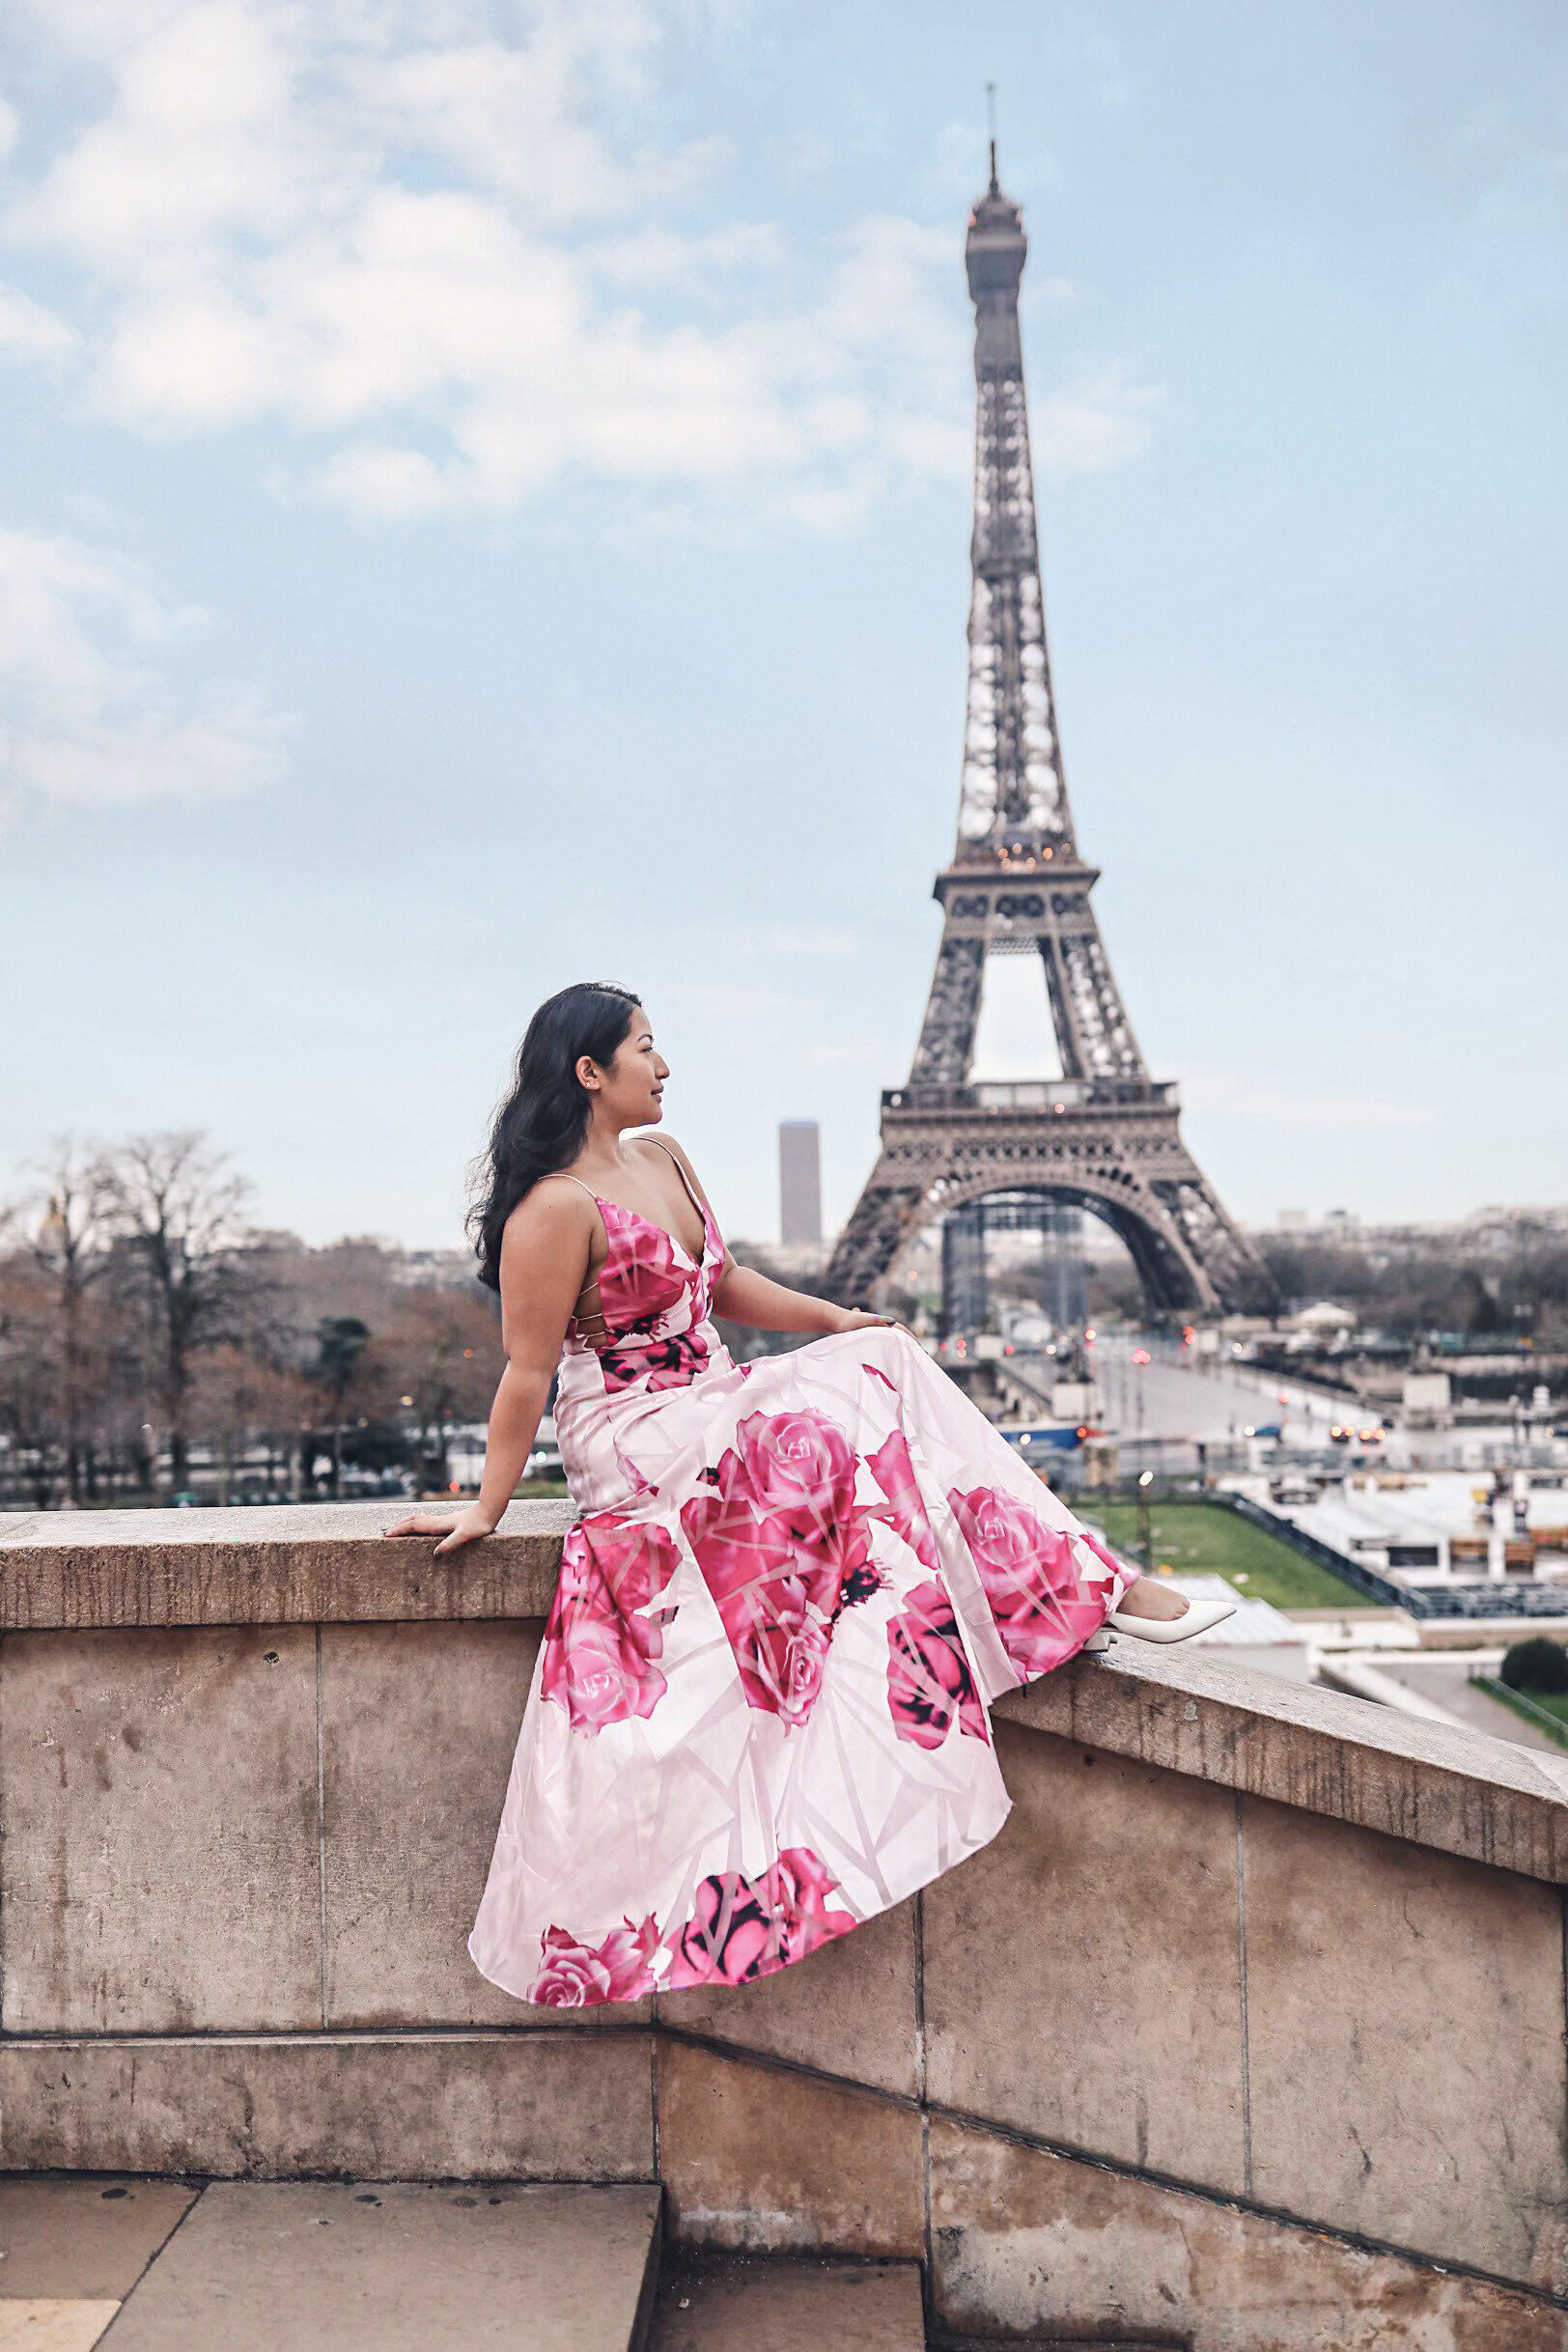
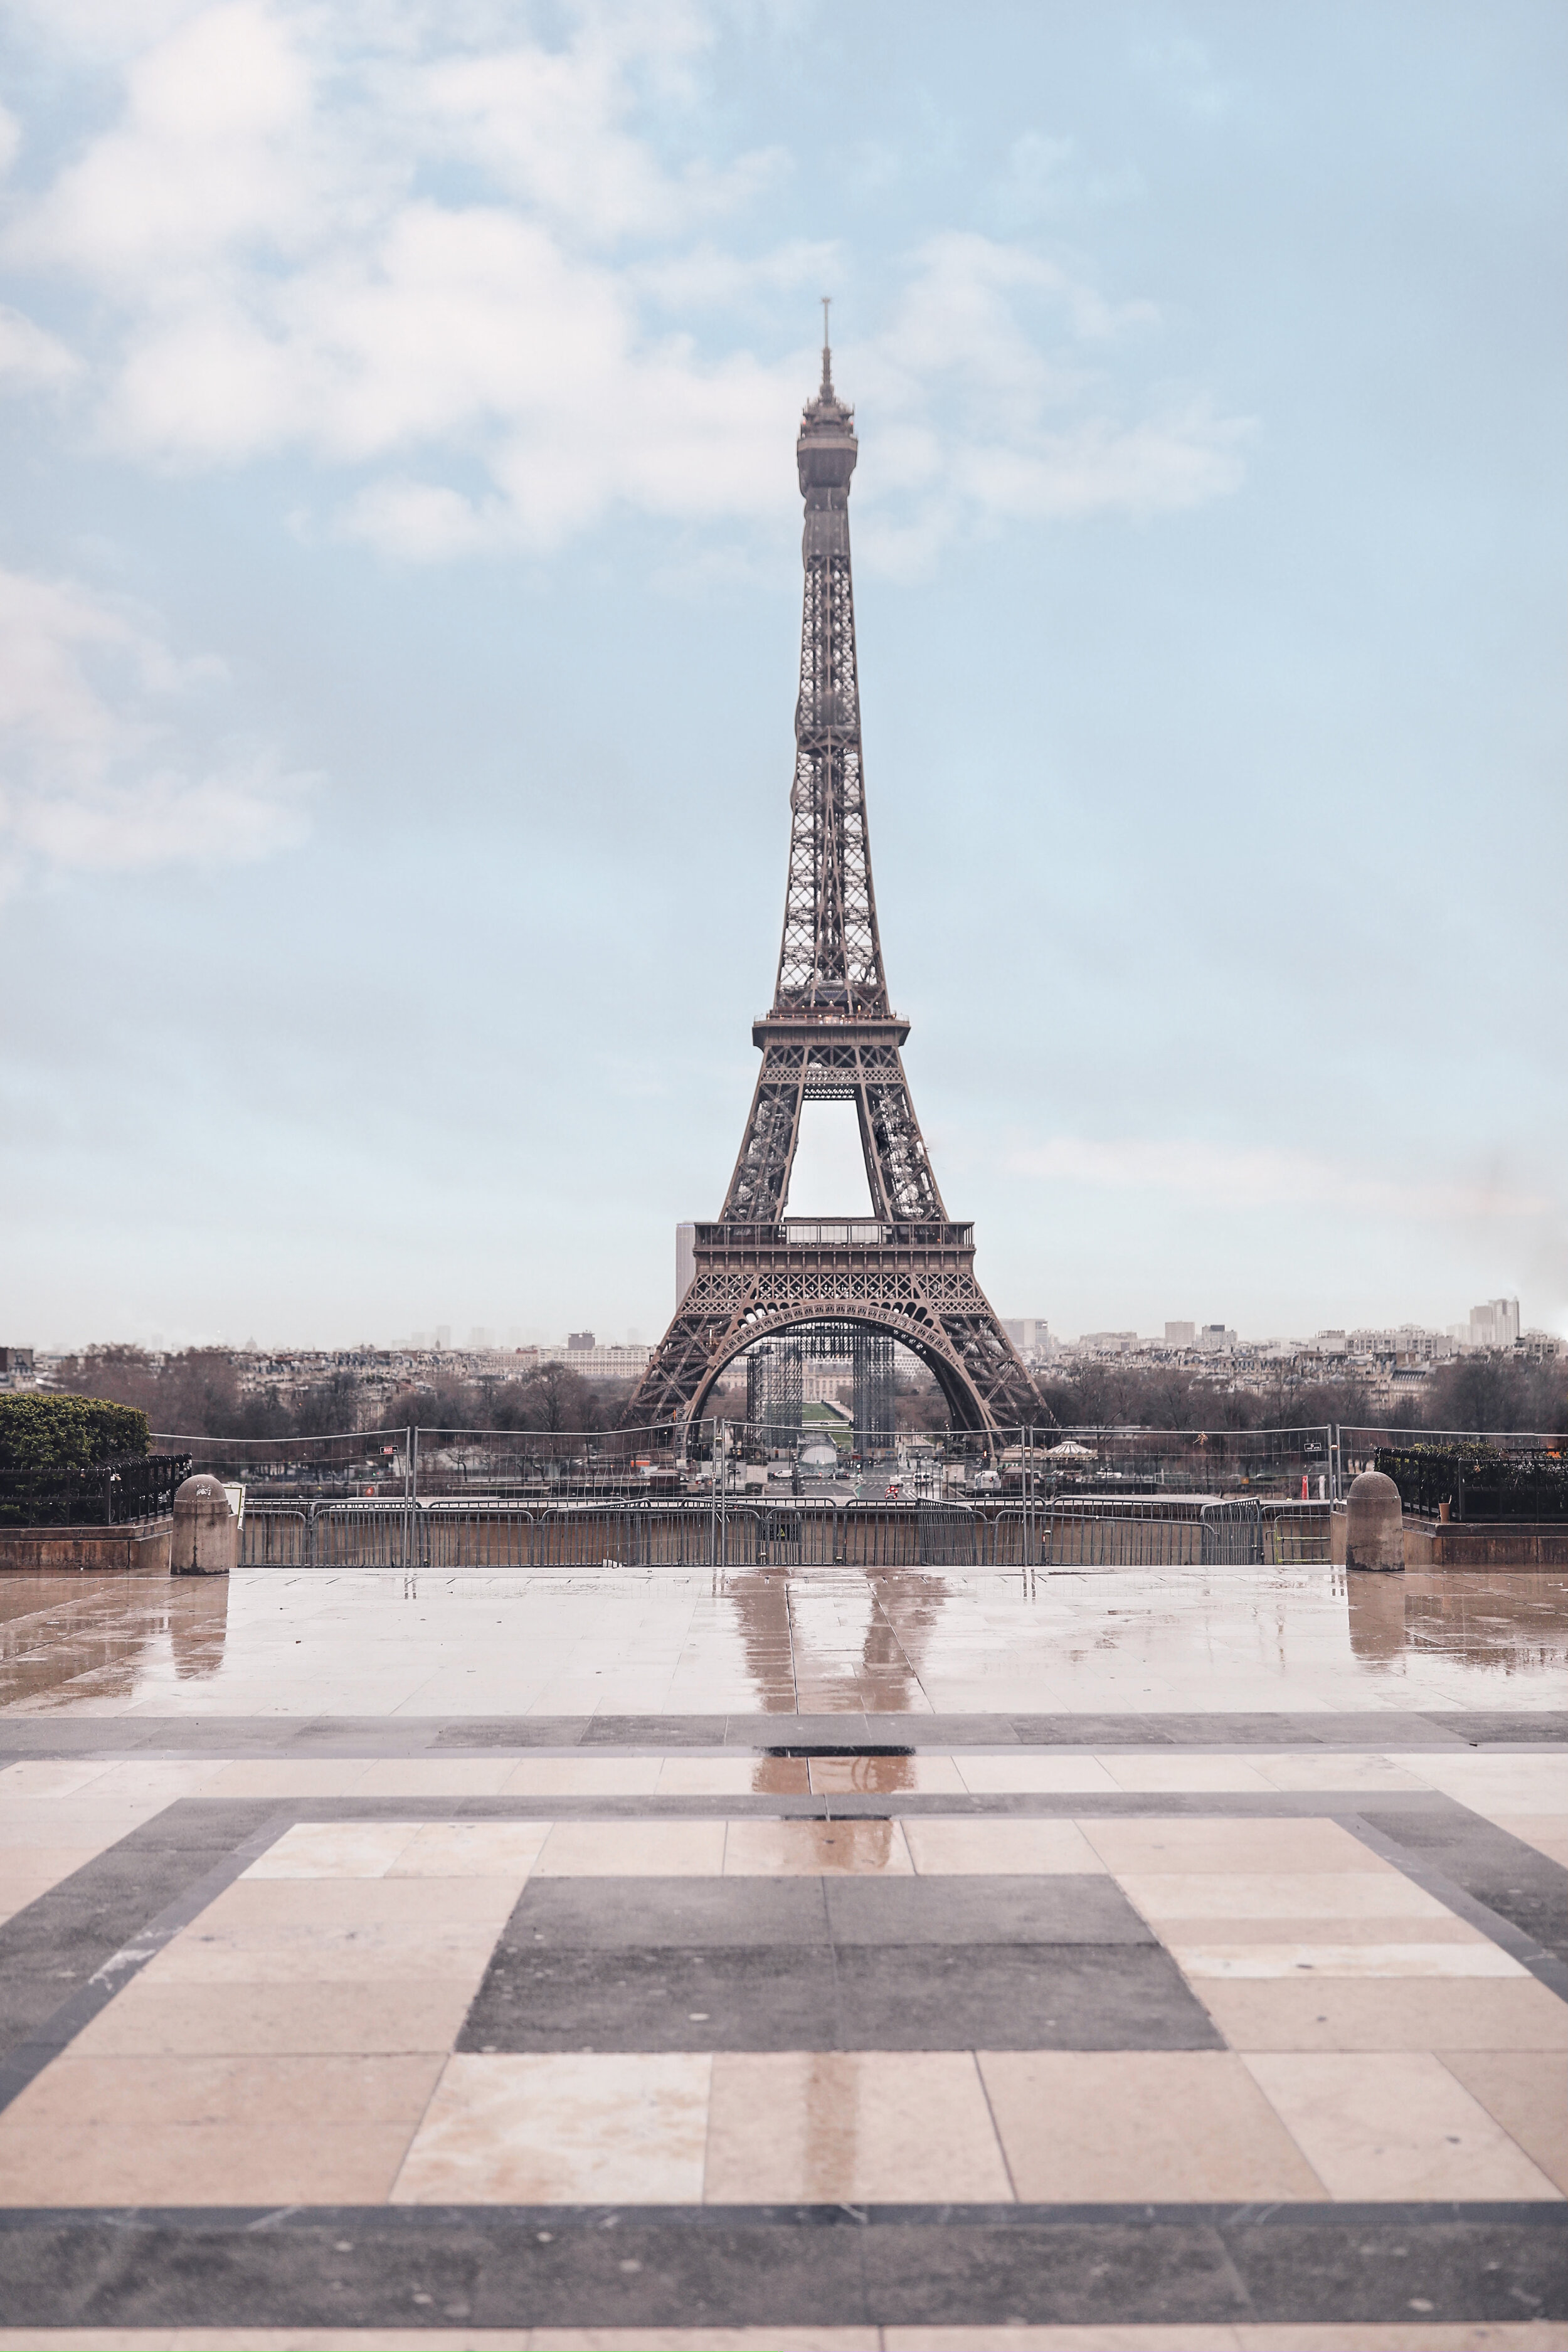
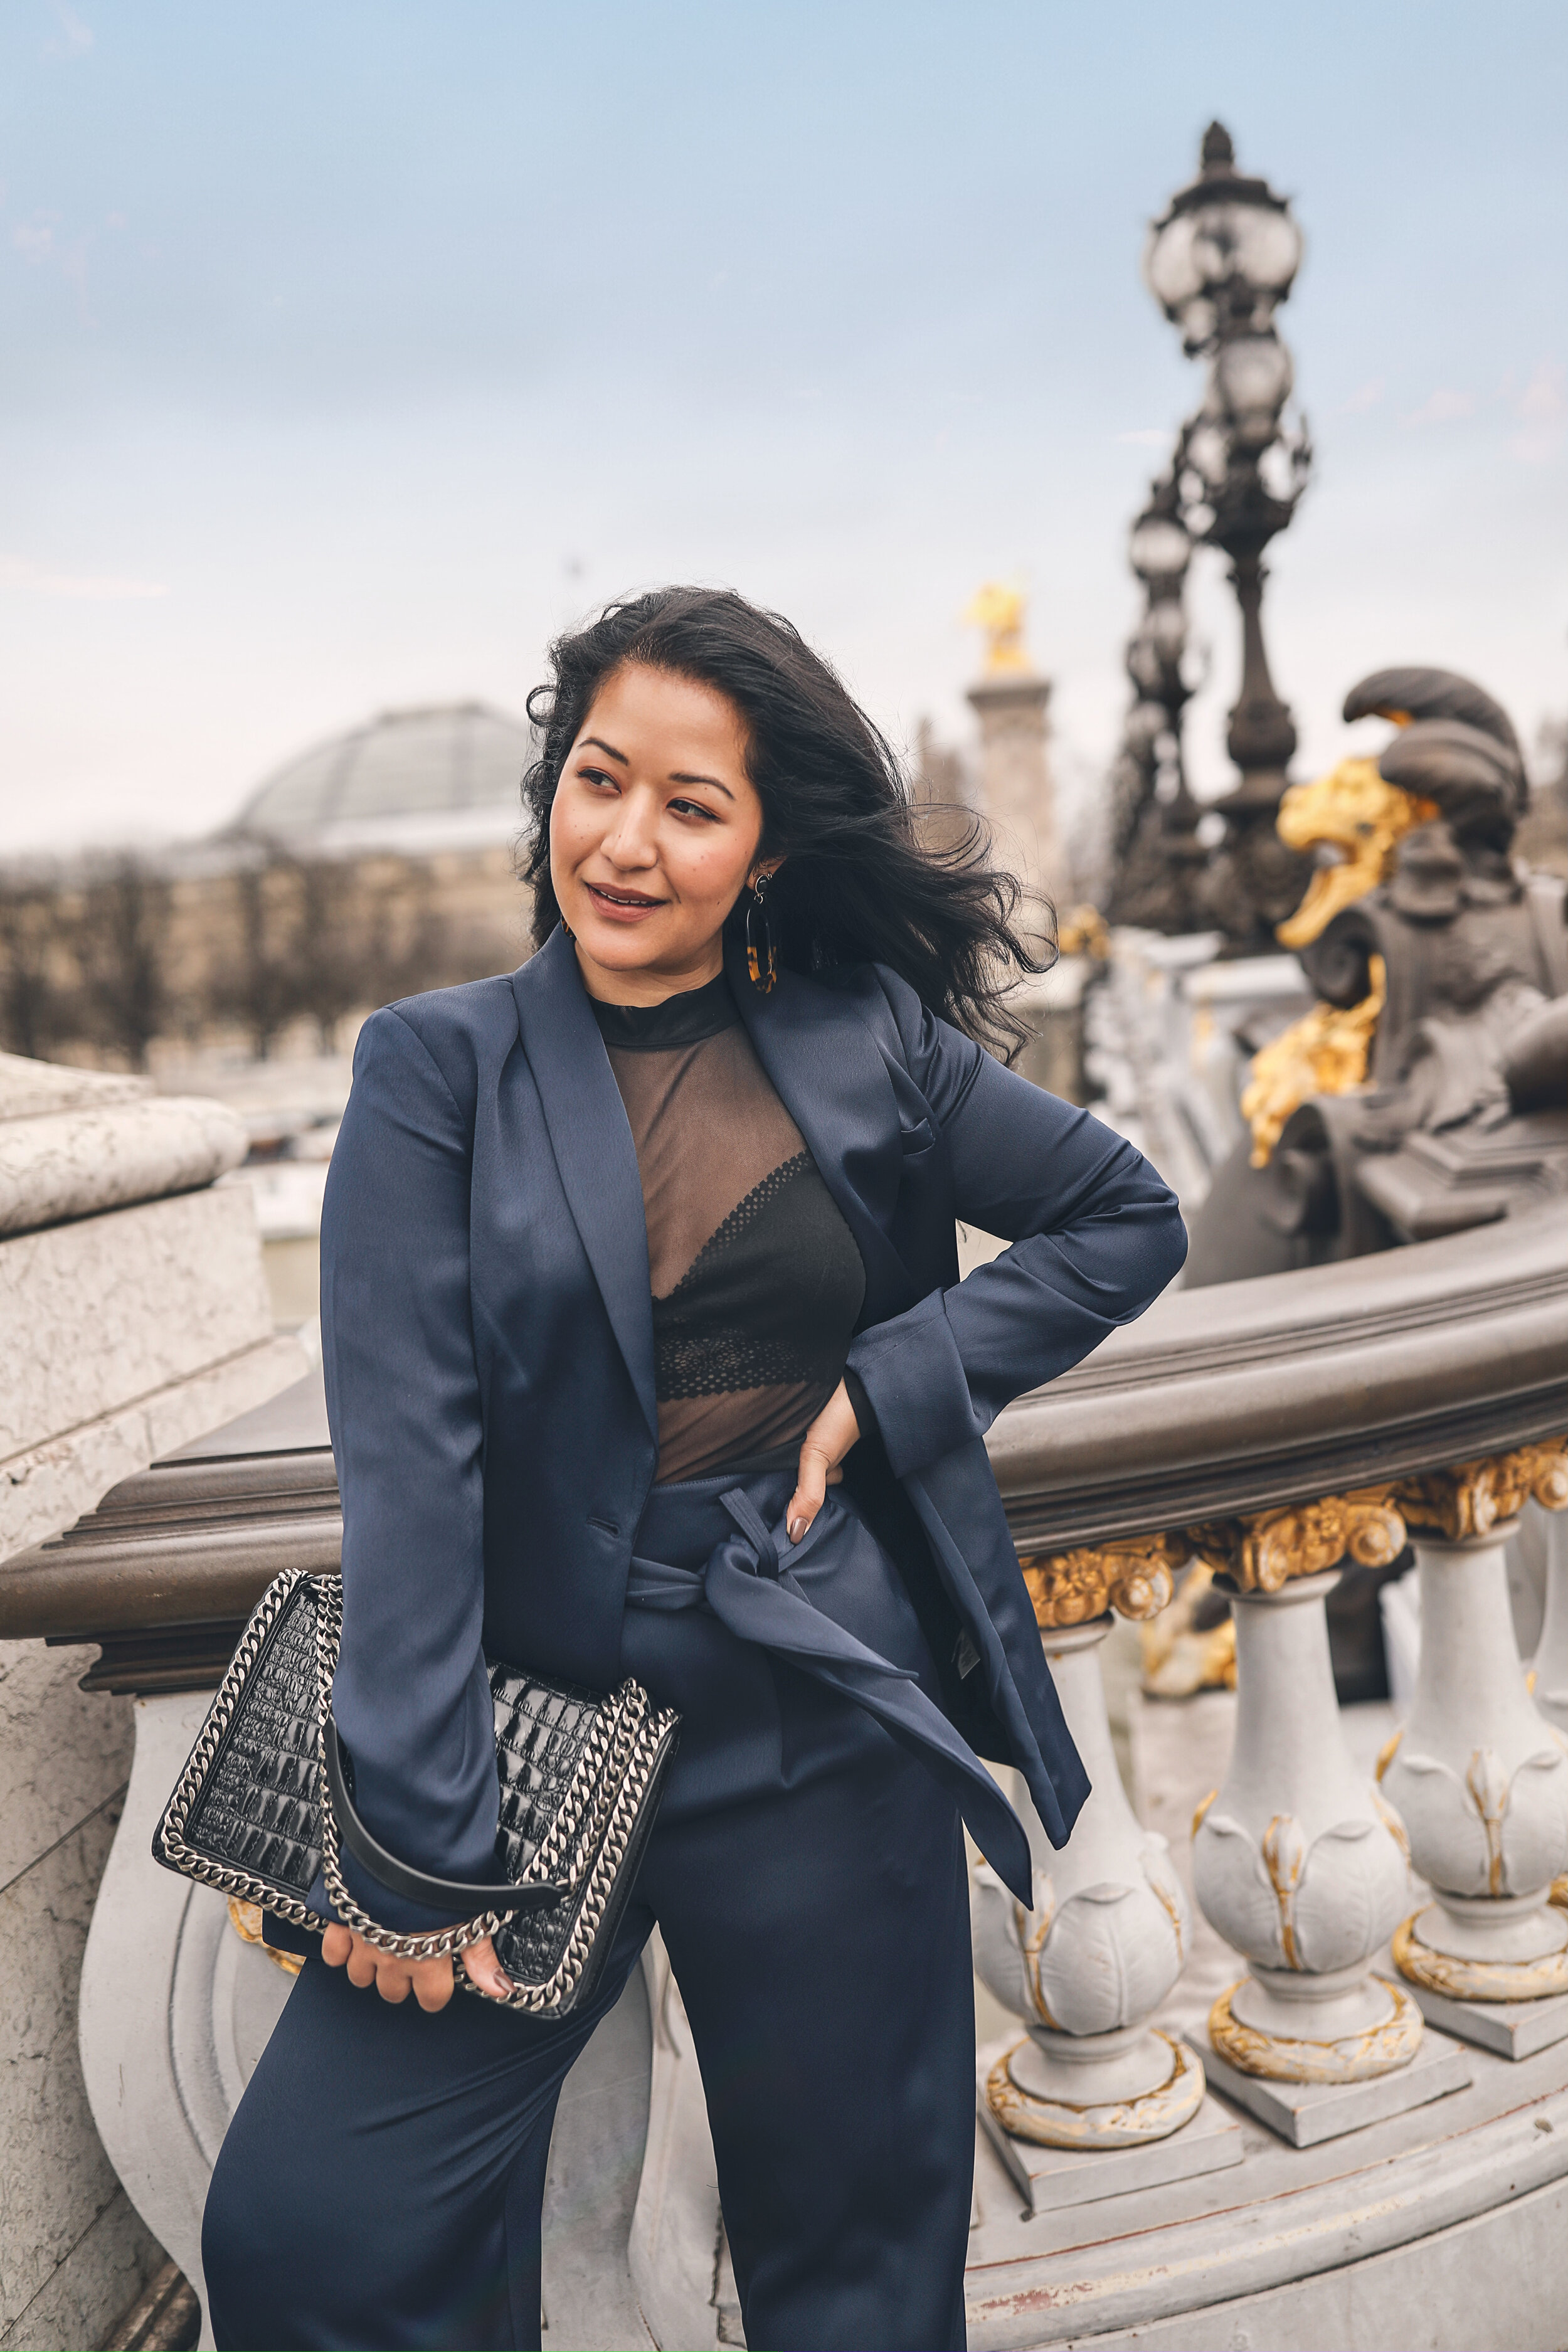
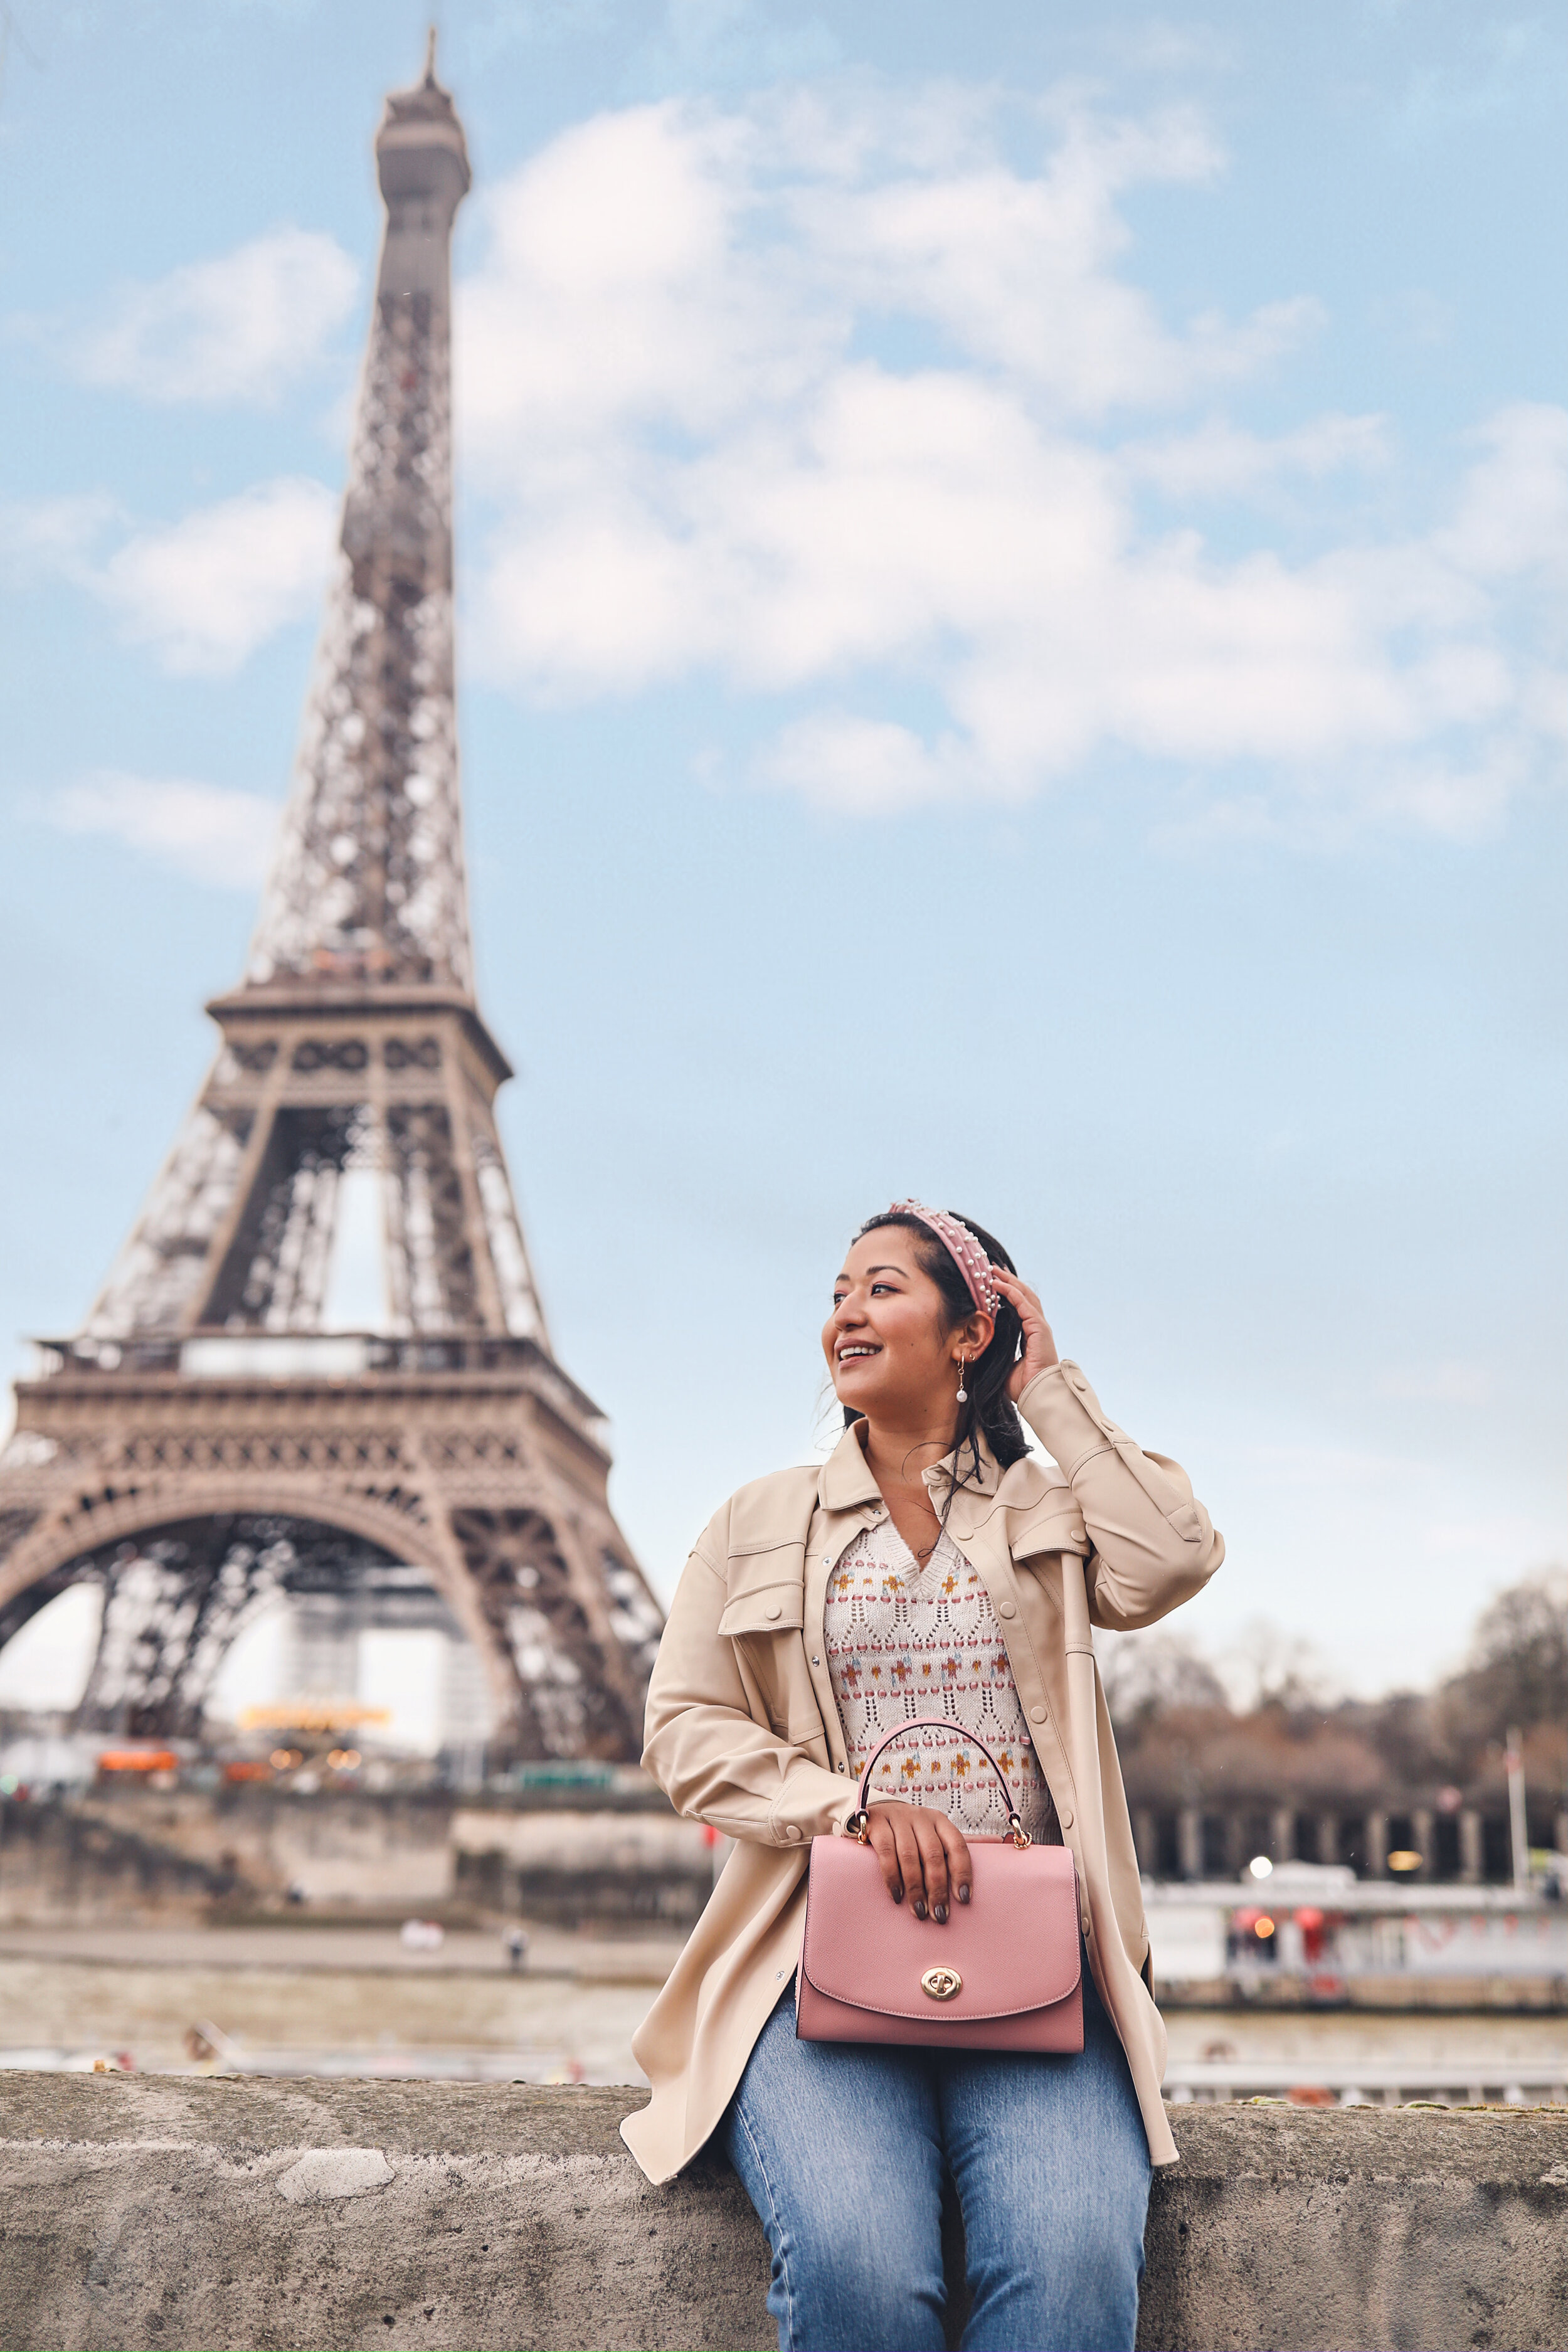
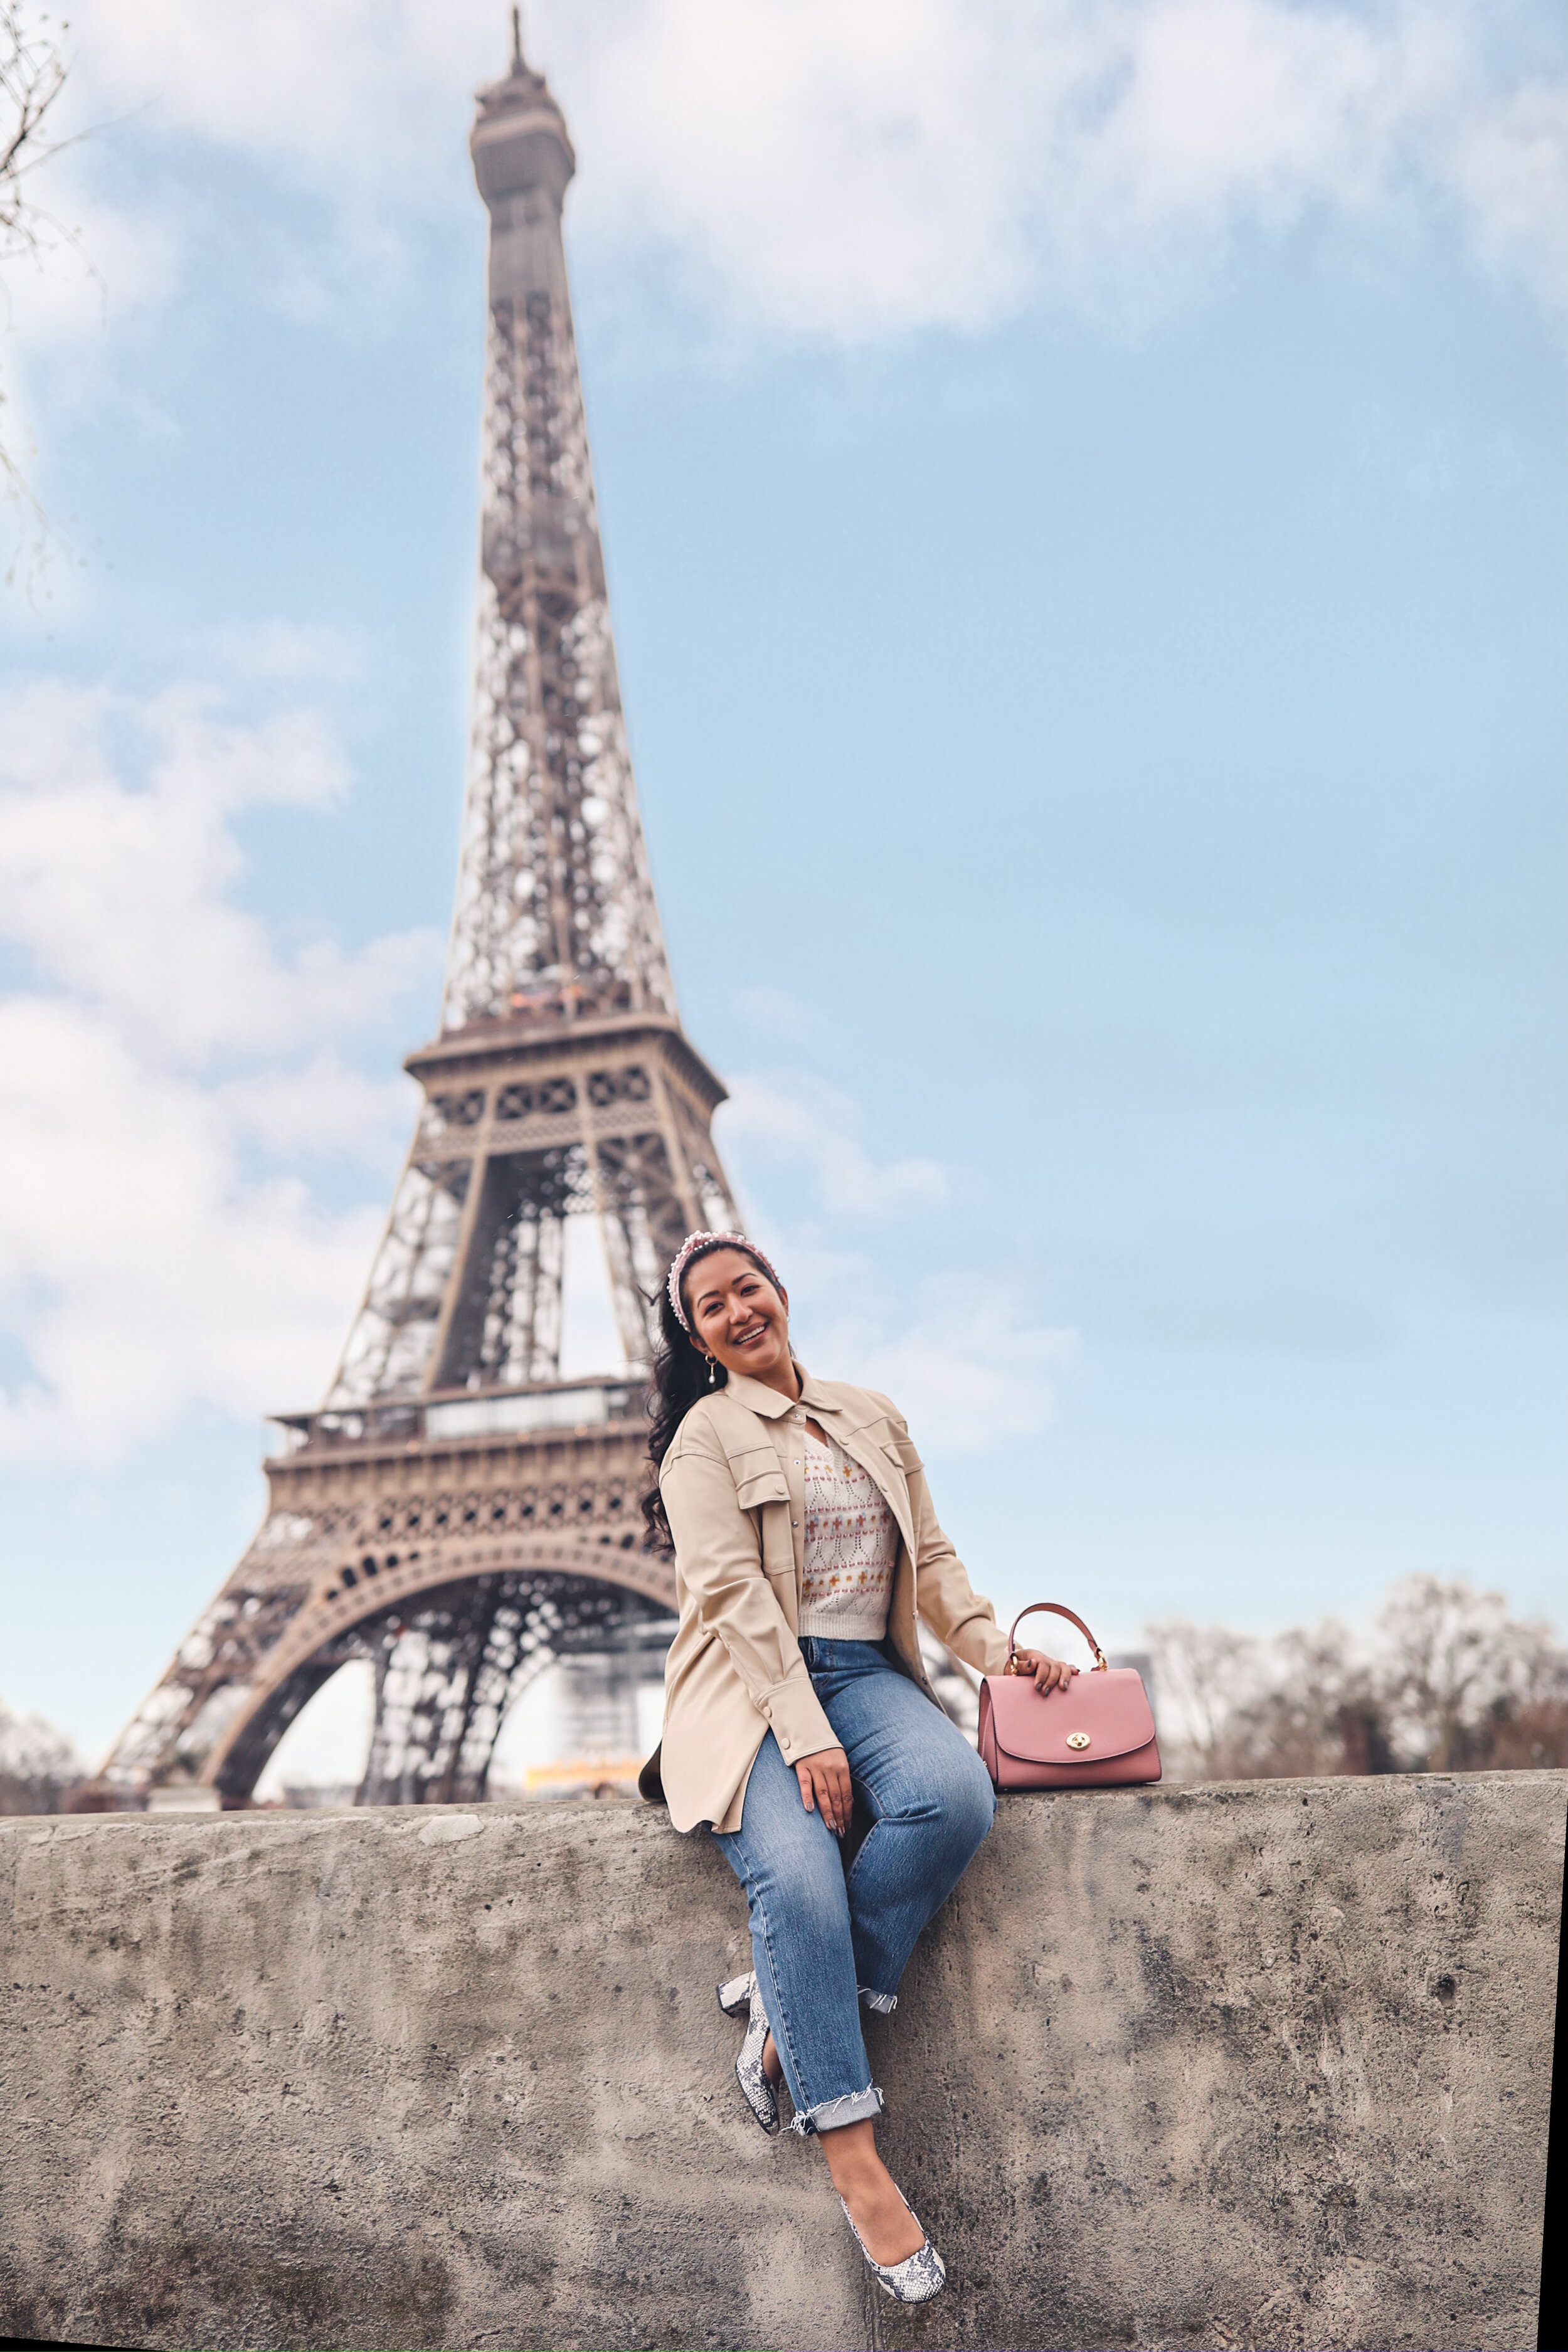
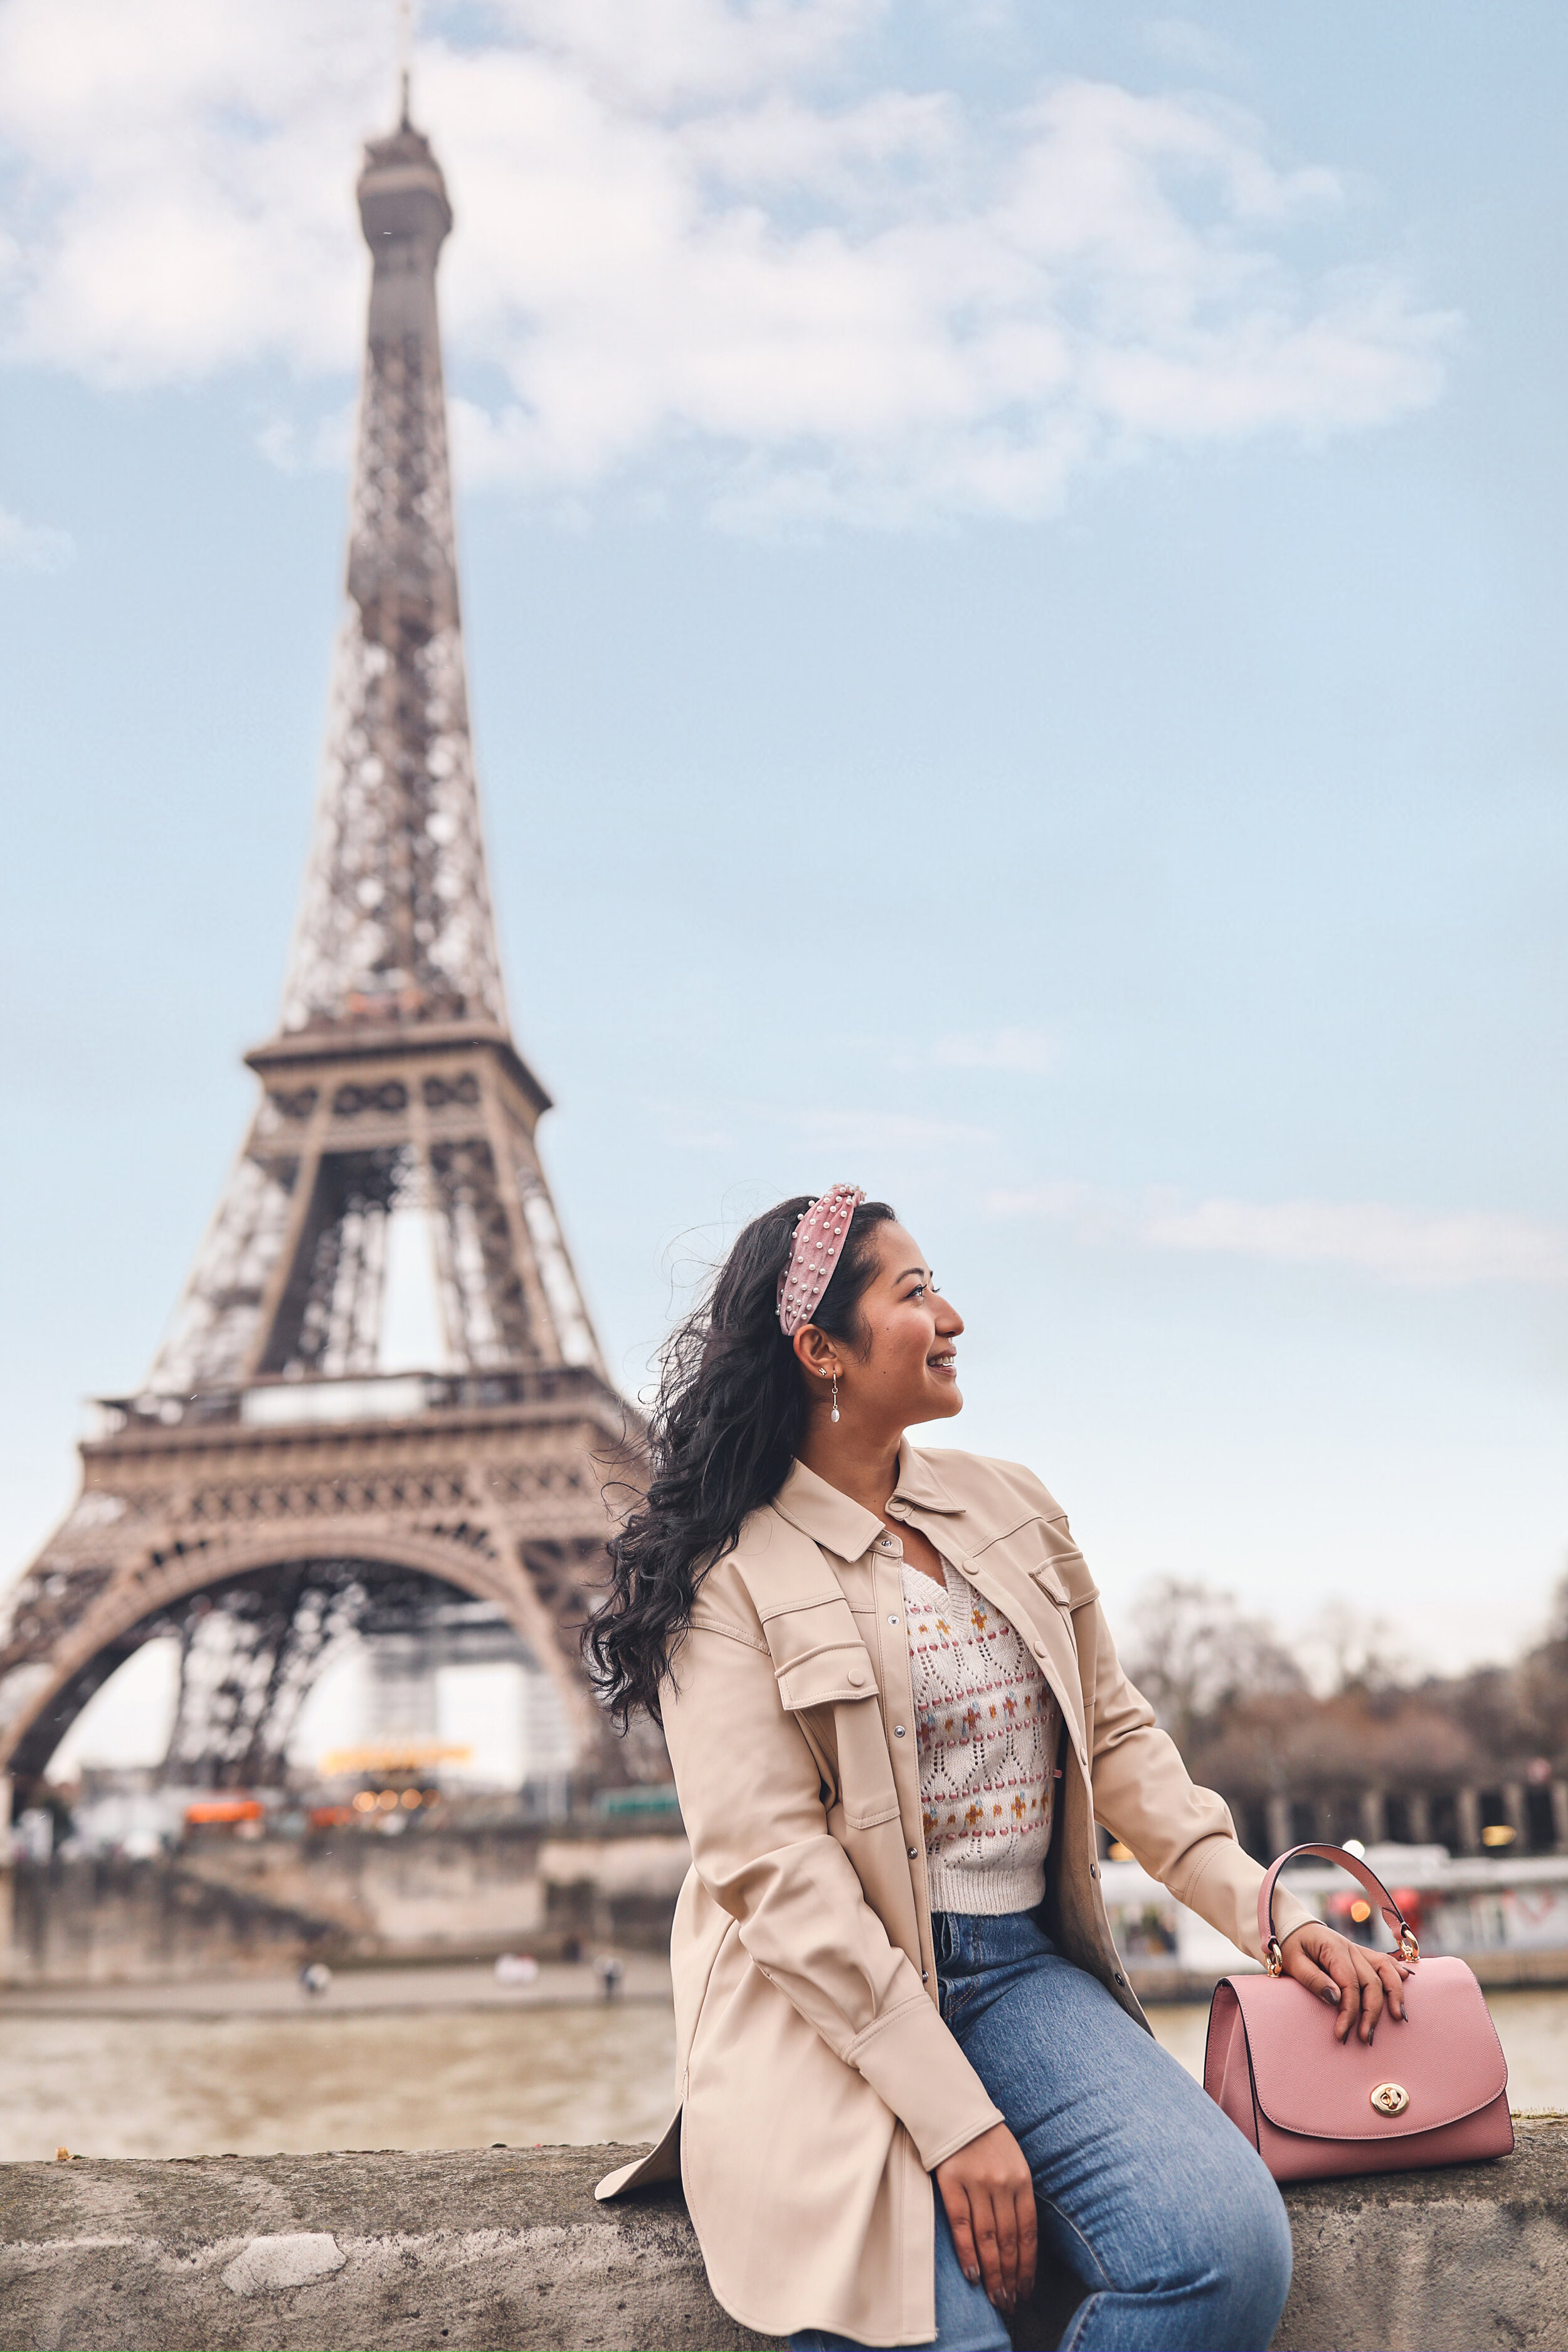
Trocadero
This legendary photo location is a must! Not only just for a photo but to see the beautiful Eiffel tower in its full glory! The Eiffel tower looks so much bigger from this spot and photos will turn out beautiful no matter what the circumstance is. This is such a tourist hot spot so I recommend going there first thing in the morning. I went to shoot at this location on a weekday morning around 8am. There were only four other people there. It was also drizzling rain but I was determined to shoot.
Two spots to shoot at in the Trocadéro would be on the staircase and on the main platform. I have seen this photo be taken in the morning and at night, both equally beautiful.
Map Location HERE

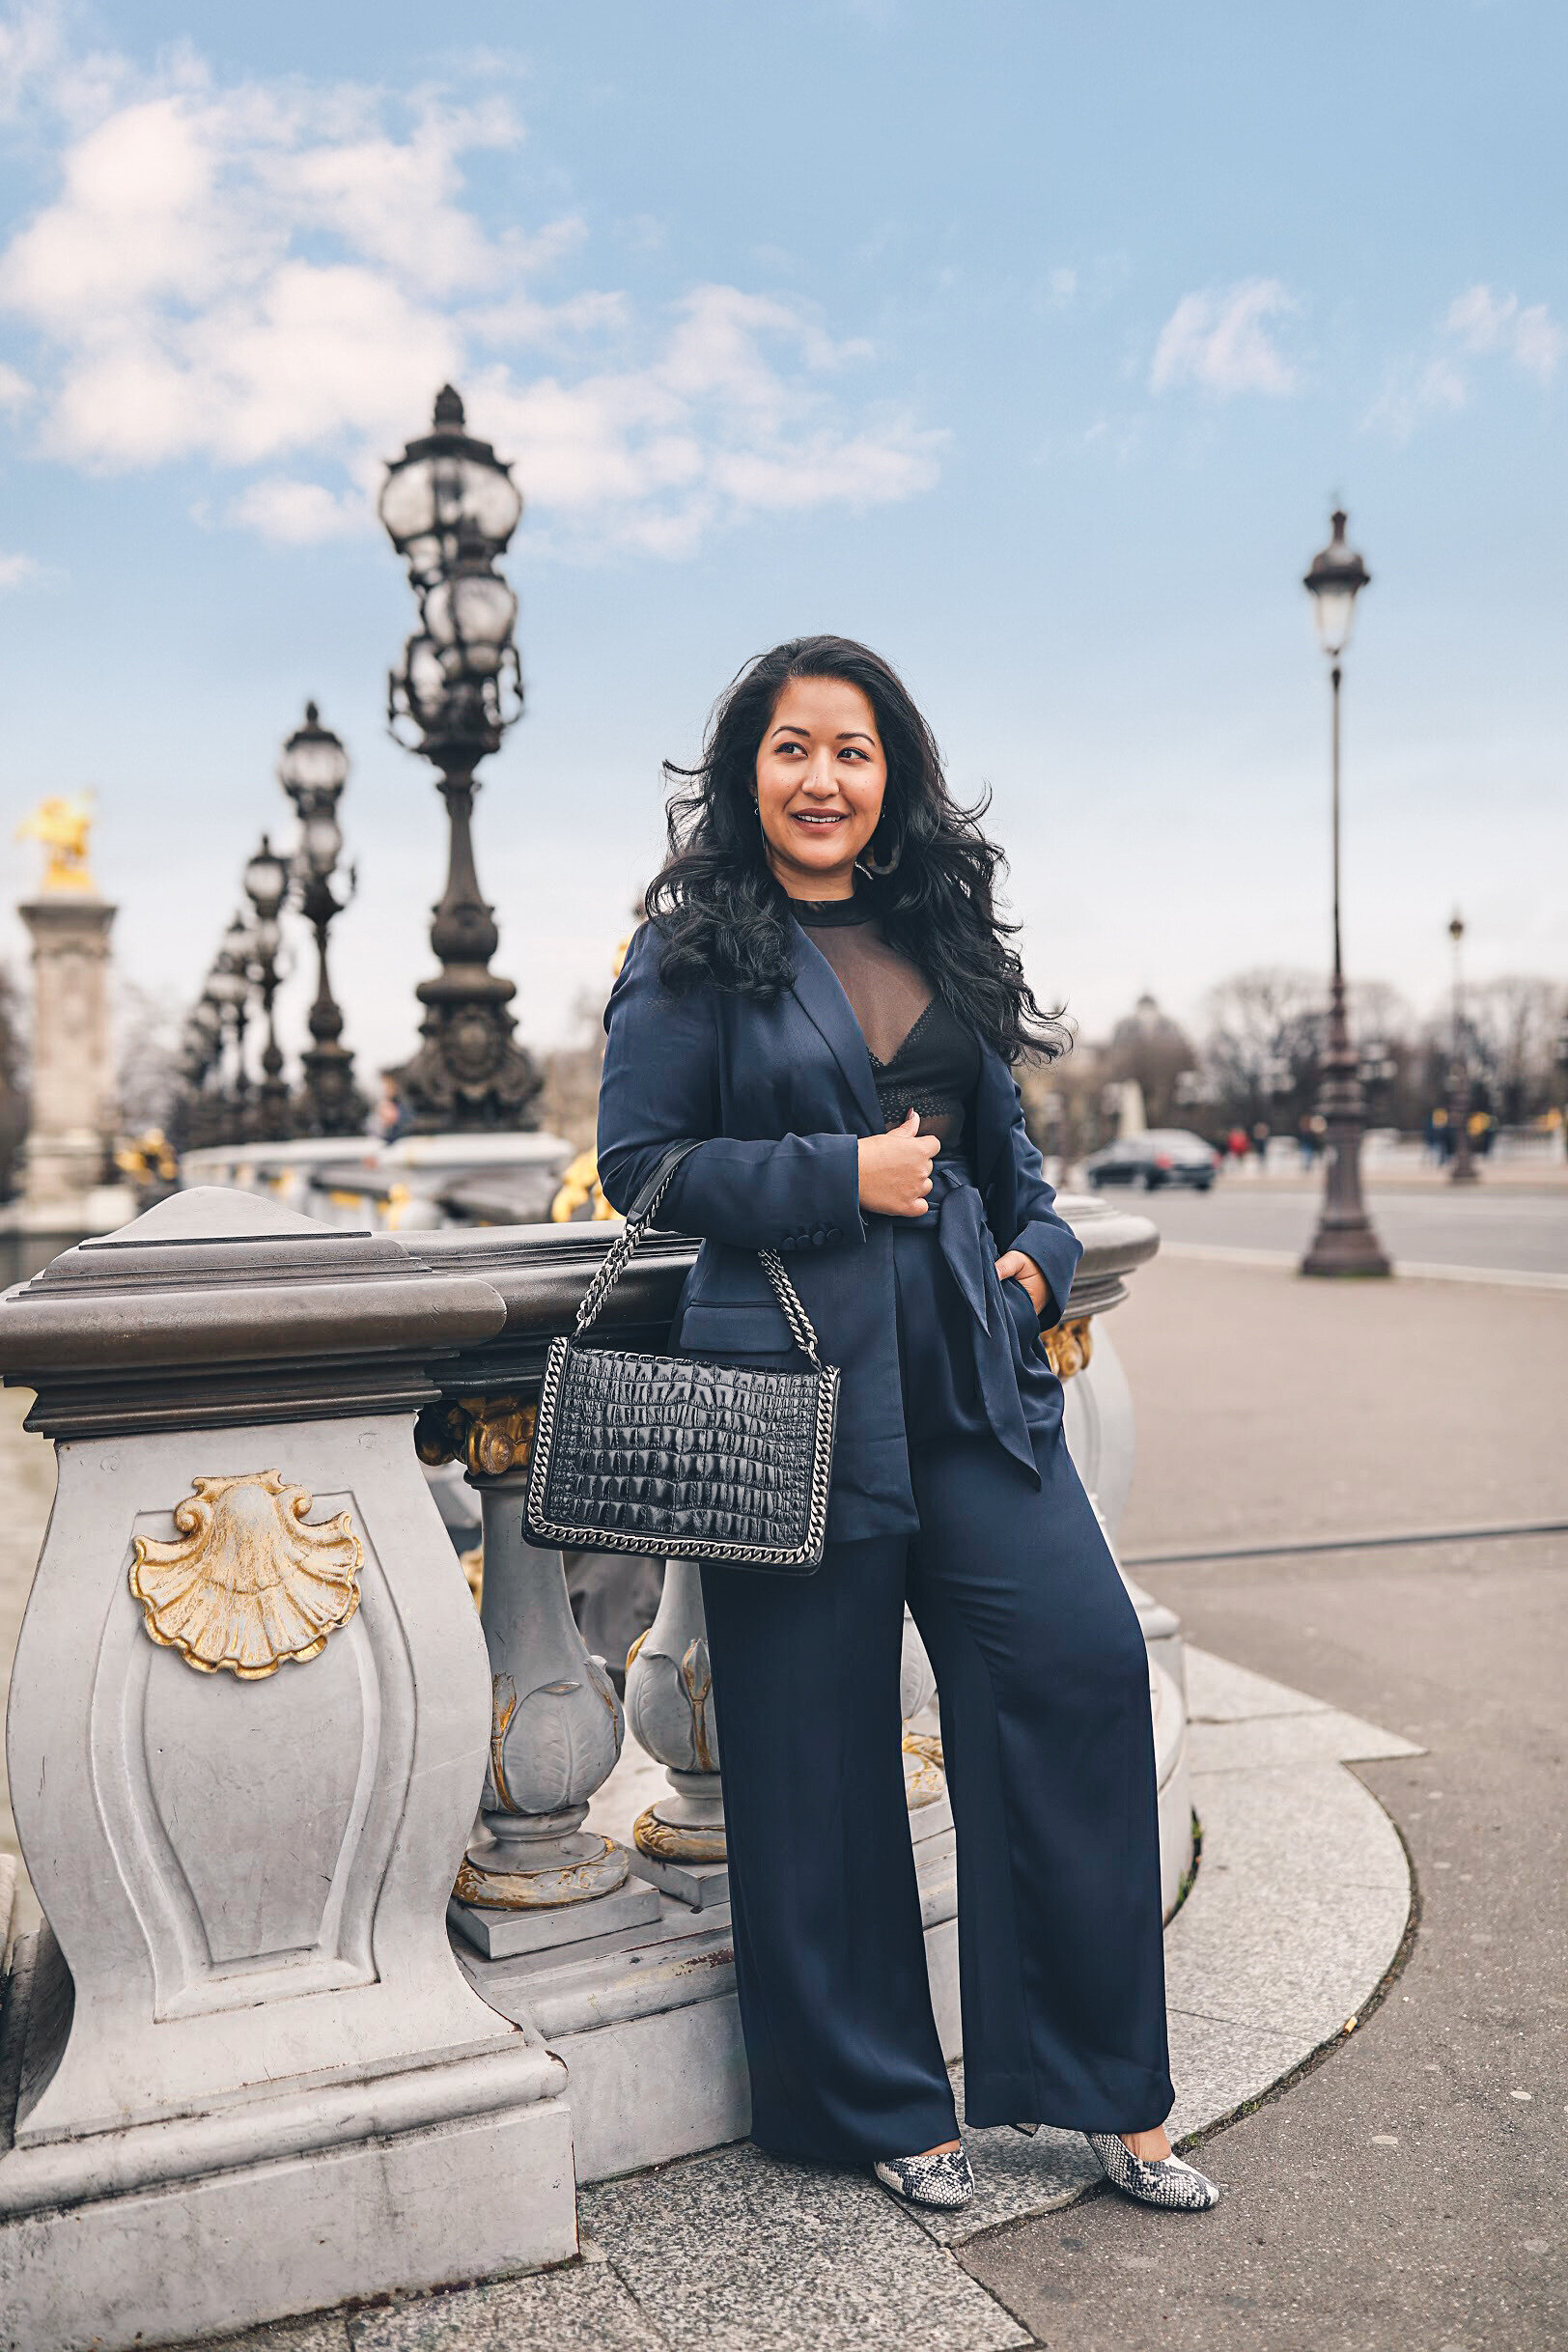
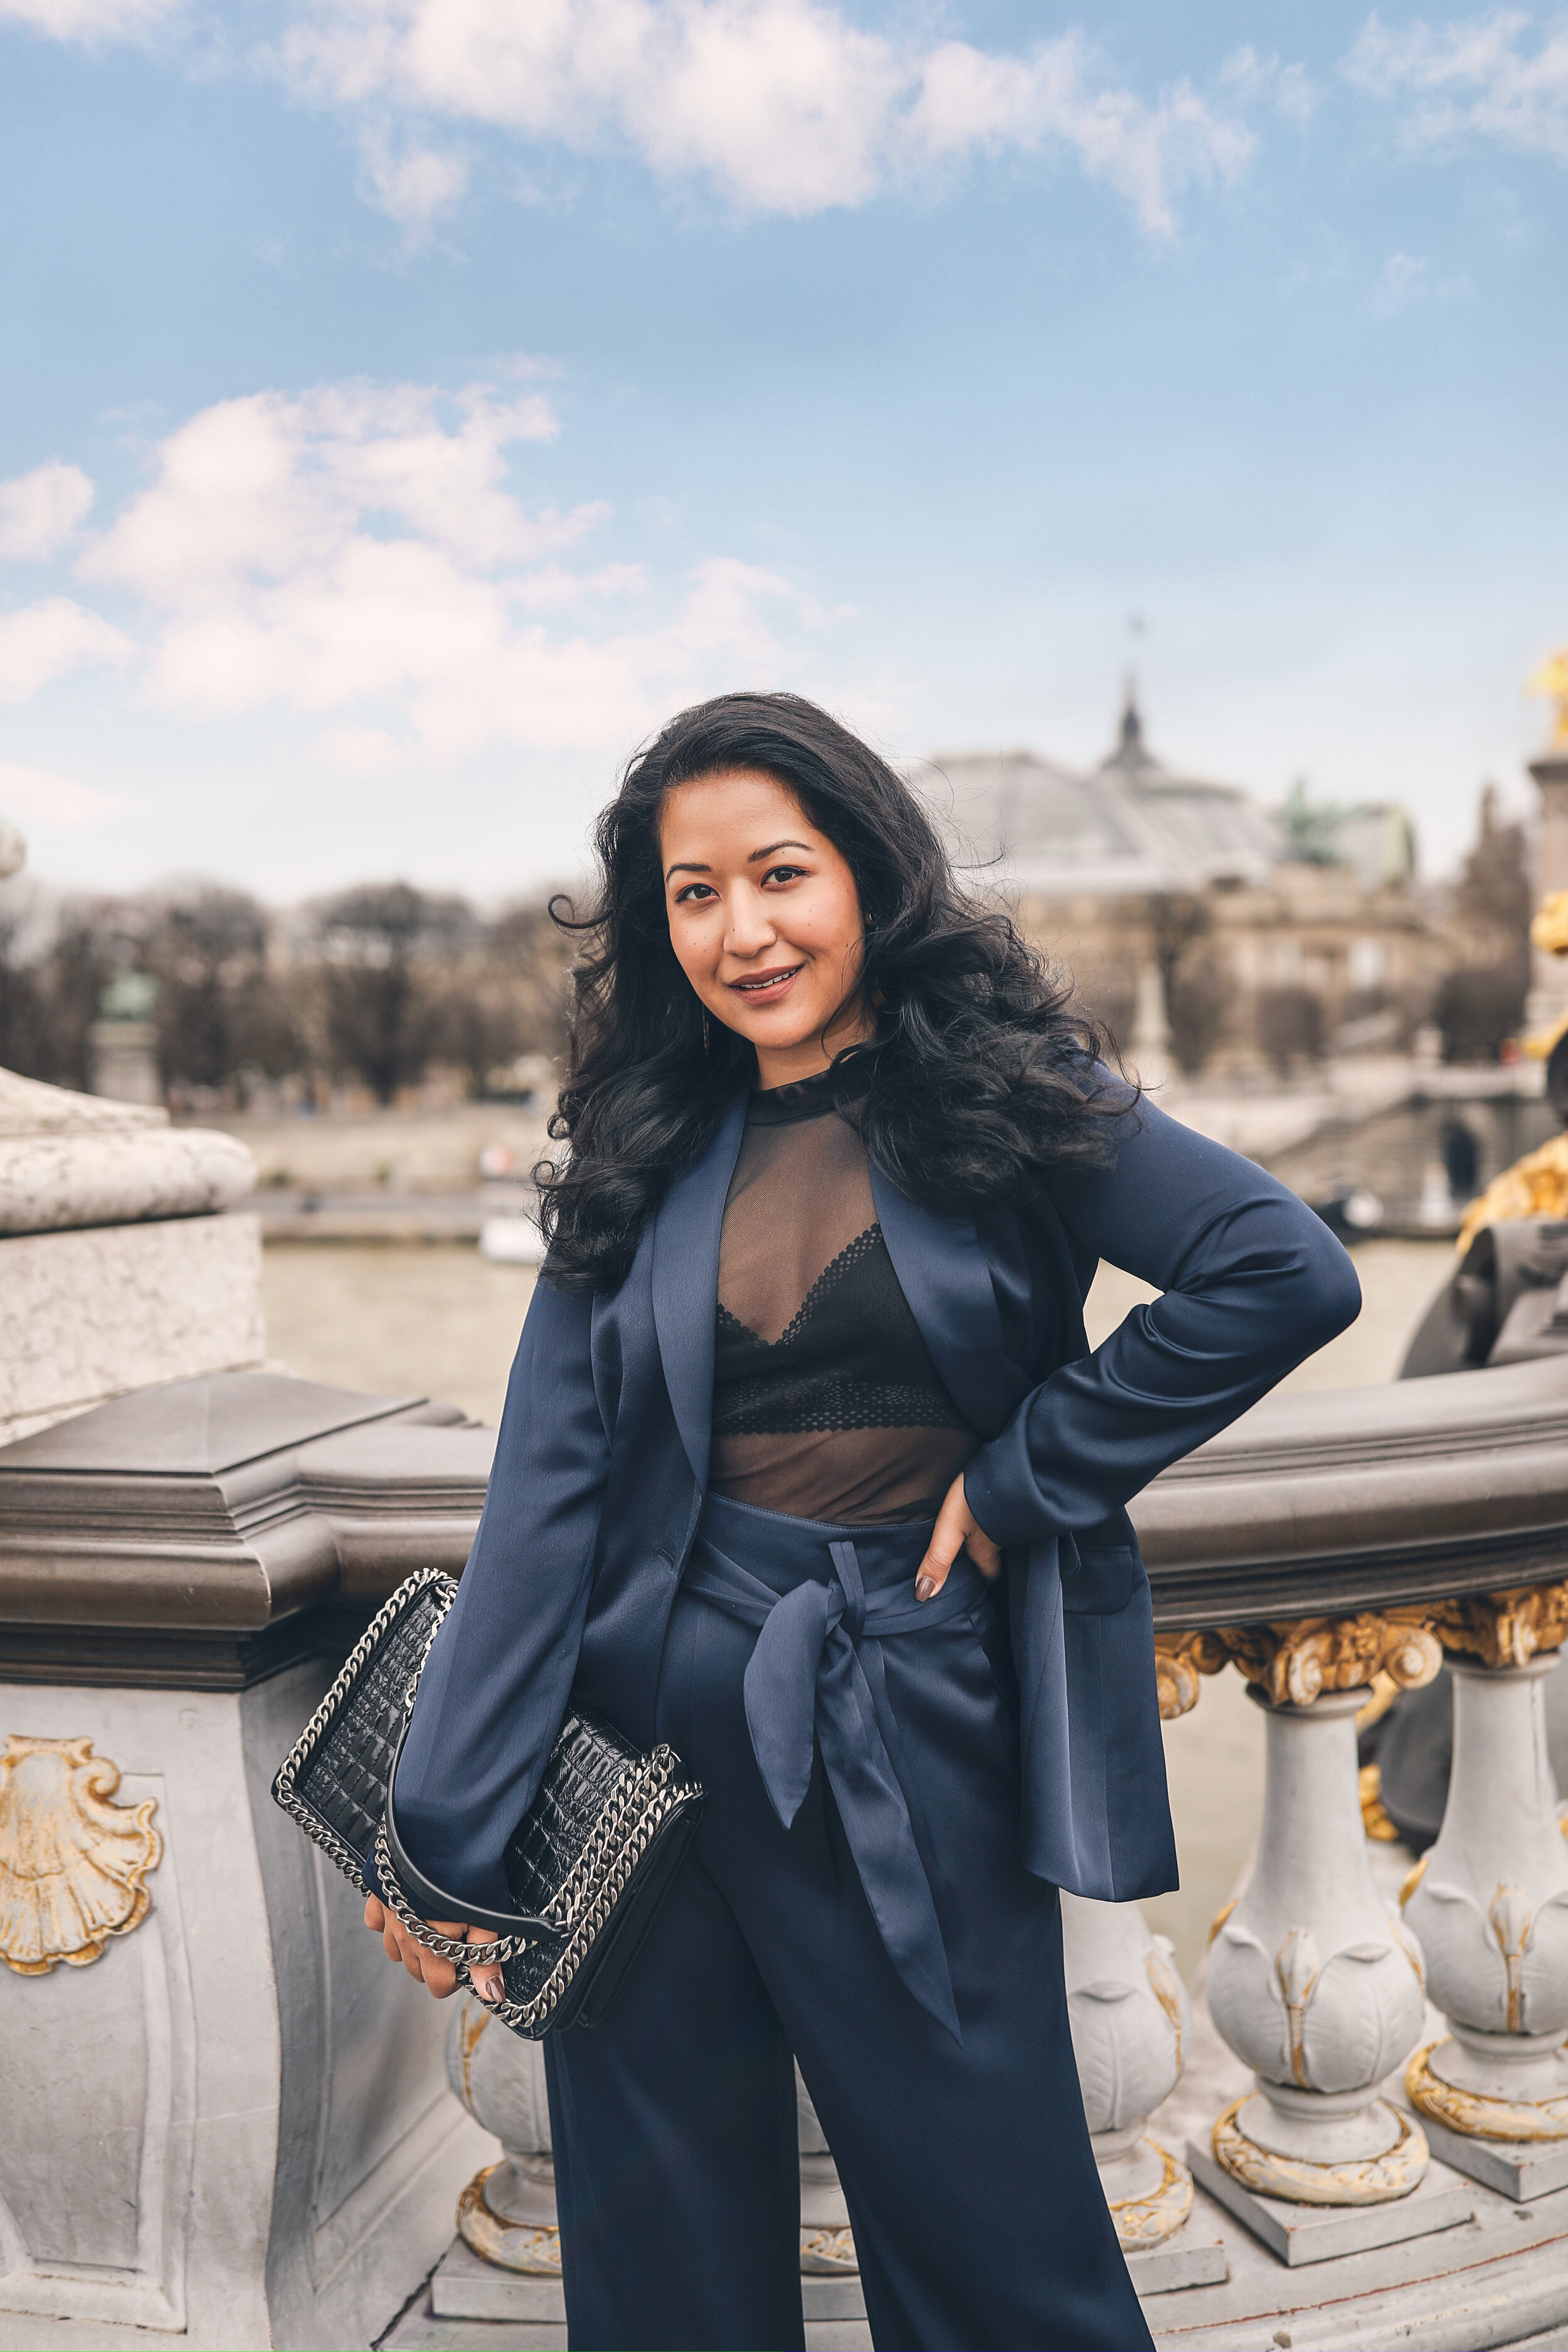
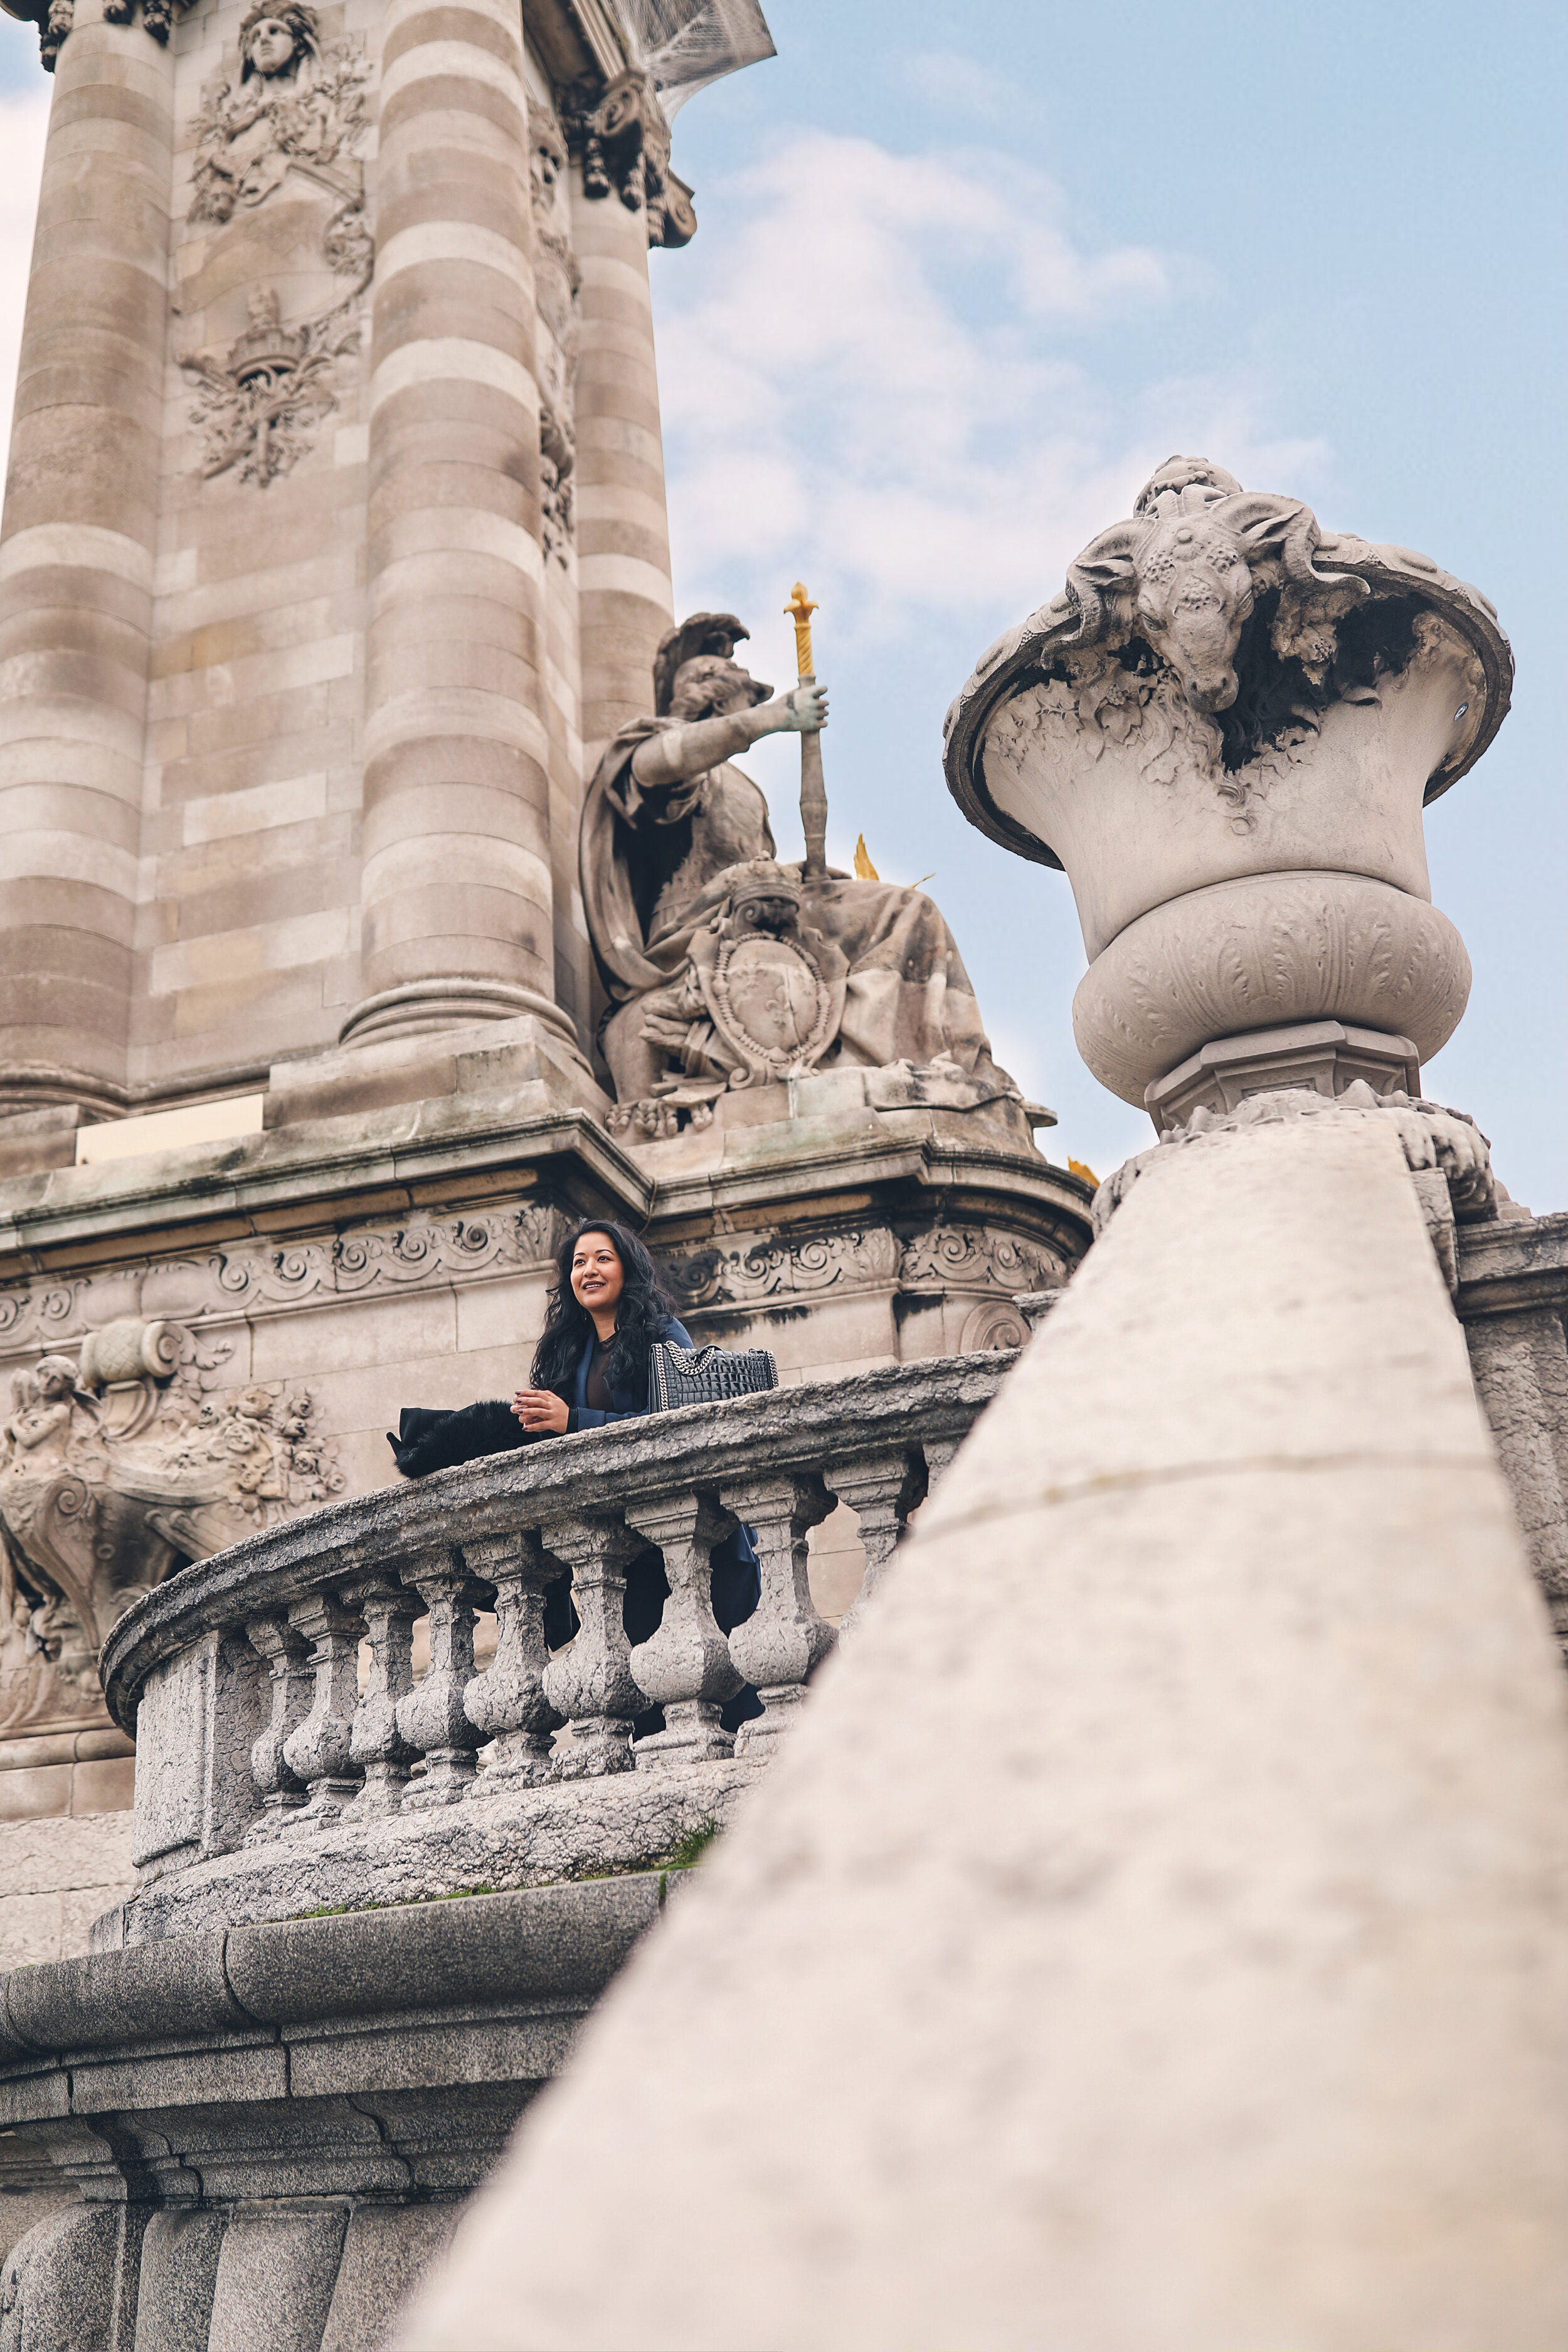
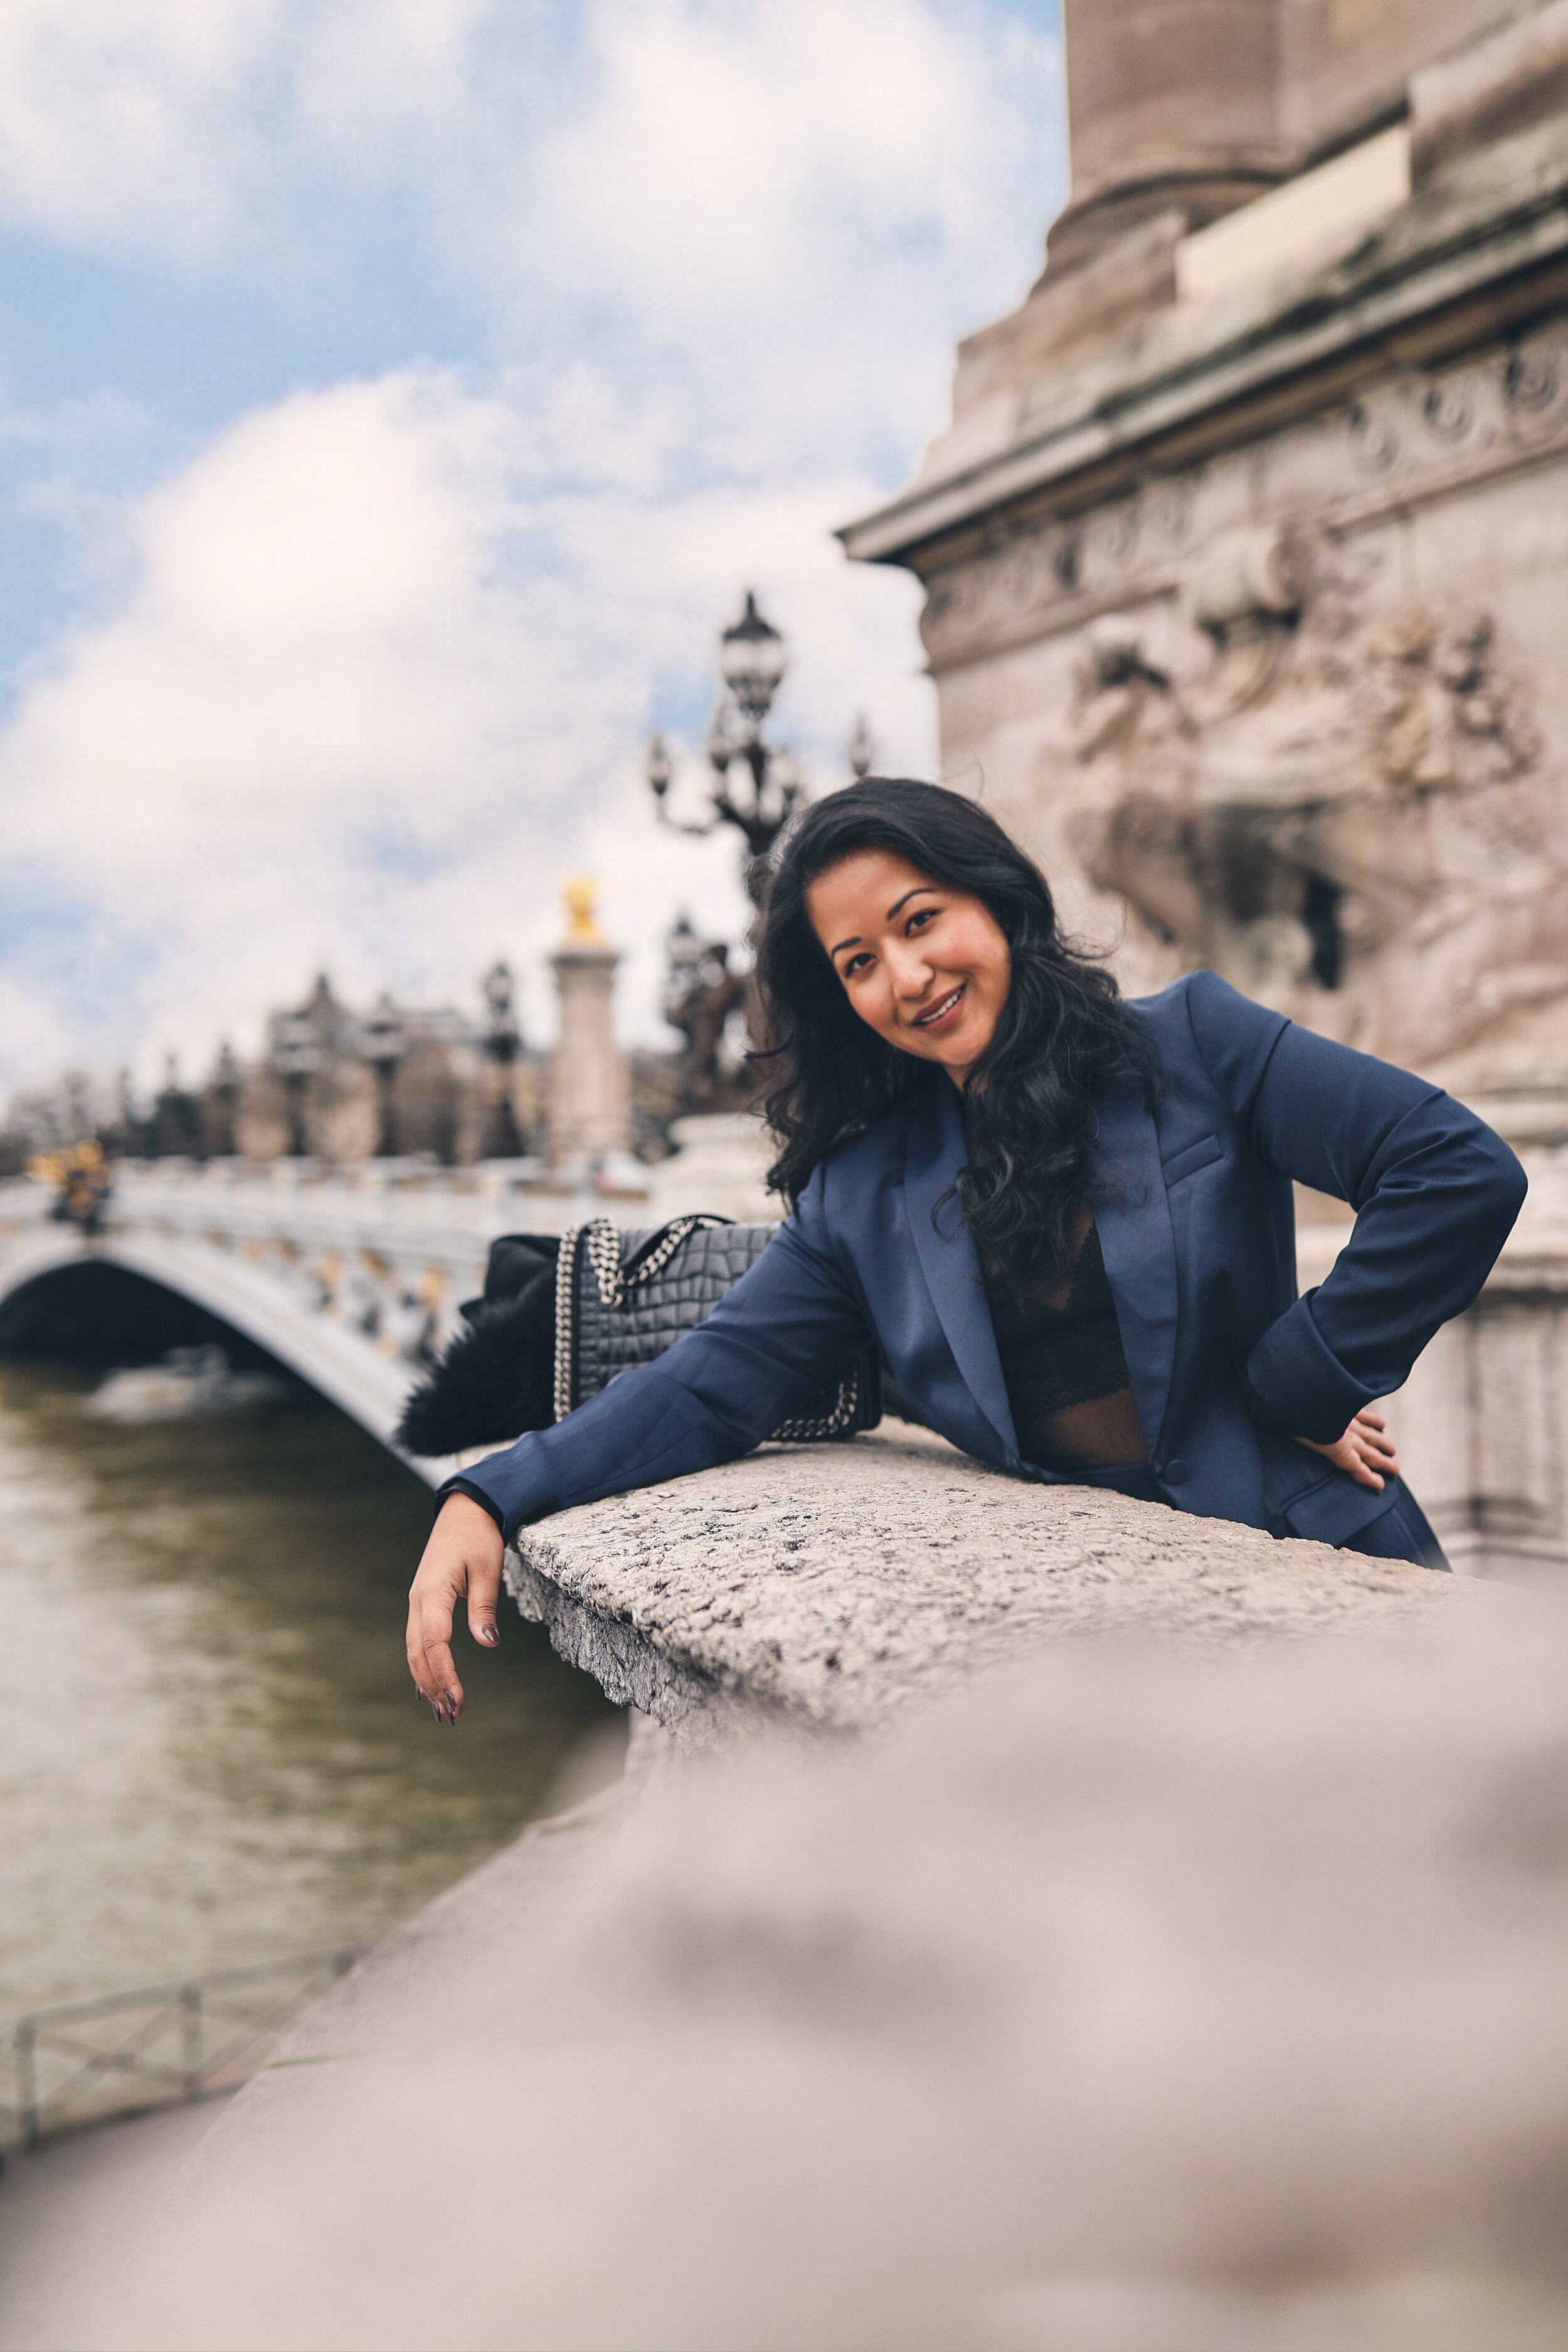
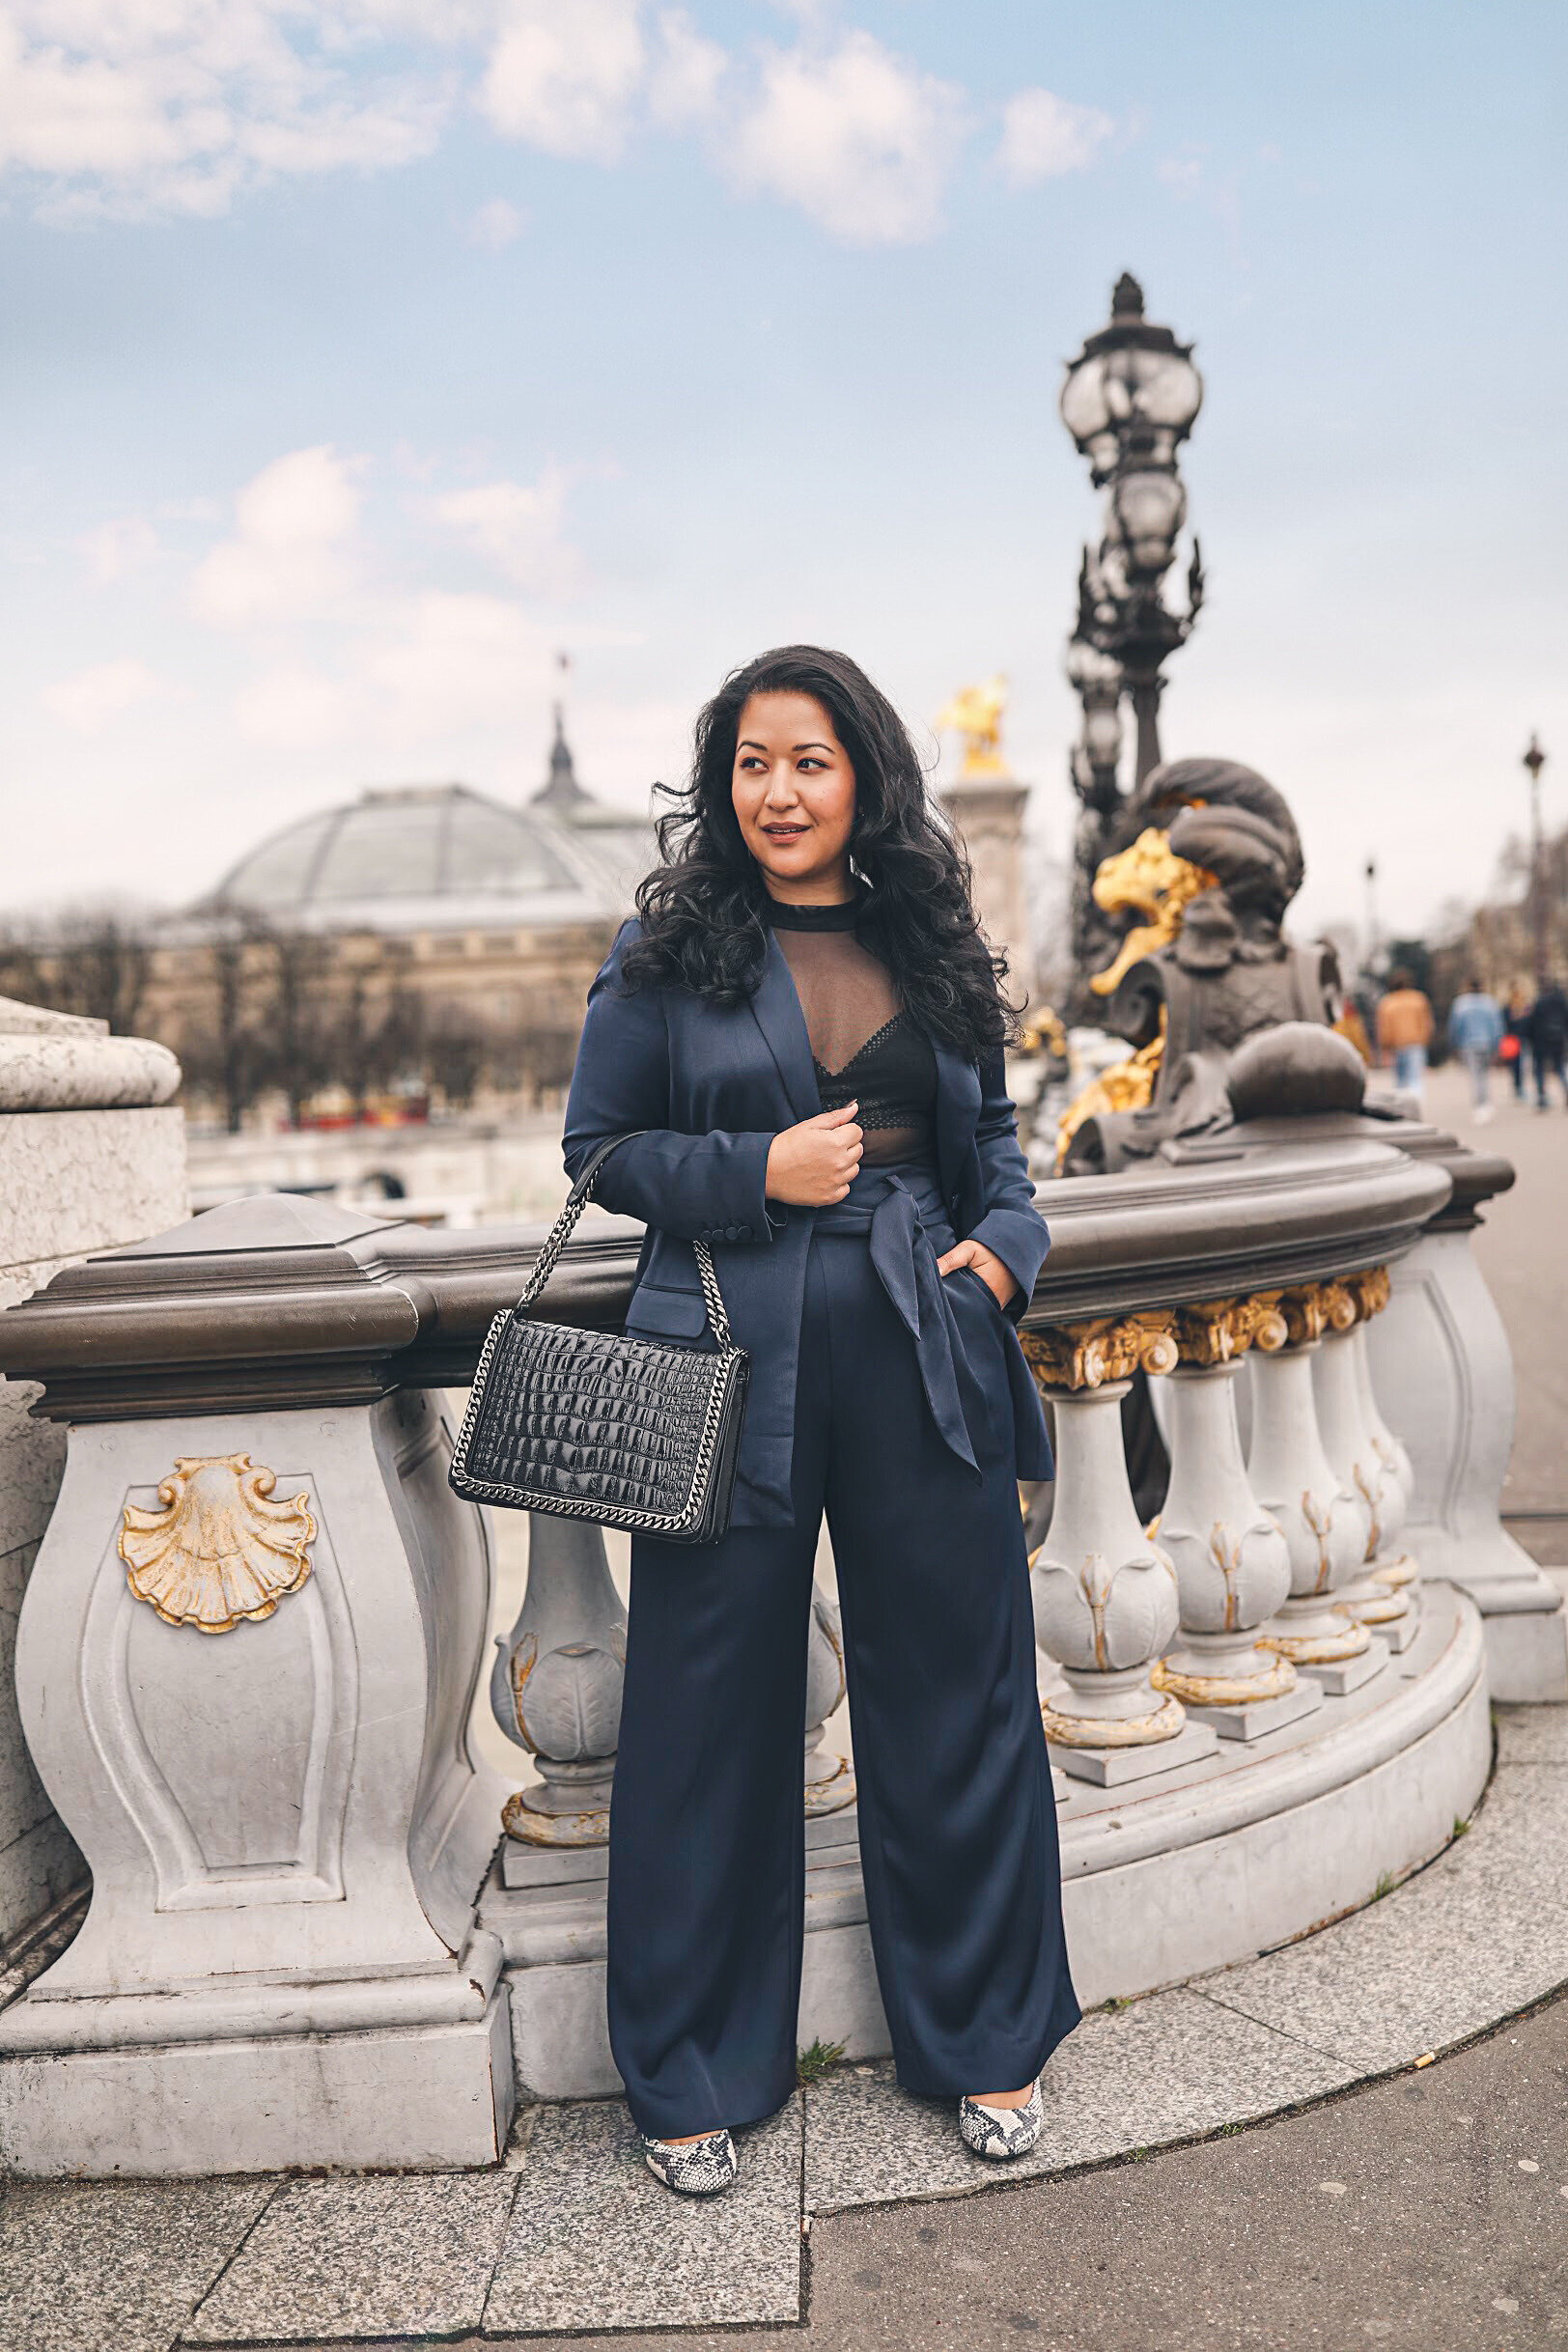
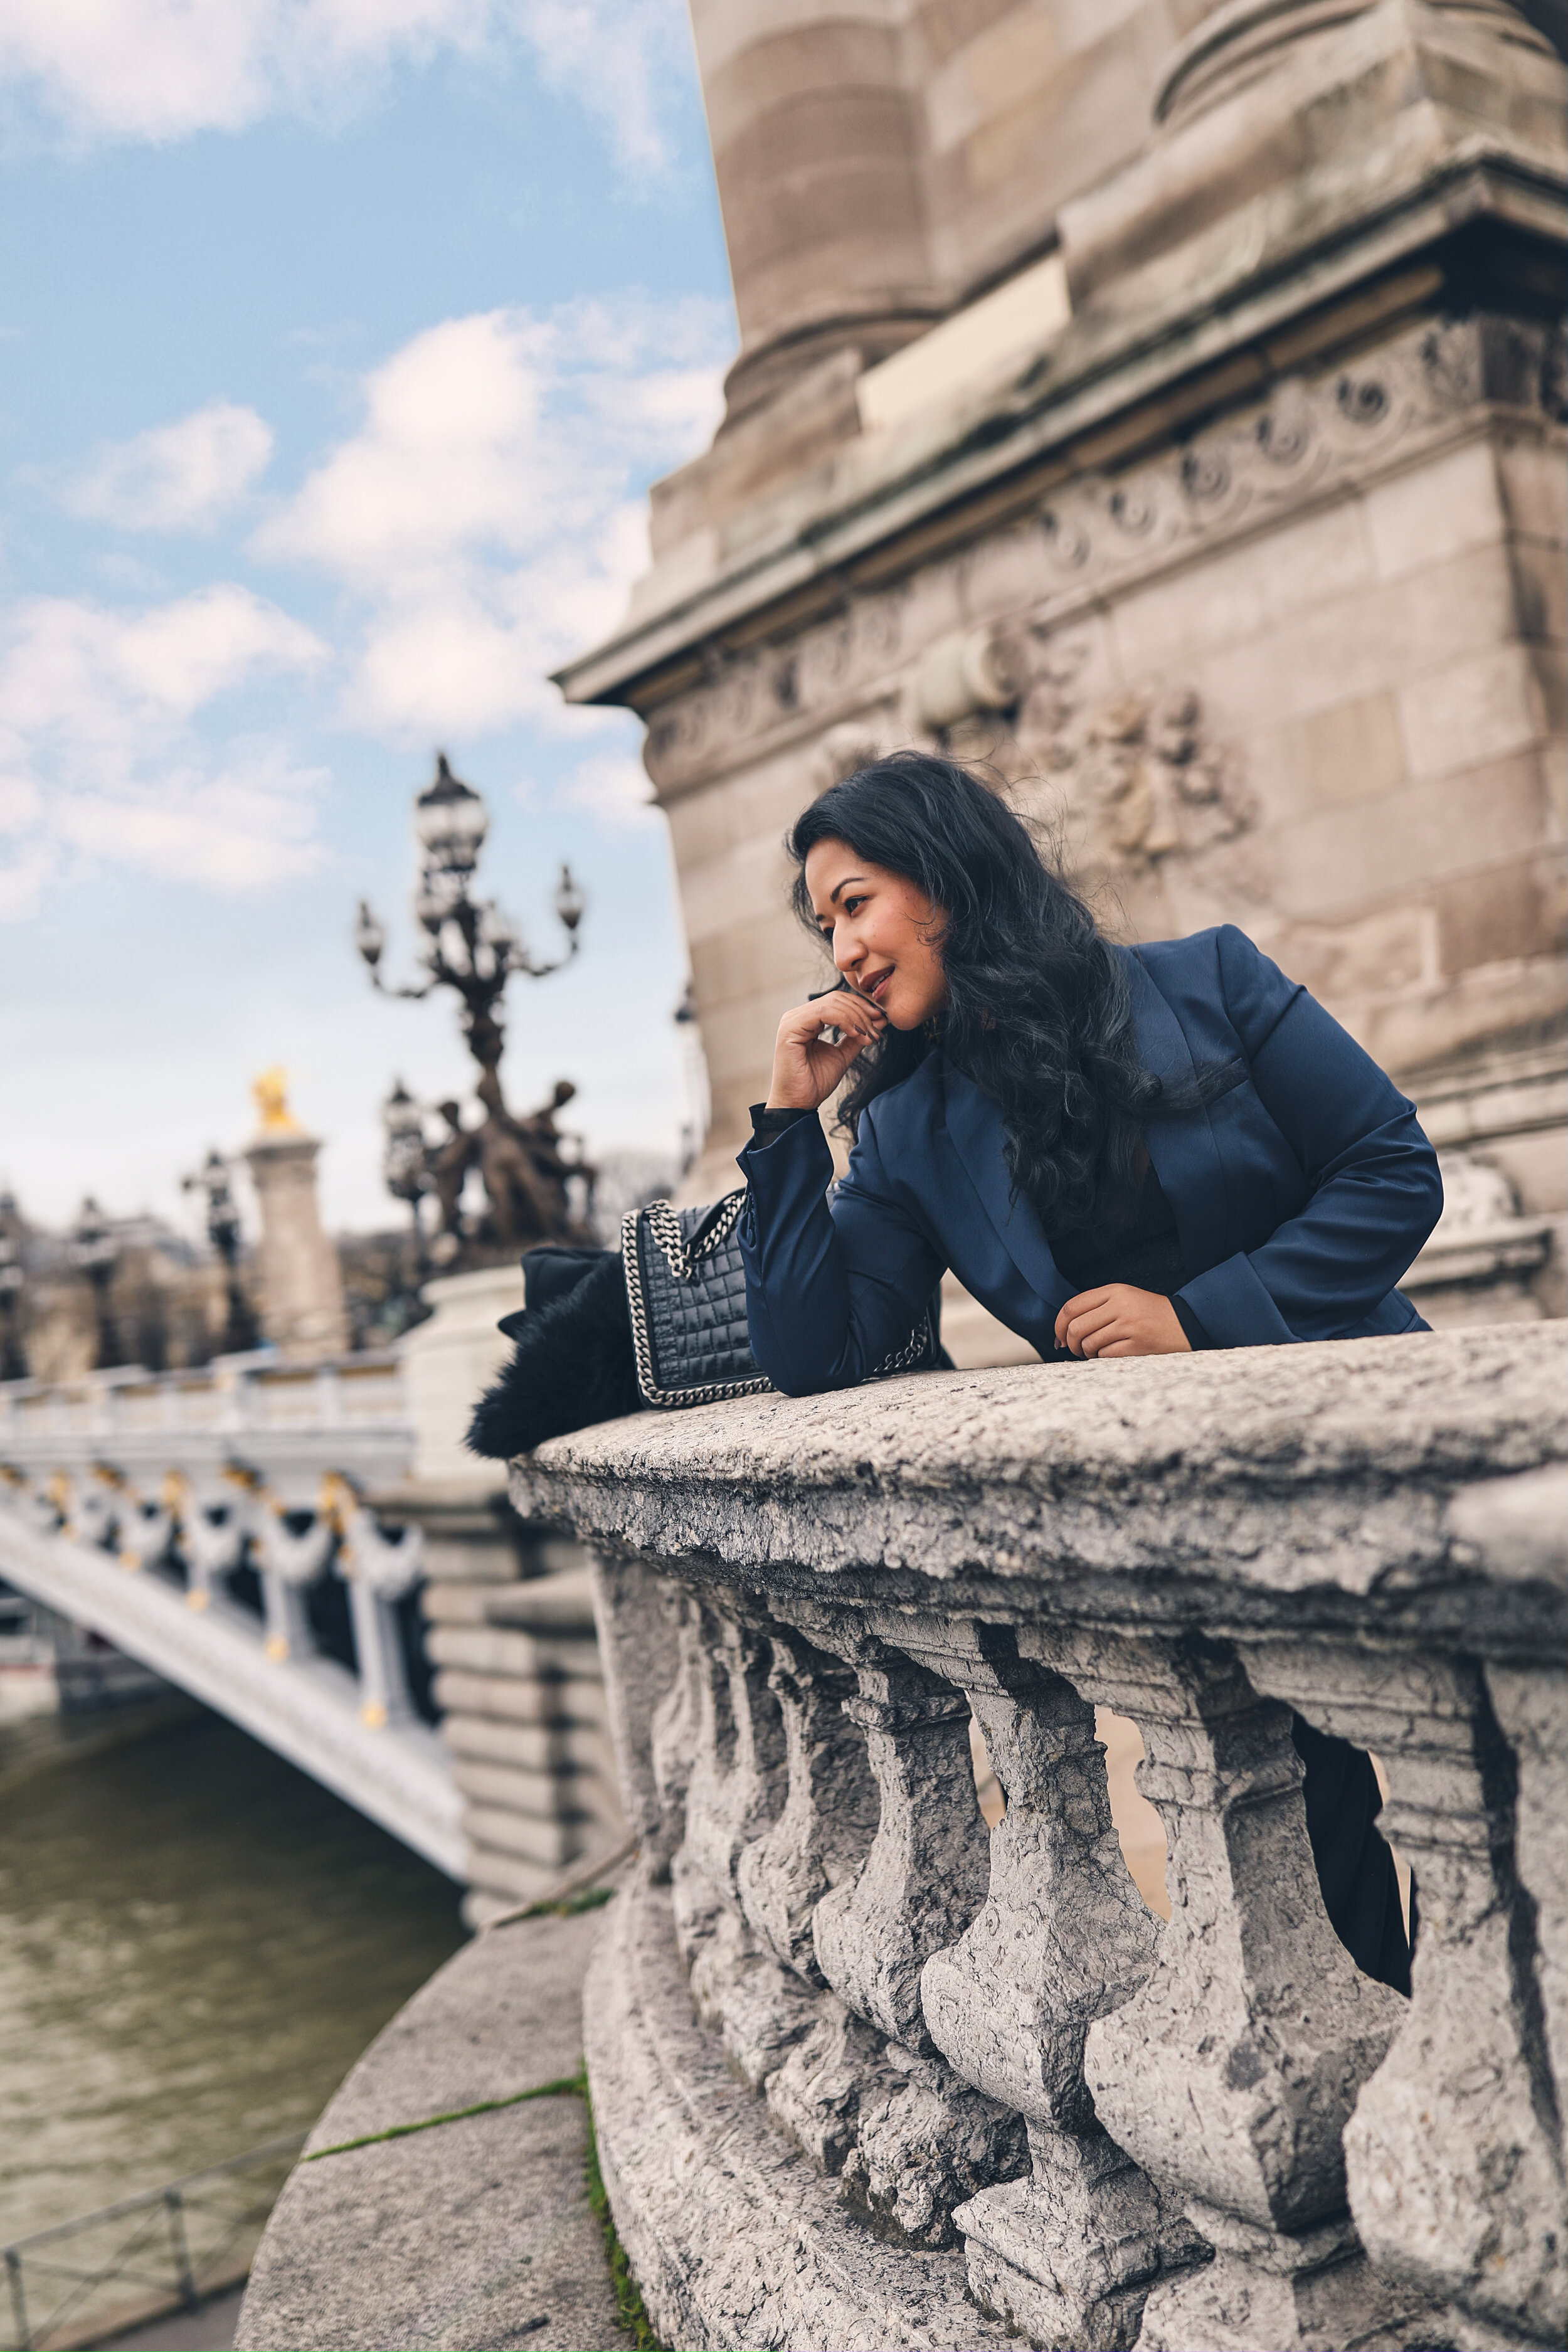
Pont Alexandre III Bridge
The prettiest bridge in Paris! The bridge itself if beautiful and getting photos here are a must! I recommend standing on the bridge itself, closer to the statues to make the image interesting. You can also use the staircase to your advantage and create depth.
Map Location HERE

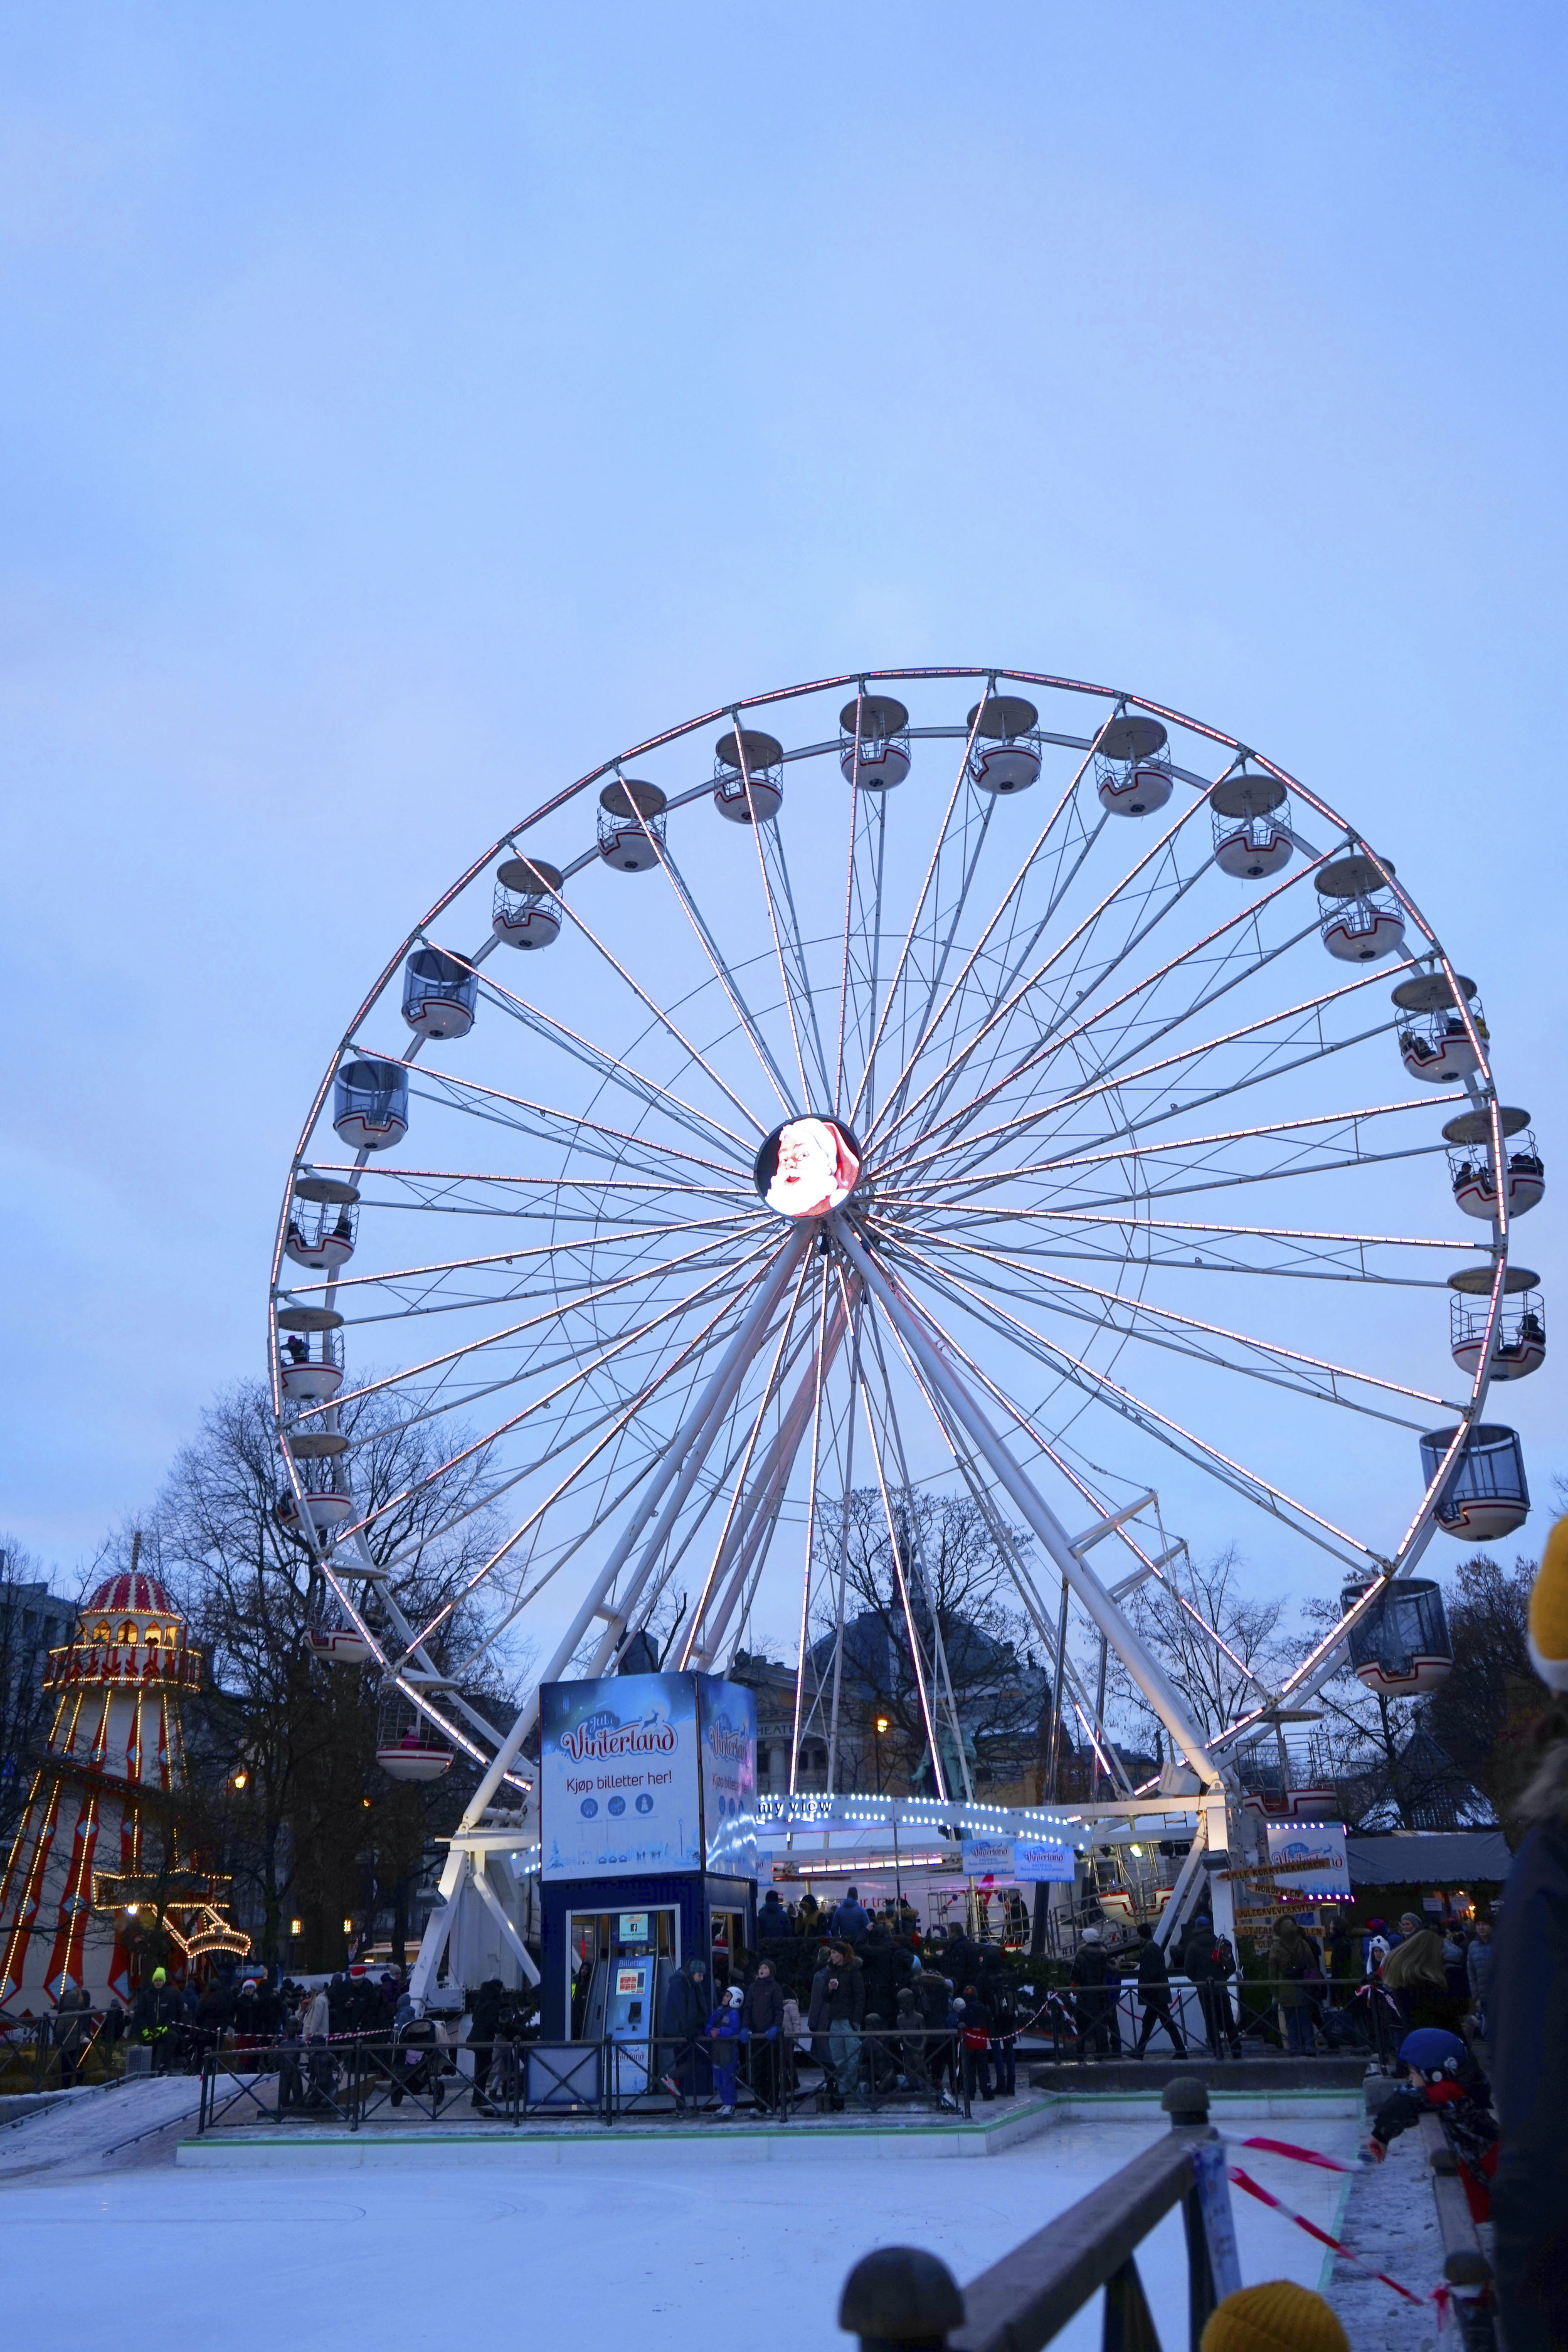
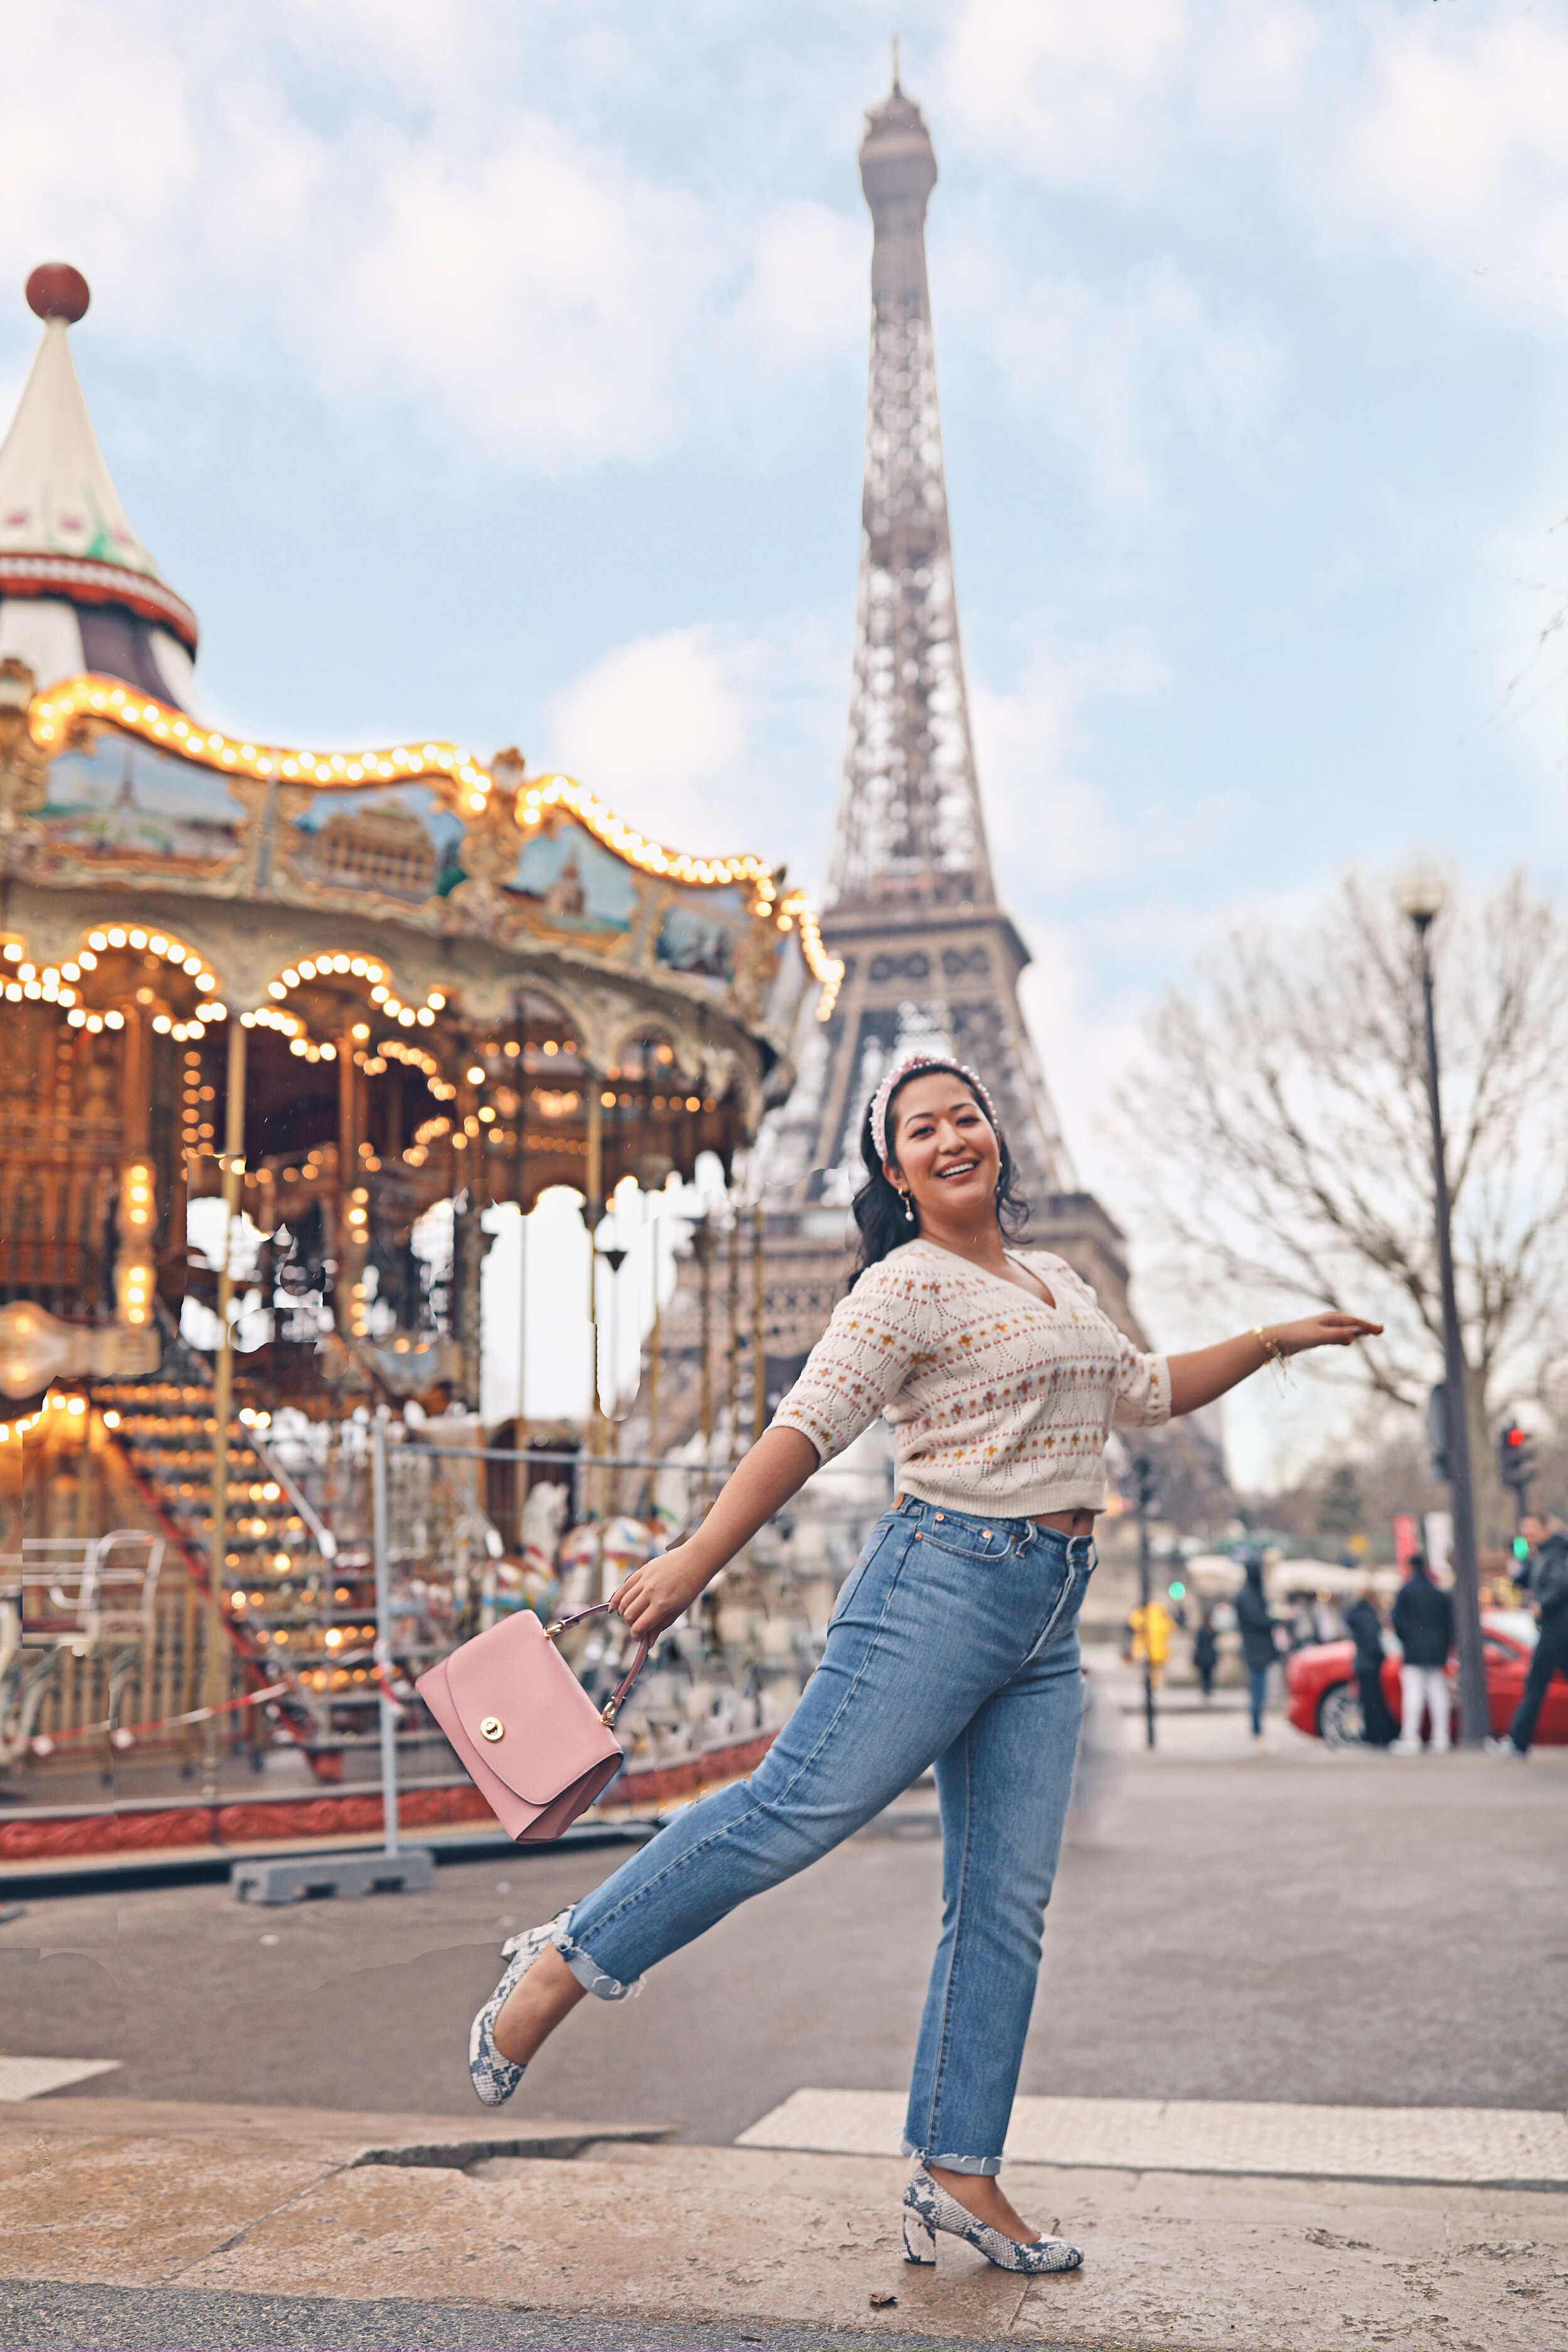
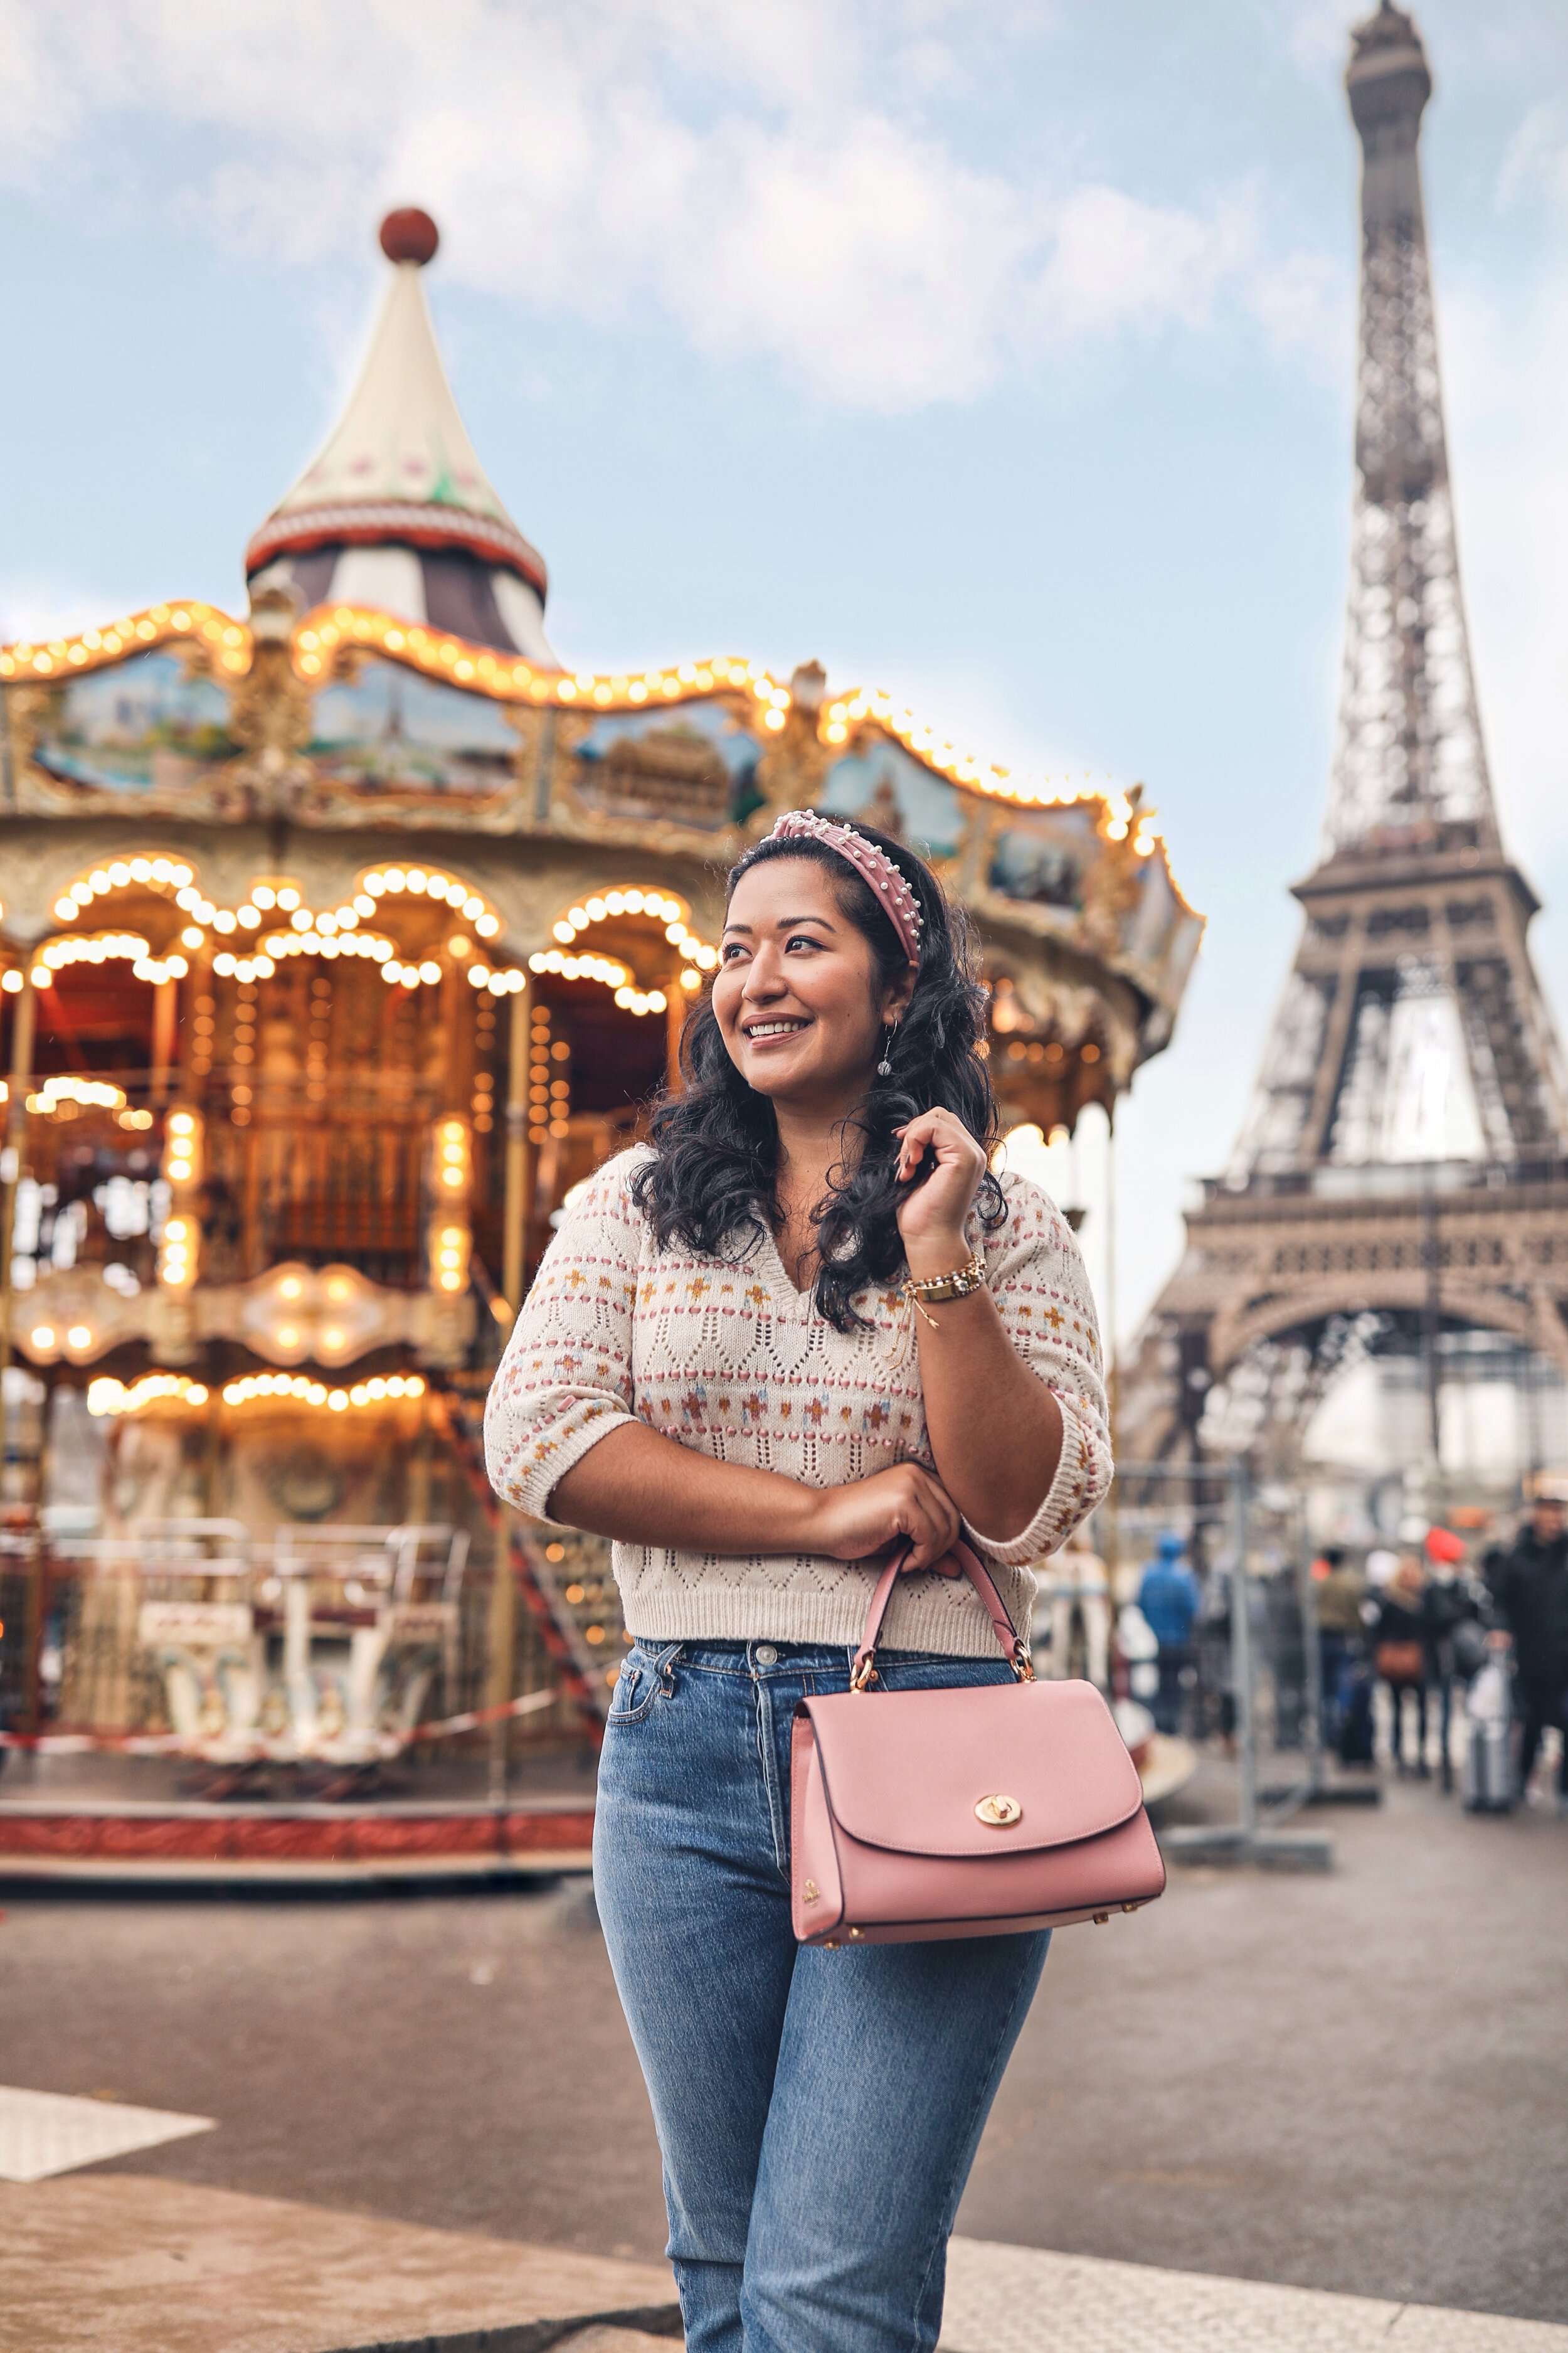
Carousel at the base of the Eiffel Tower
After visiting the Eiffel Tower, take a little walk to the Ferris wheel on the other side of the river (farther away front the Eiffel tower). This spot is magical and brings out the little kid in every adult.
For this location, I found the best way to shoot it was close to the Ferris wheel on the step. You can also shoot while standing on the same level as the Ferris wheel as well. Lower angles were better here because it helps capture the full length of the Eiffel tower.
Map Location HERE
Along The Seine River
Another spot really close to the Eiffel tower and Ferris wheel is along the river on Avenue New York. You can see the Eiffel Tower perfectly! Go ahead and hop on the ledge and grab a seat. Then click the capture button and way-lah, an epic Paris shot! Anywhere along the river is a good spot to take pictures in Paris (will be honest though and say that the color of the water is not the prettiest). So take them on a lower angle.
Map Location HERE
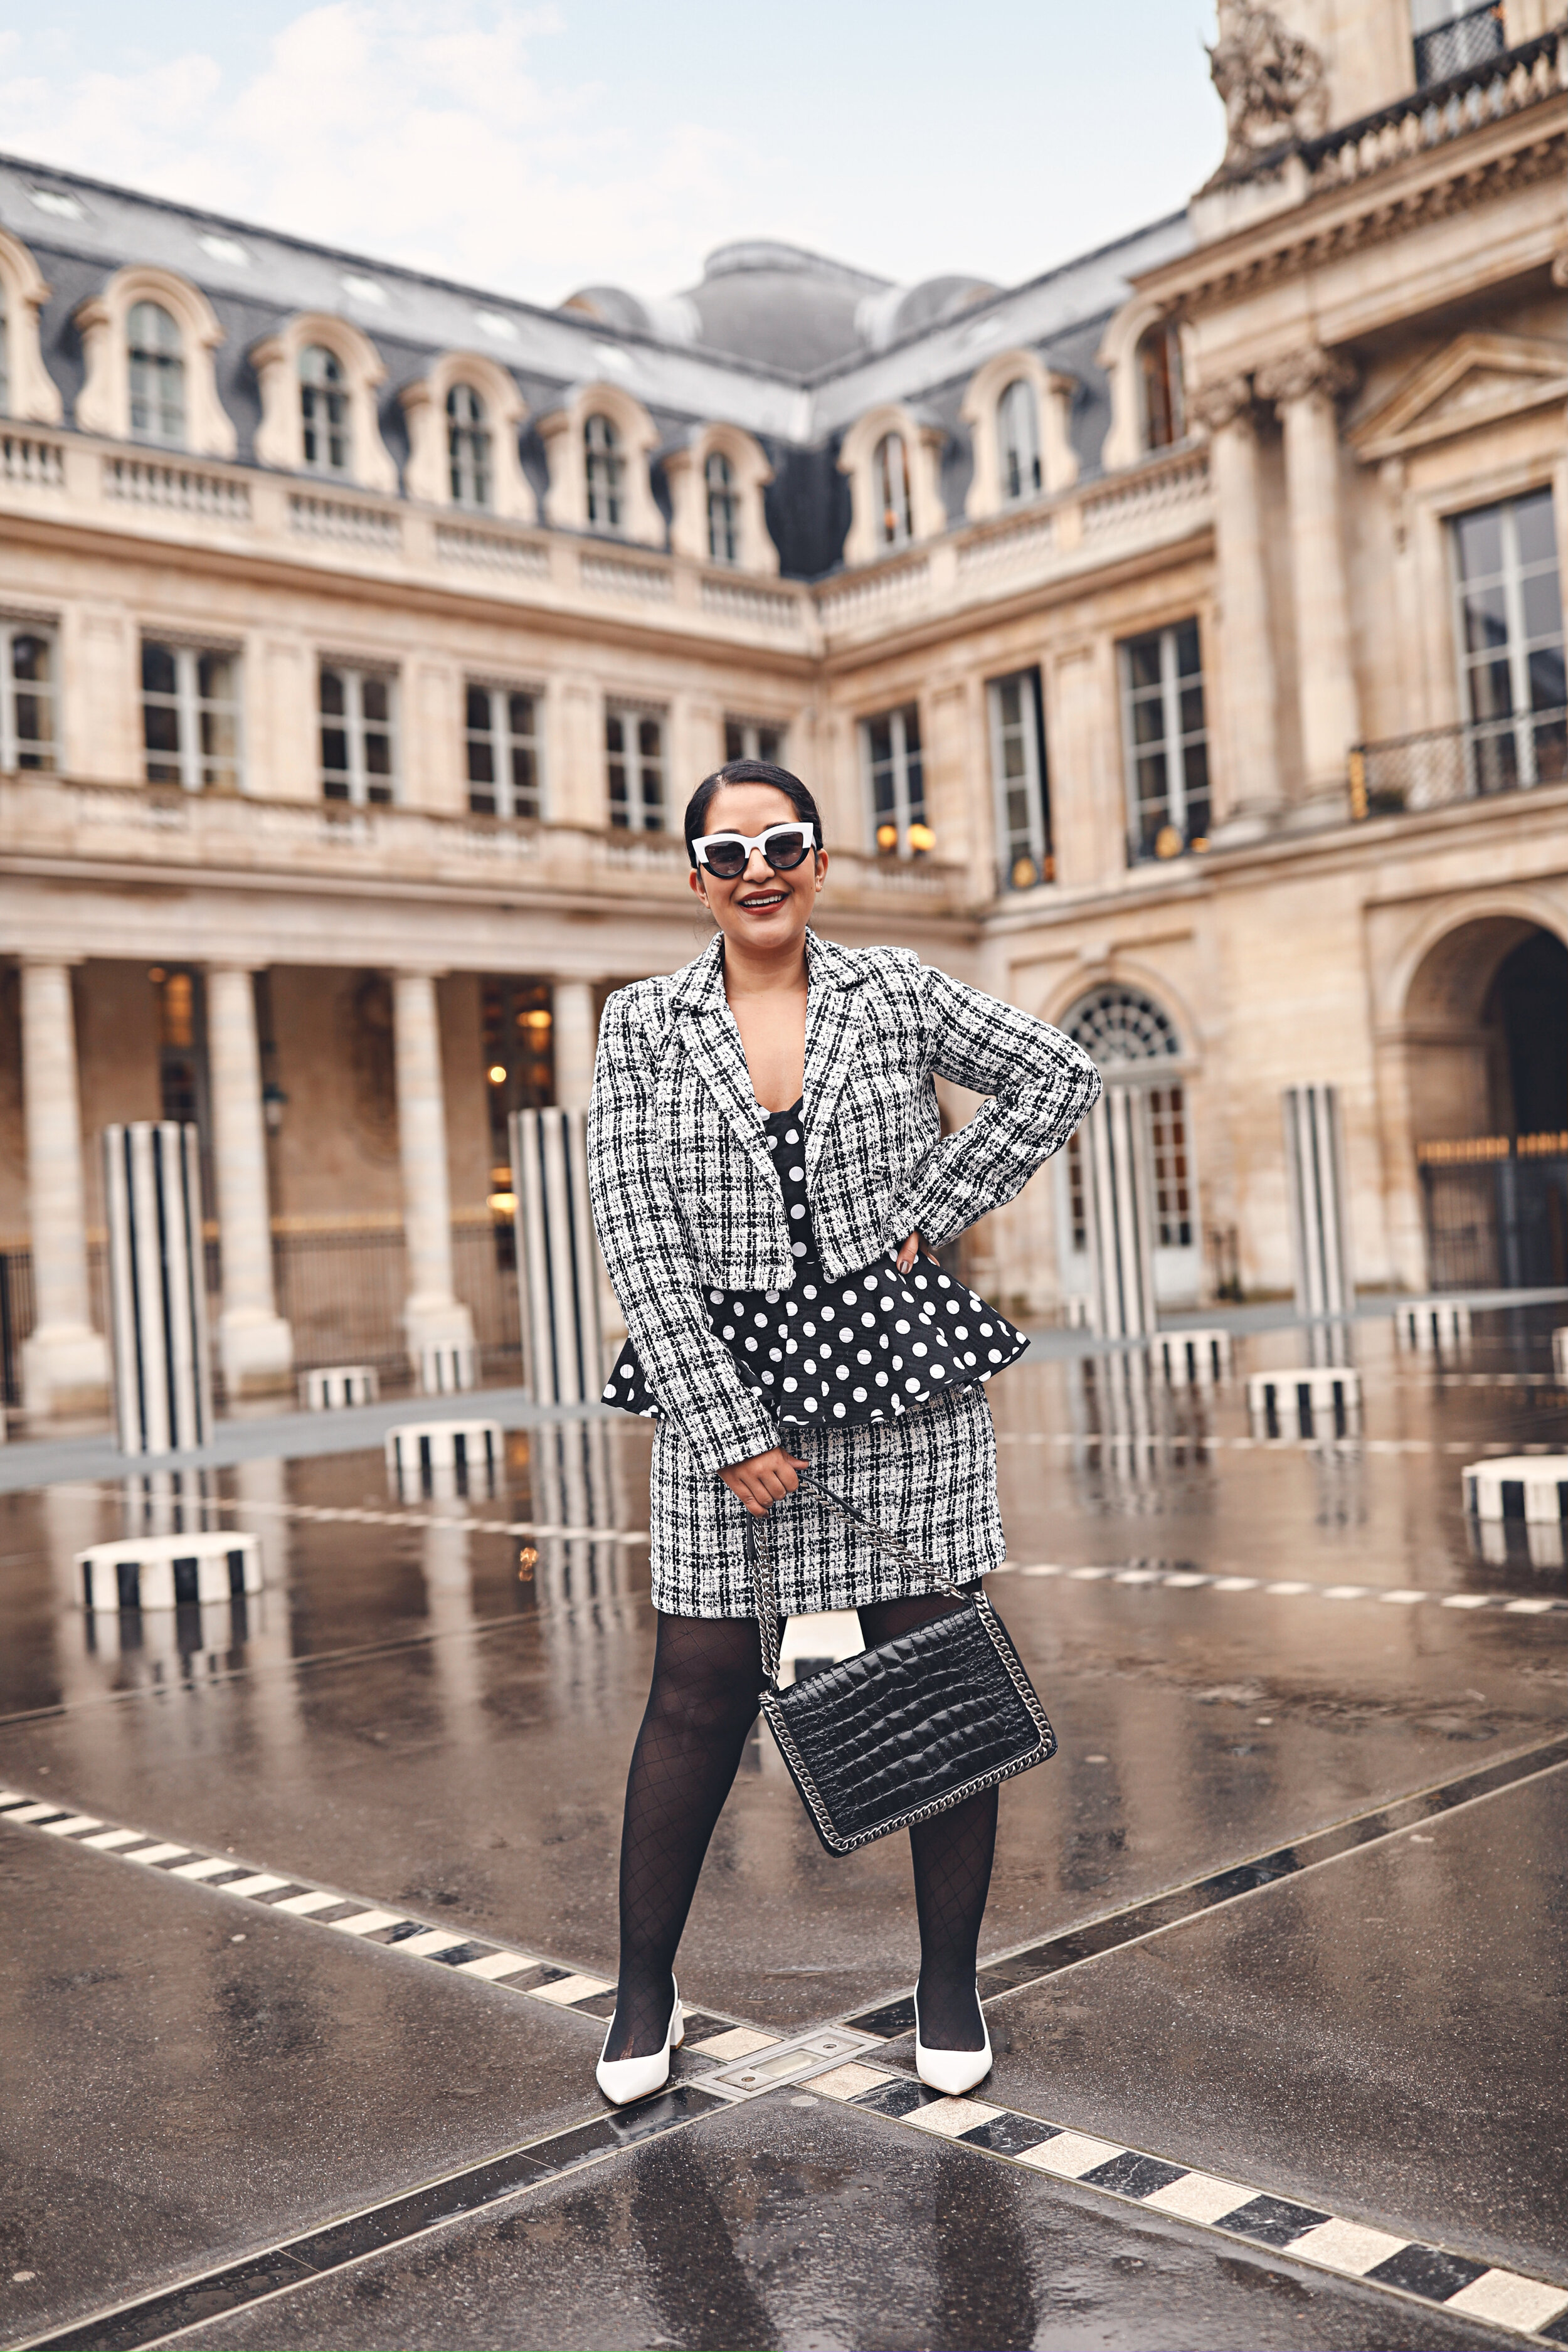
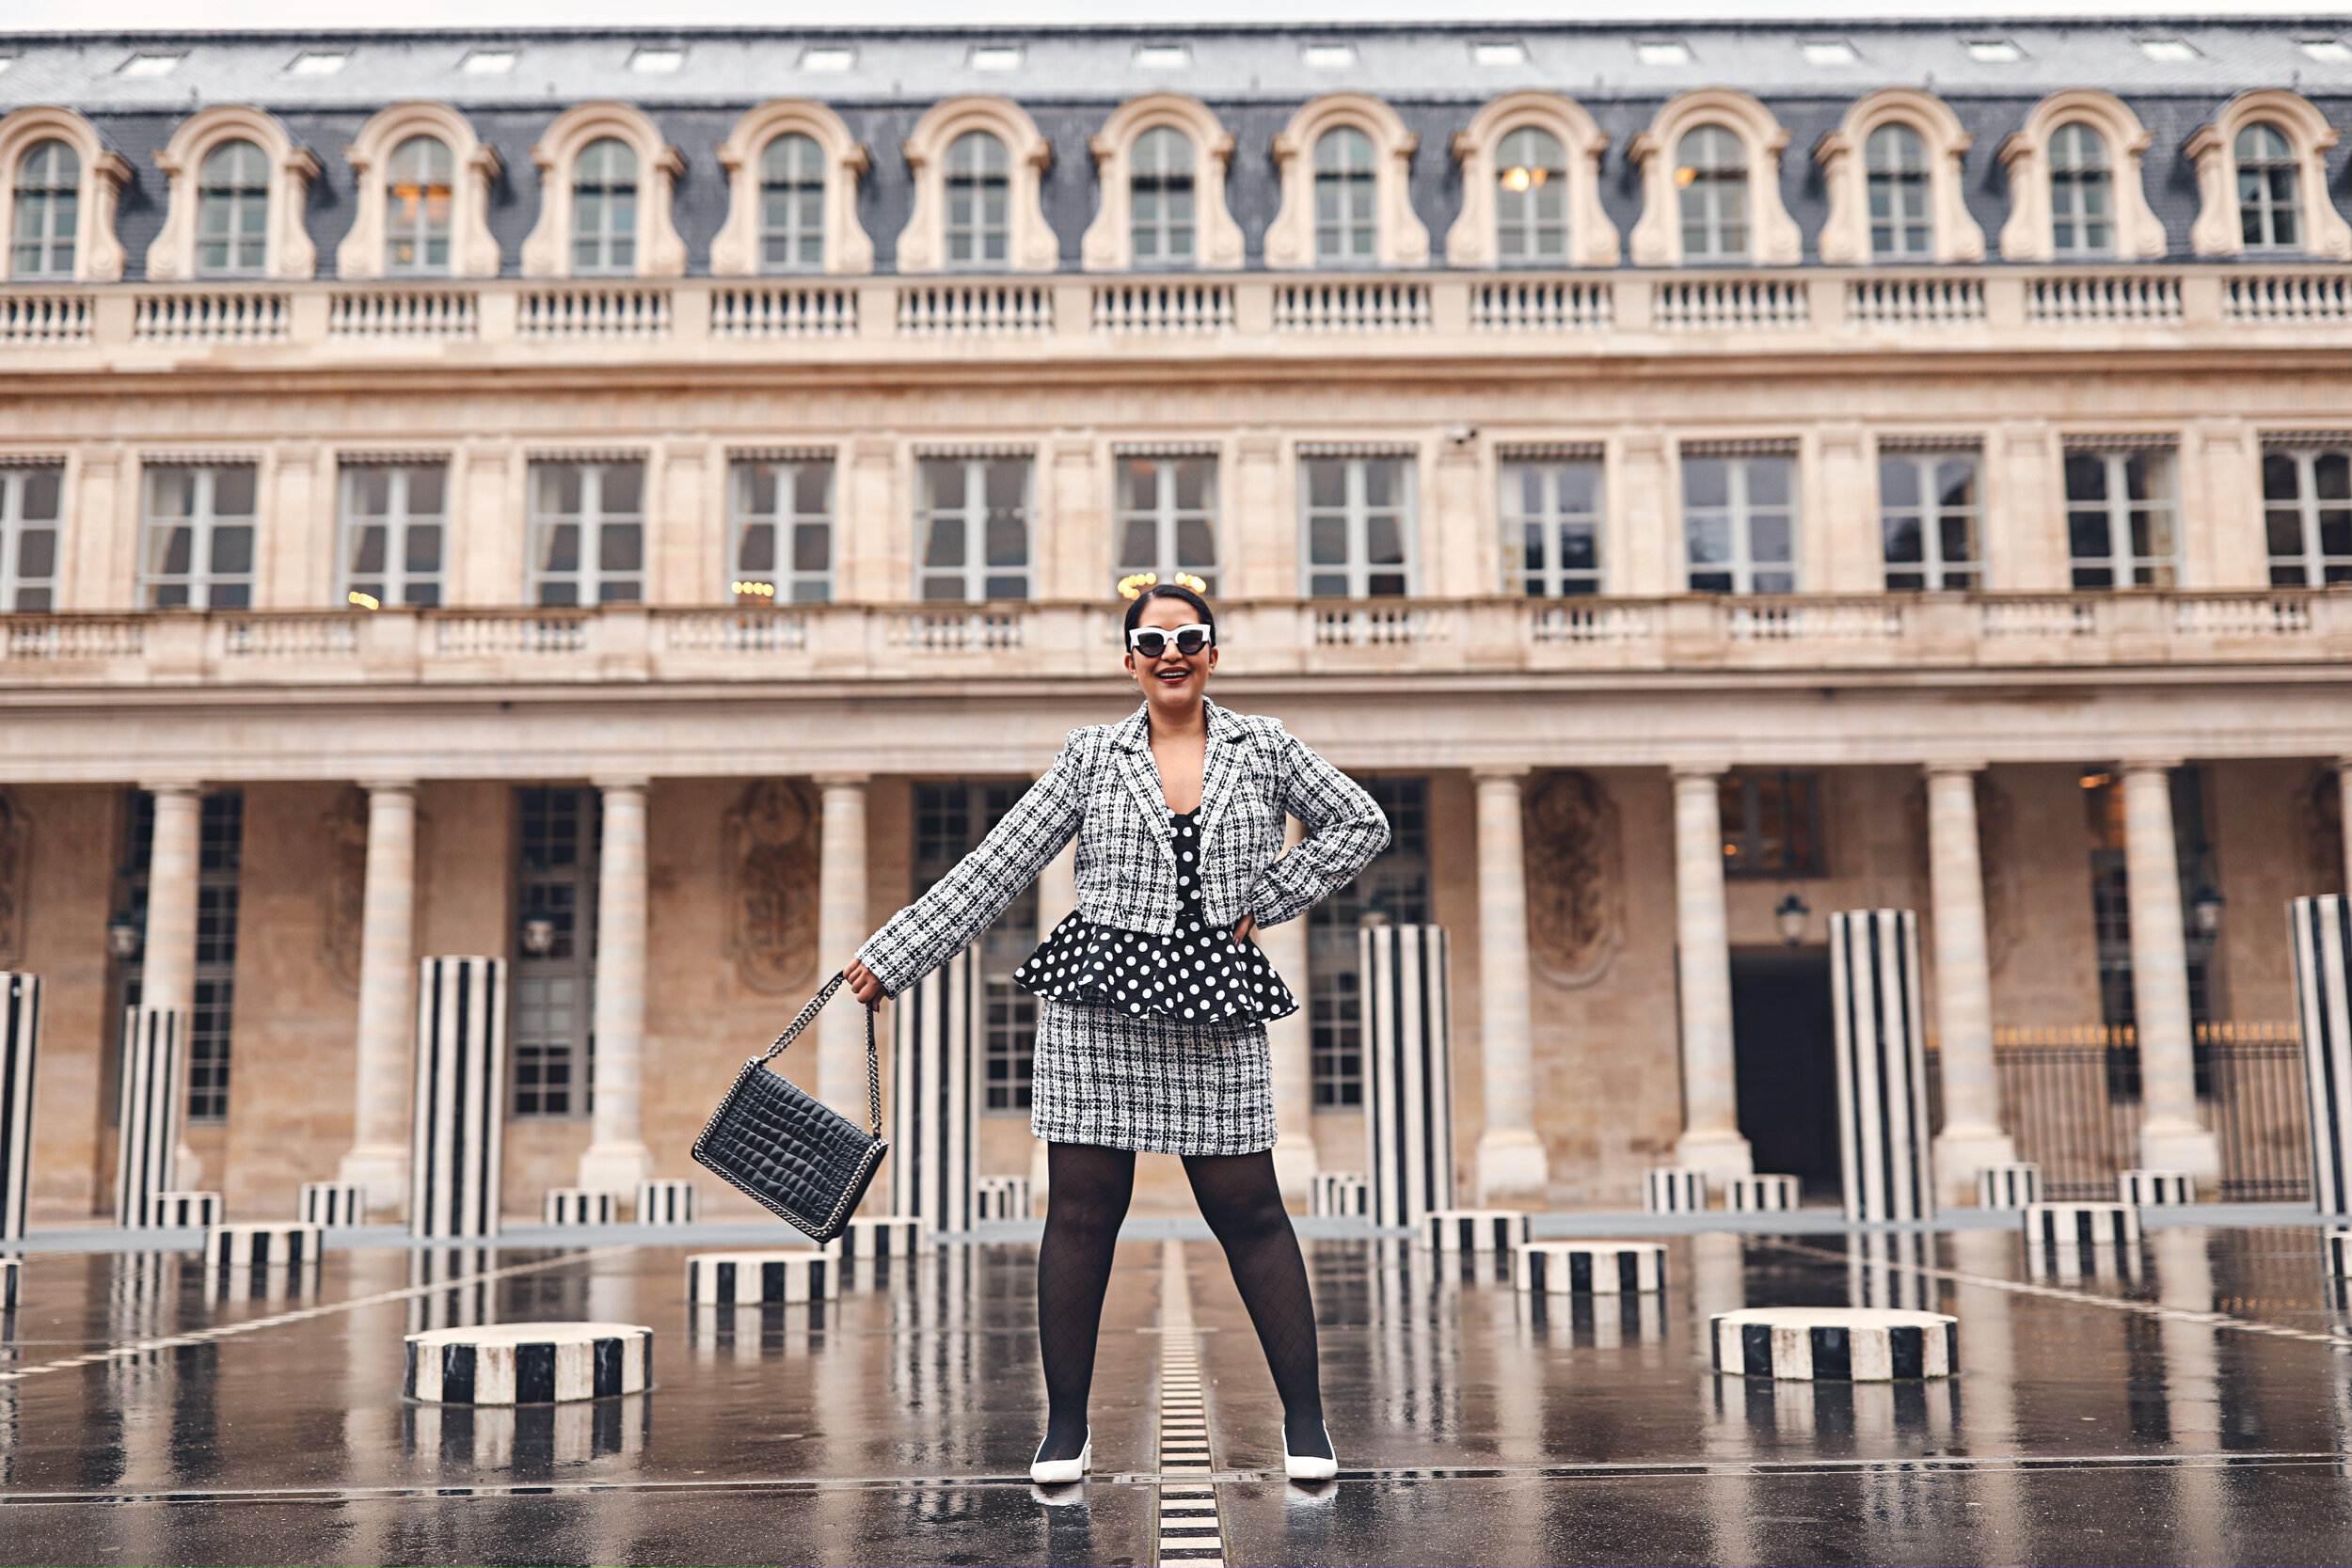
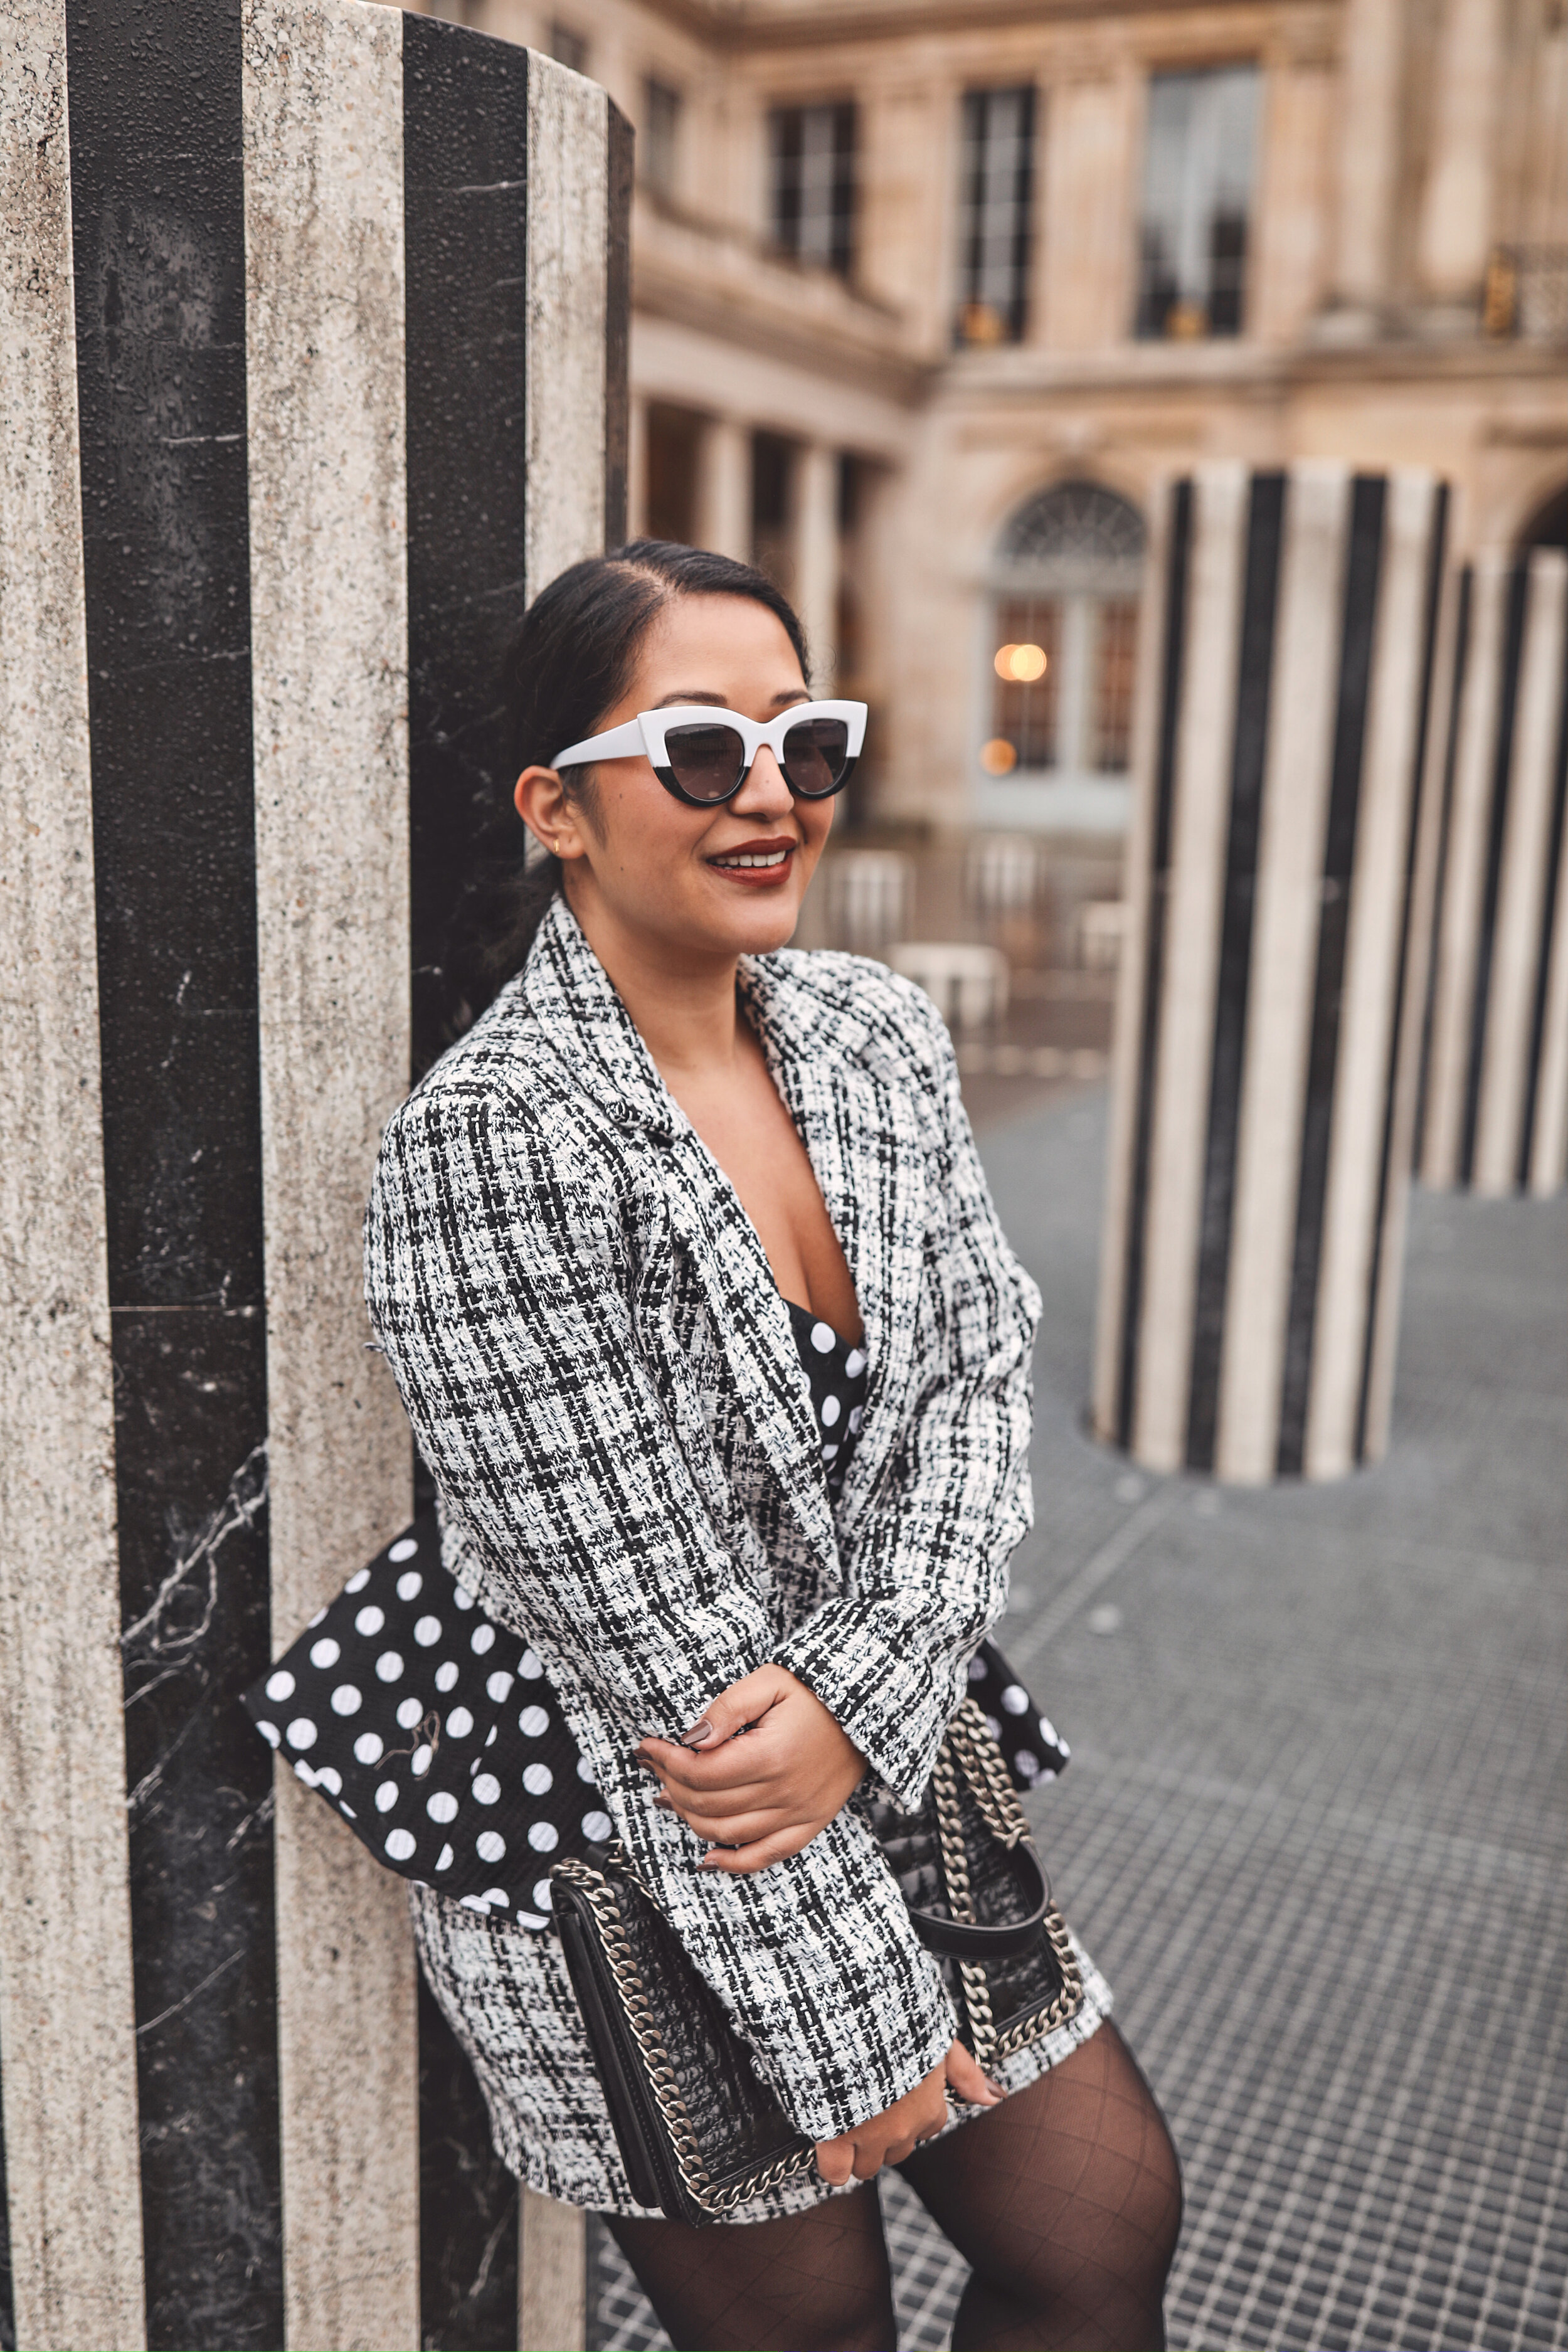
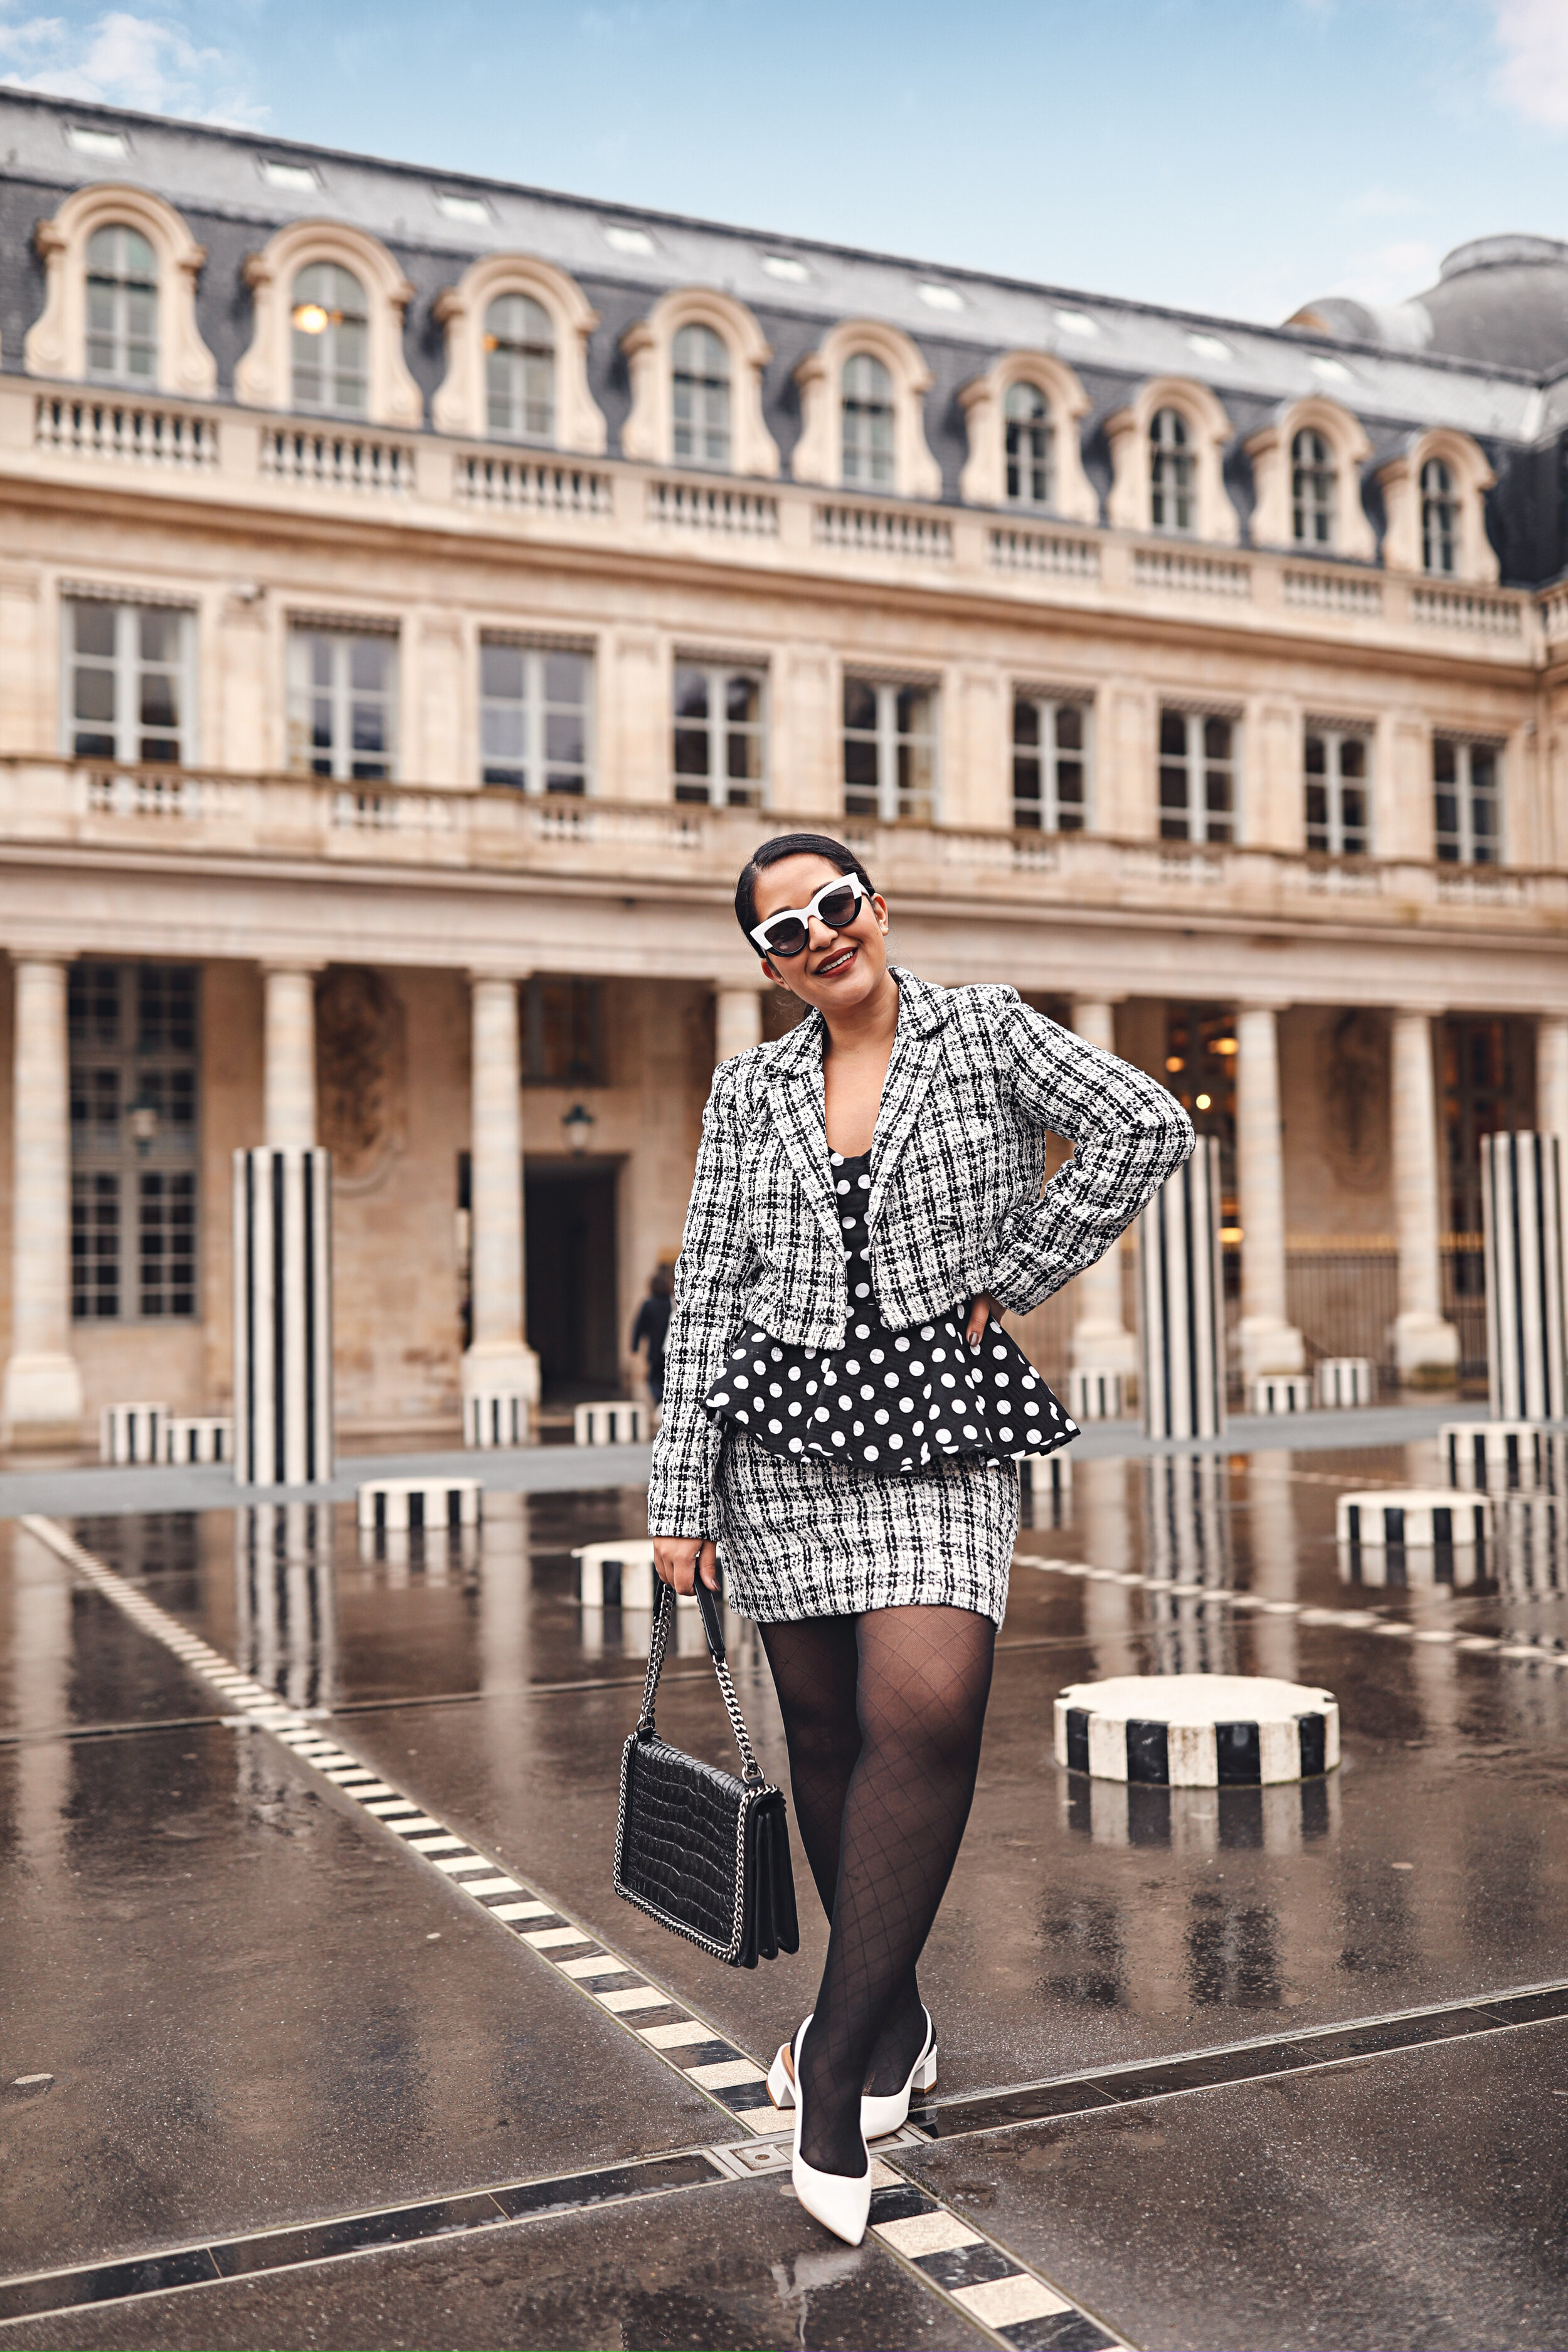
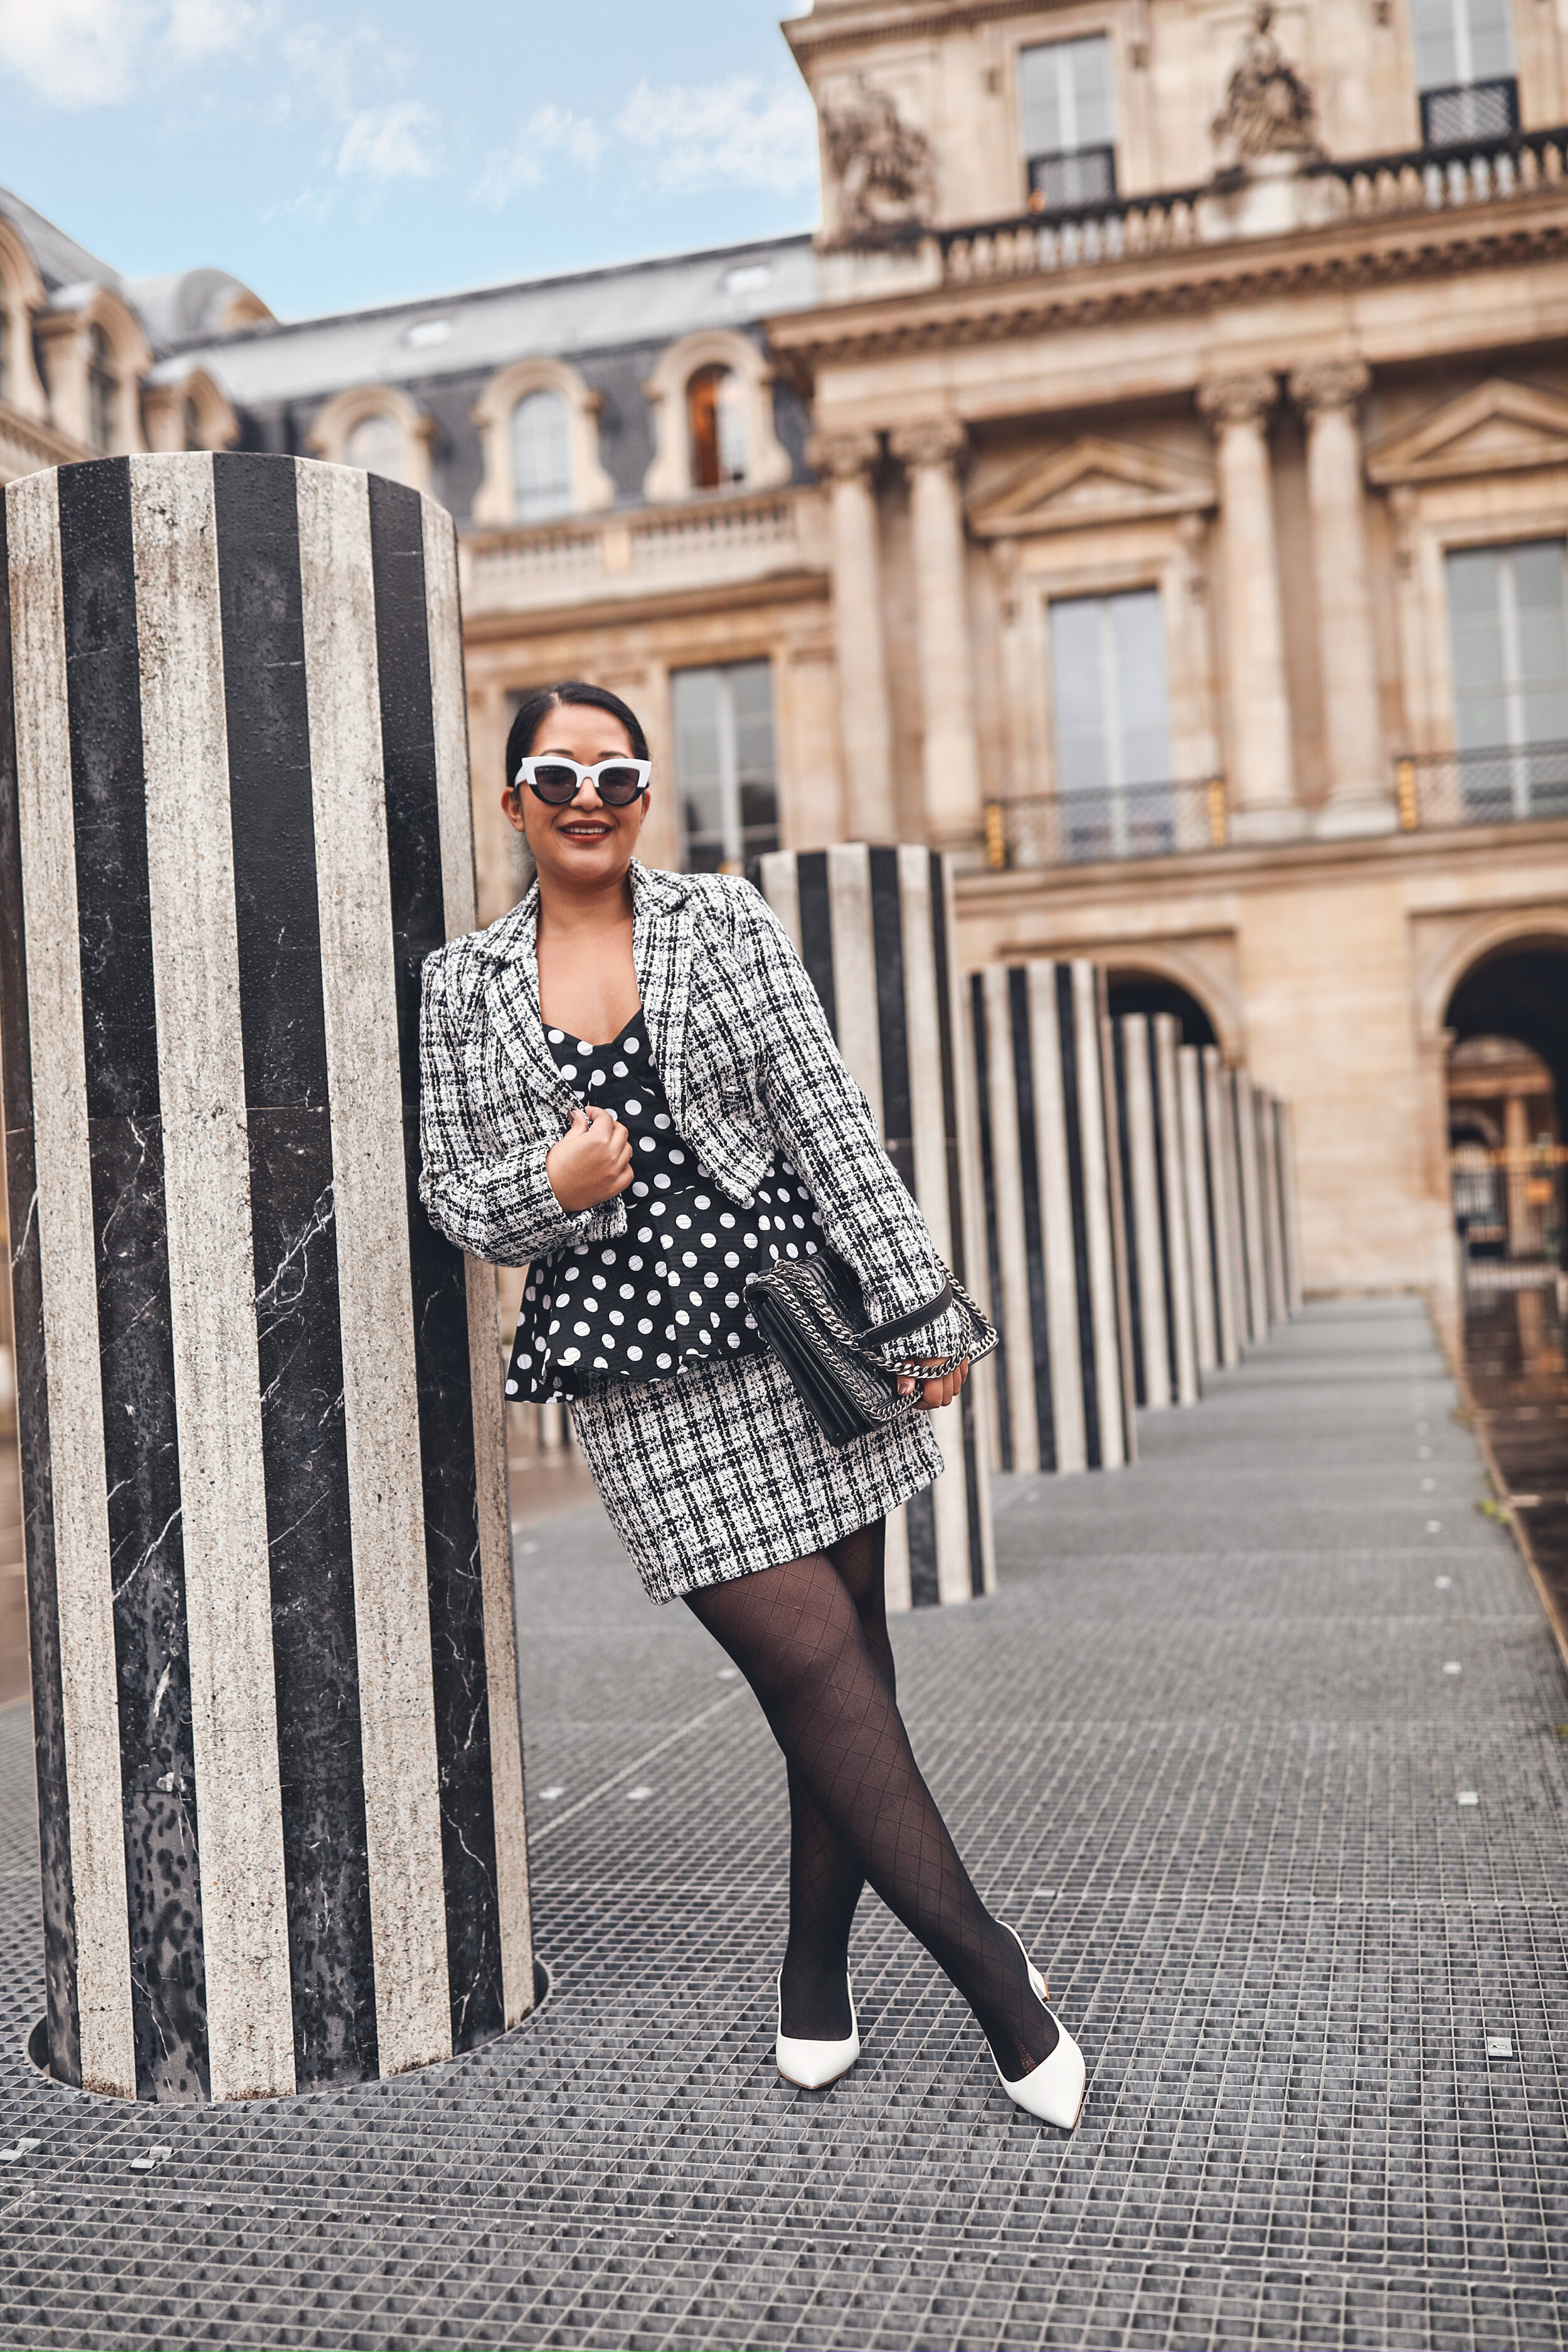
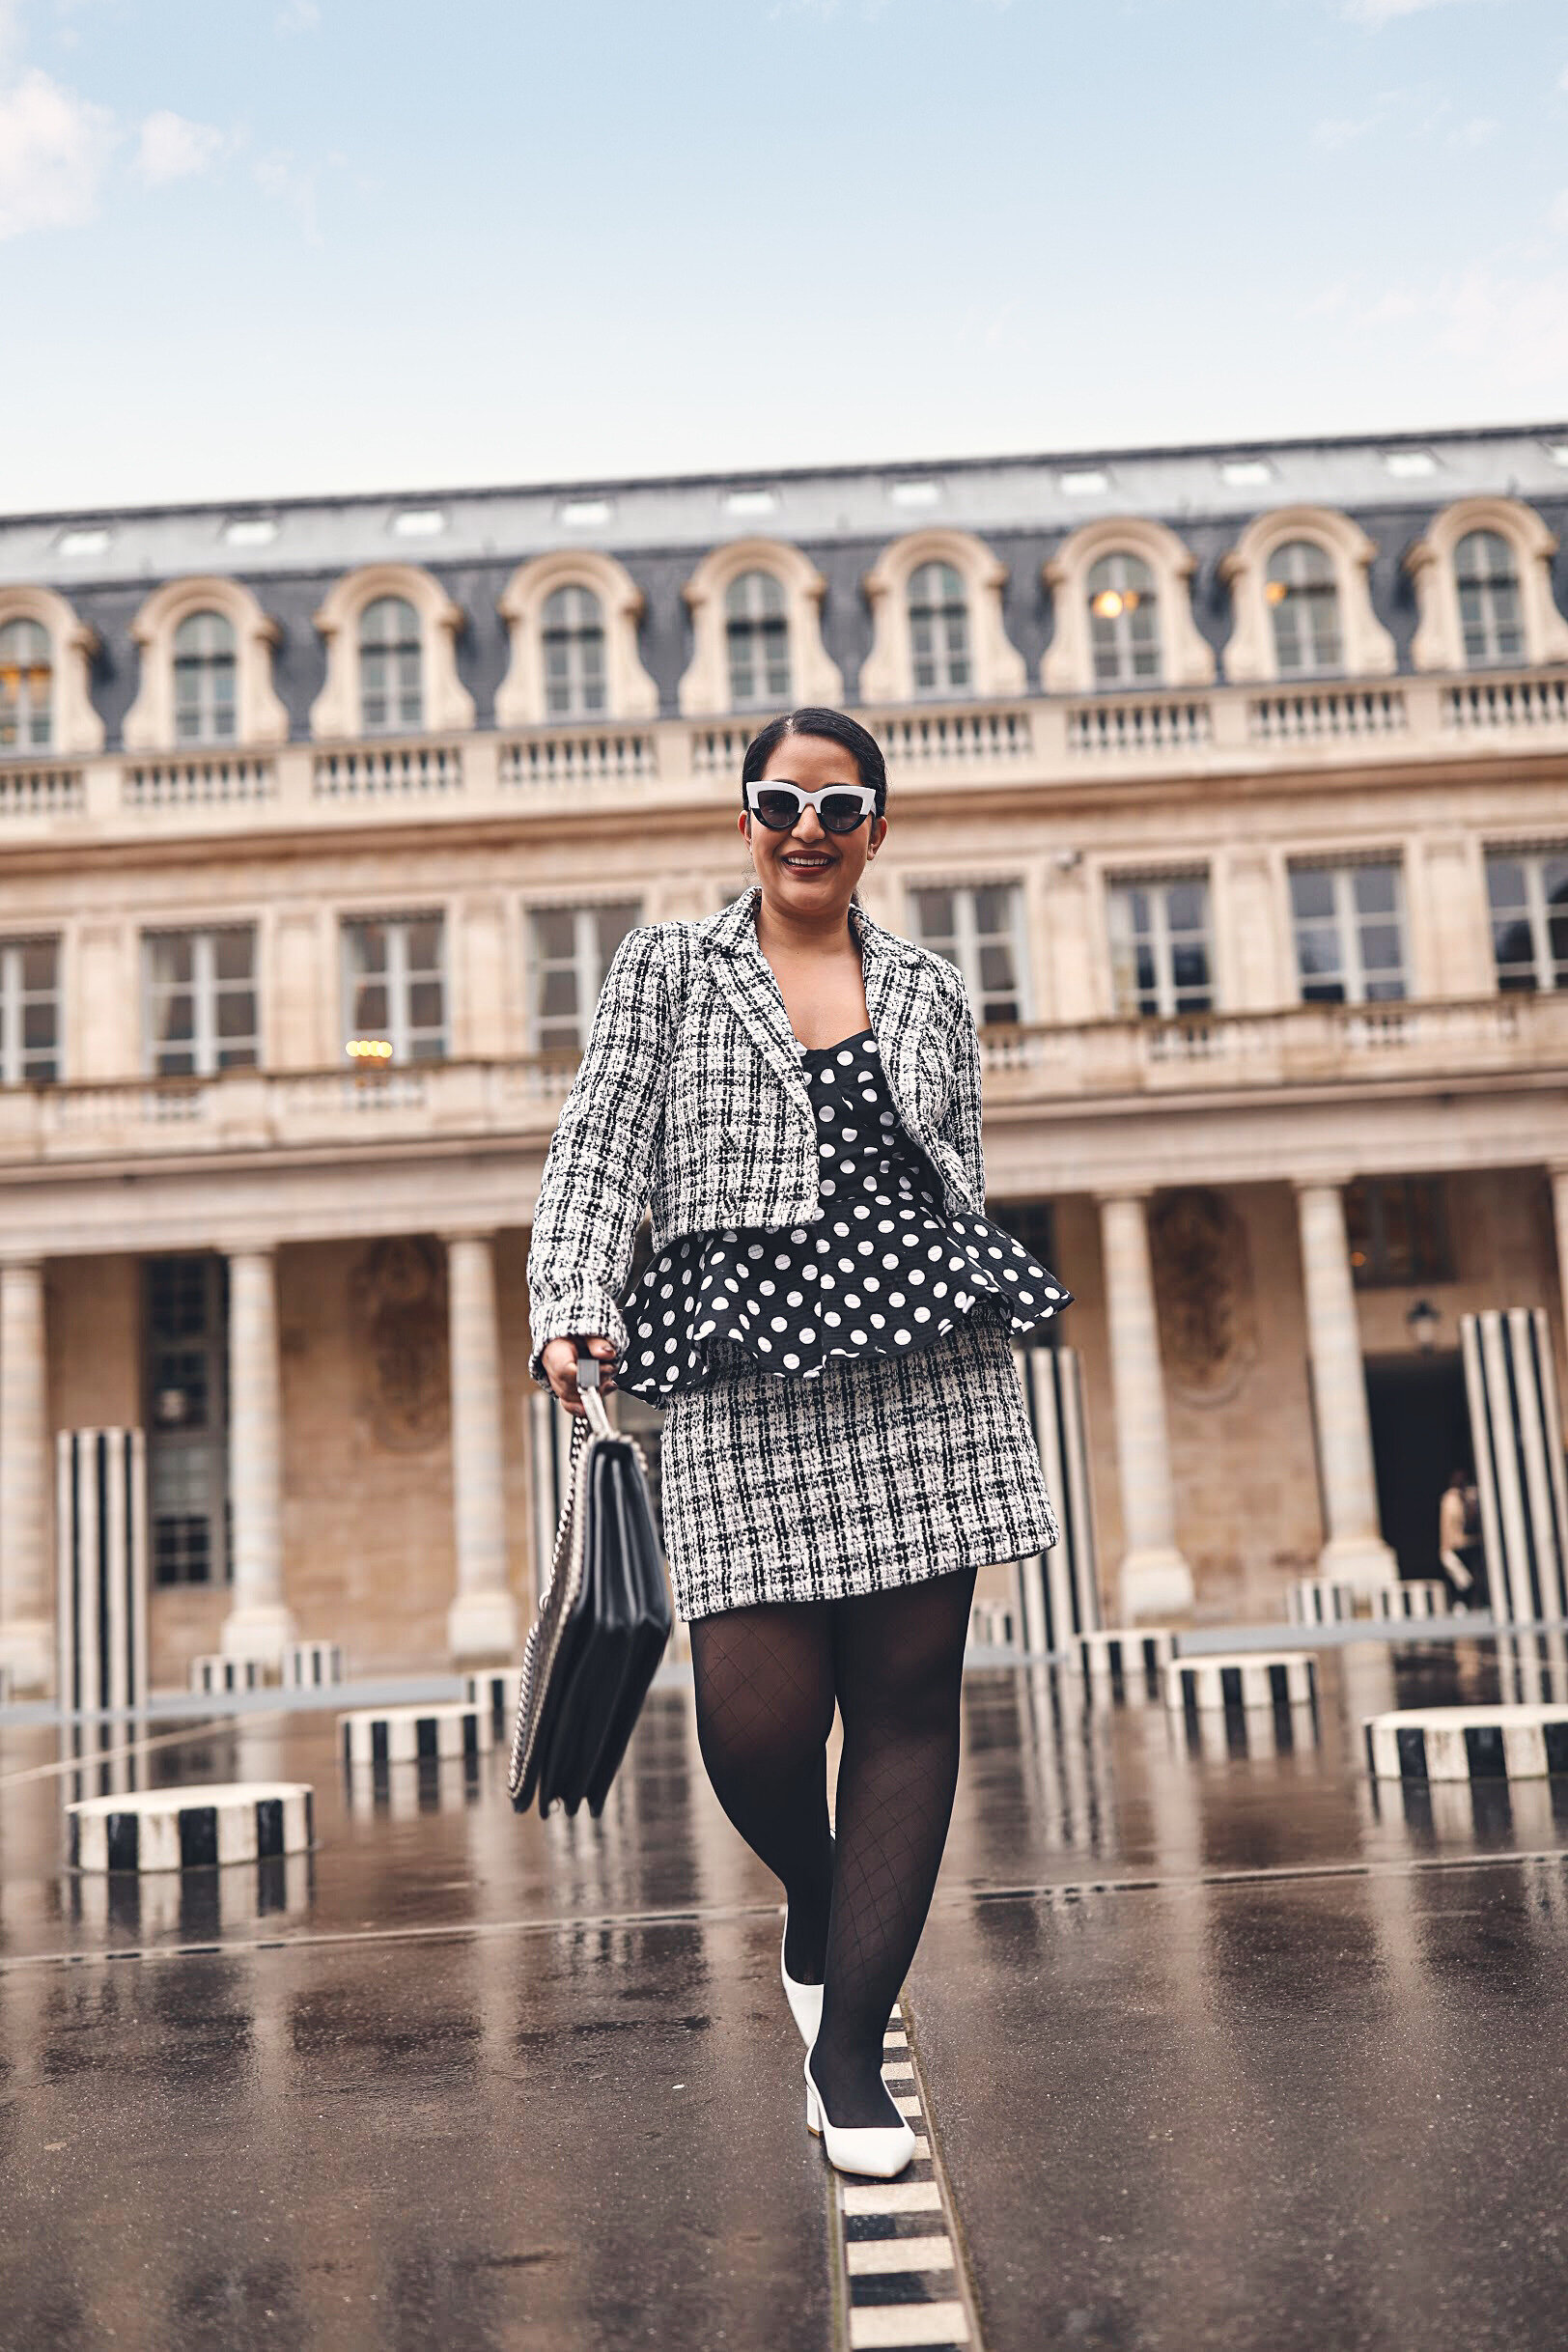
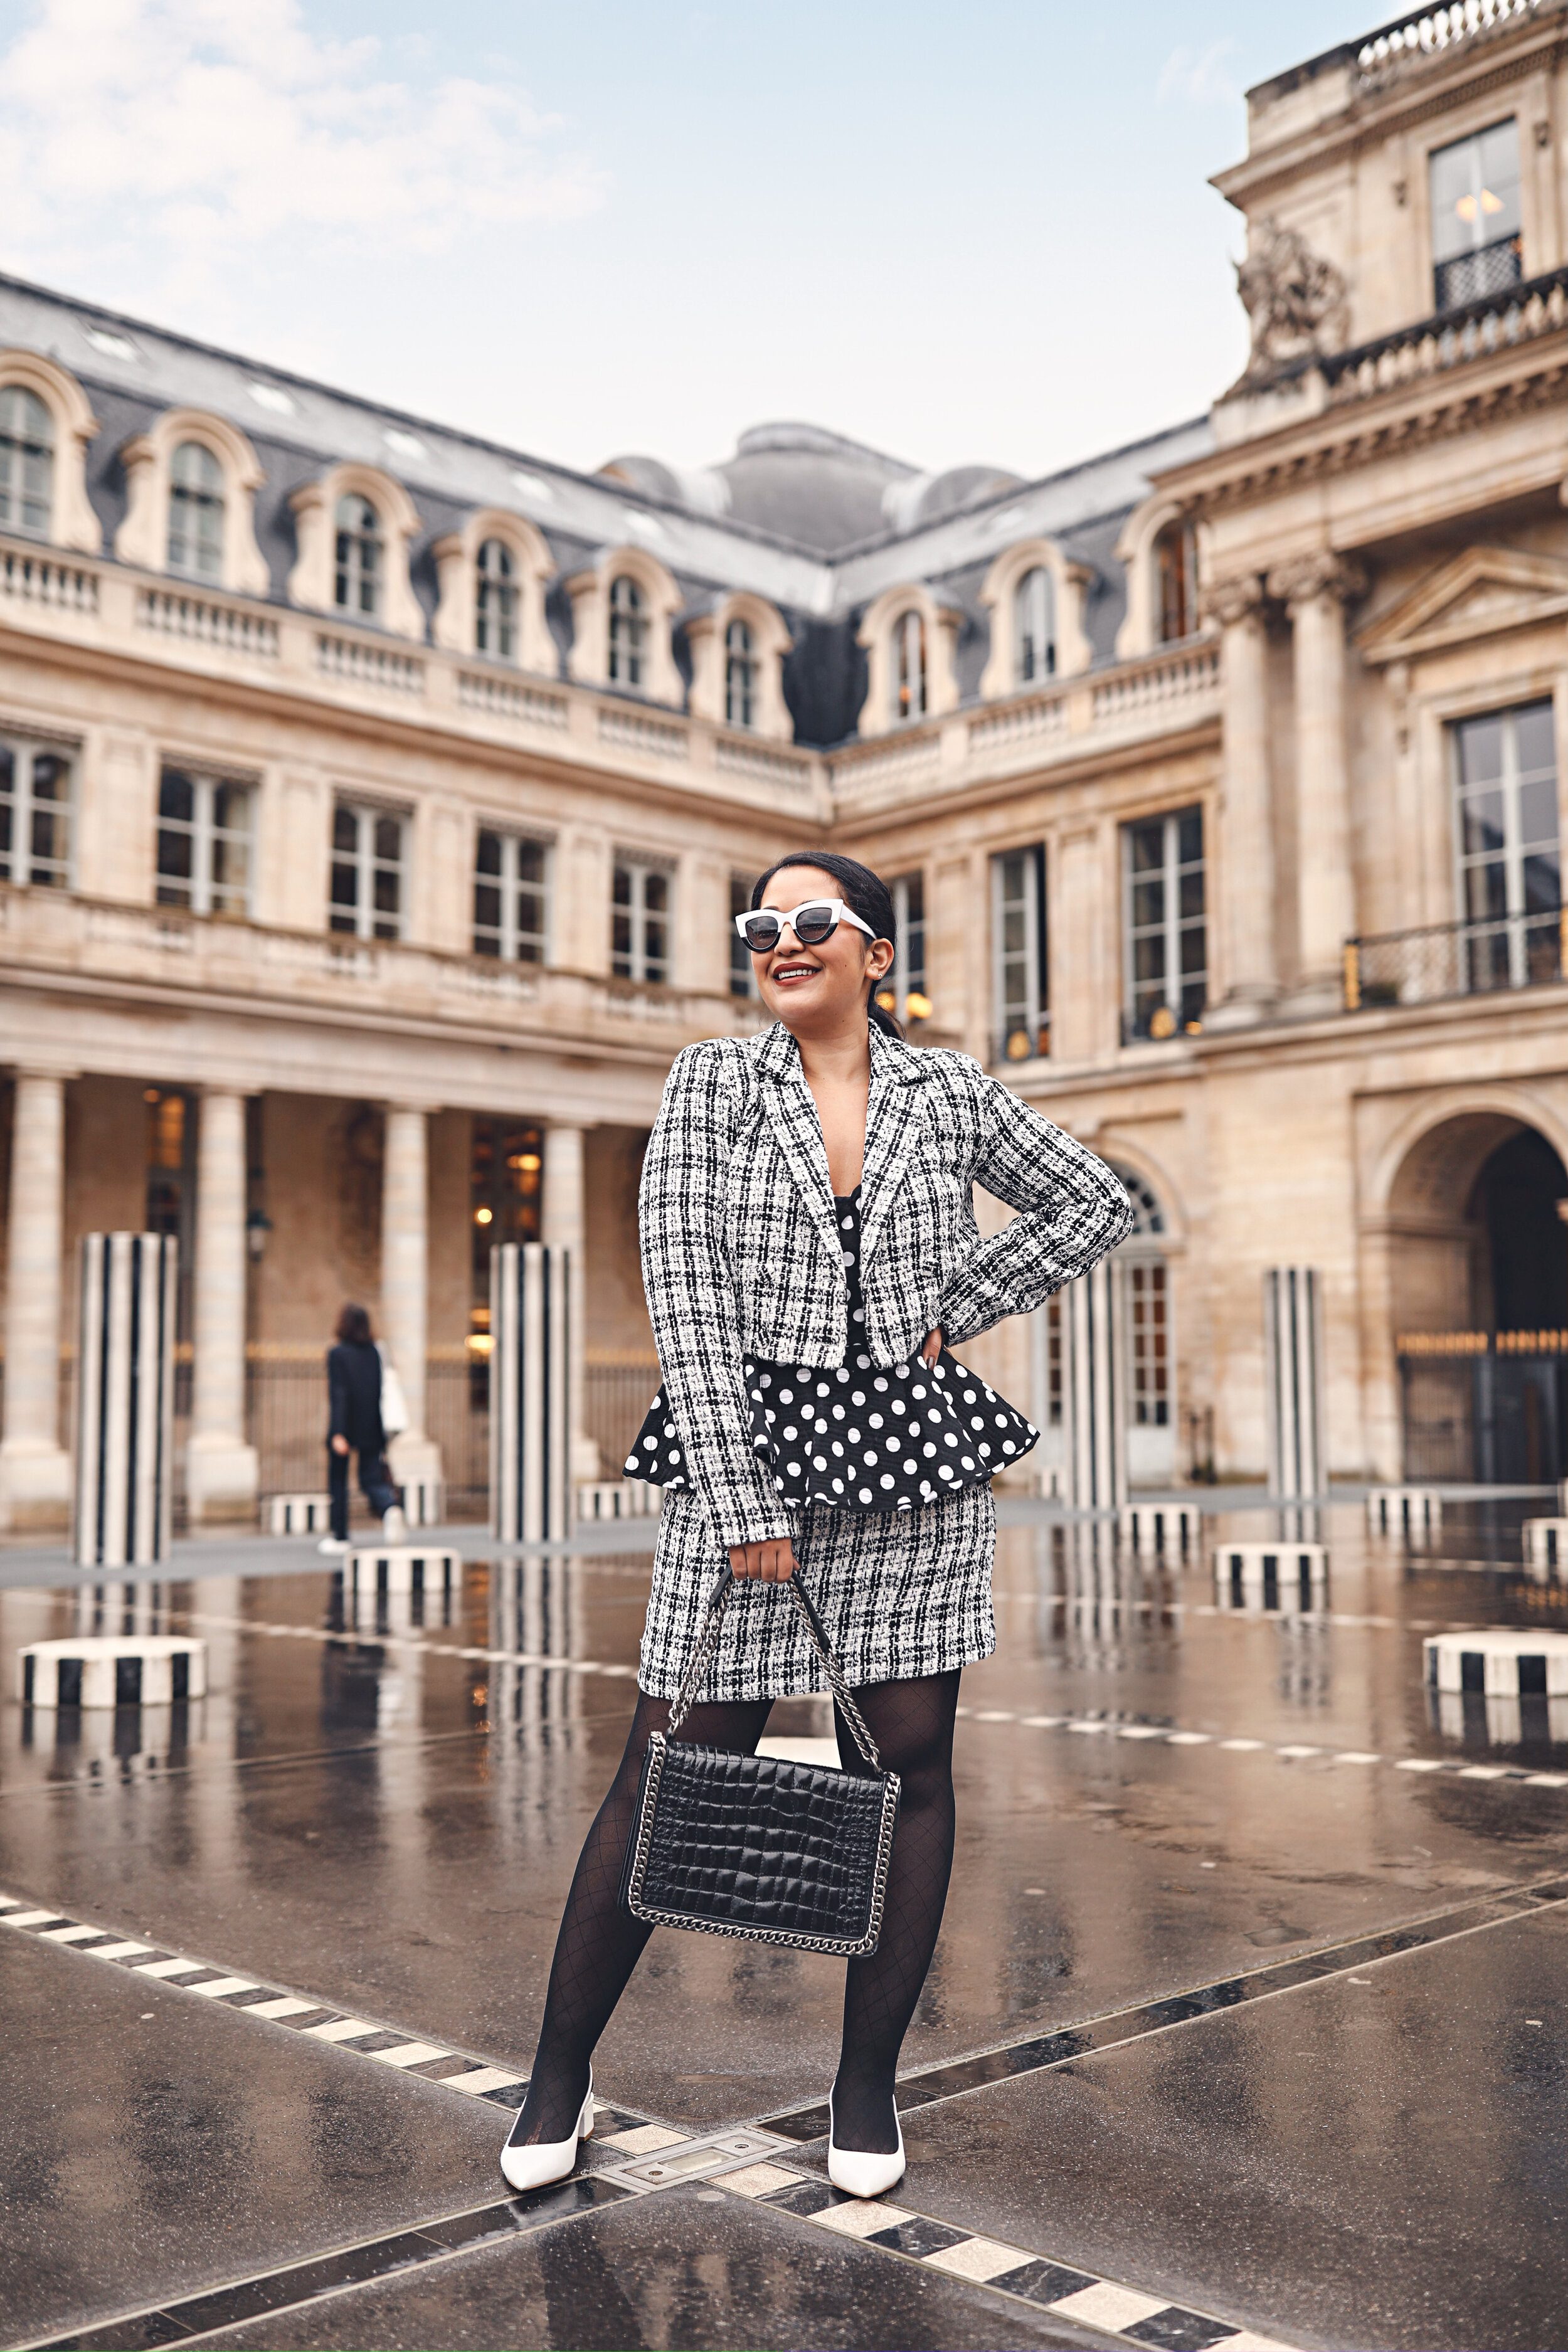
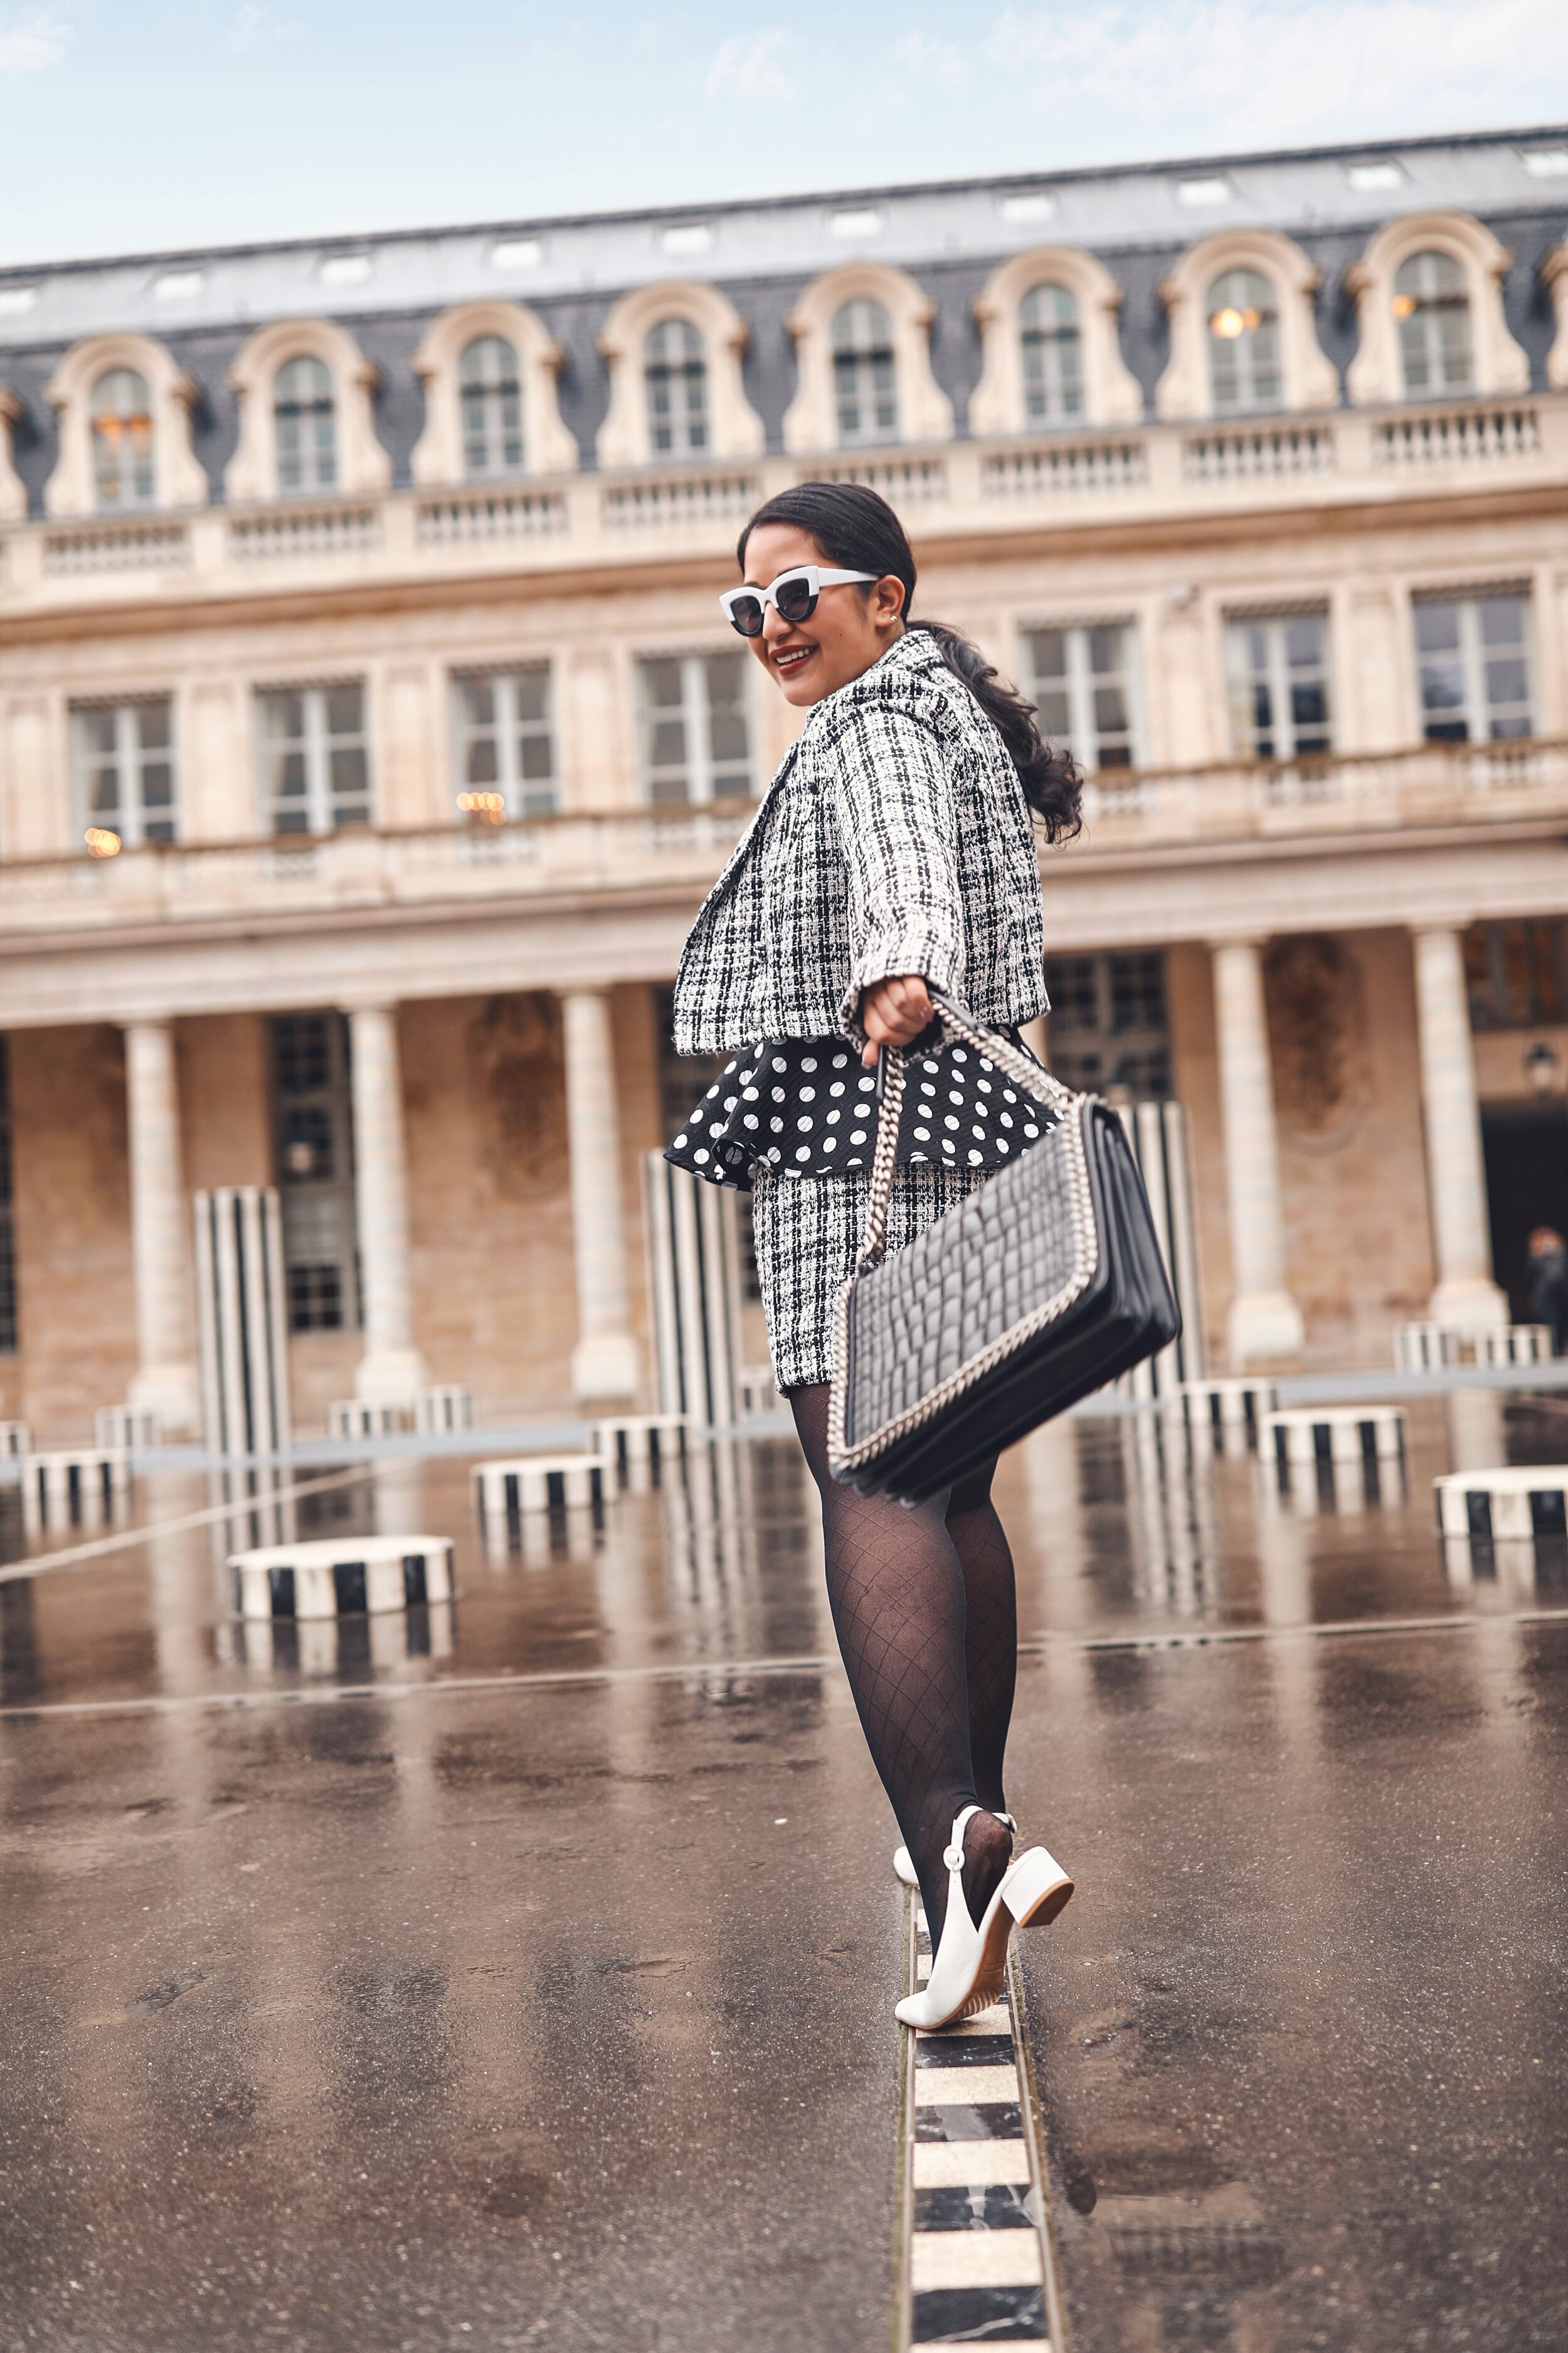
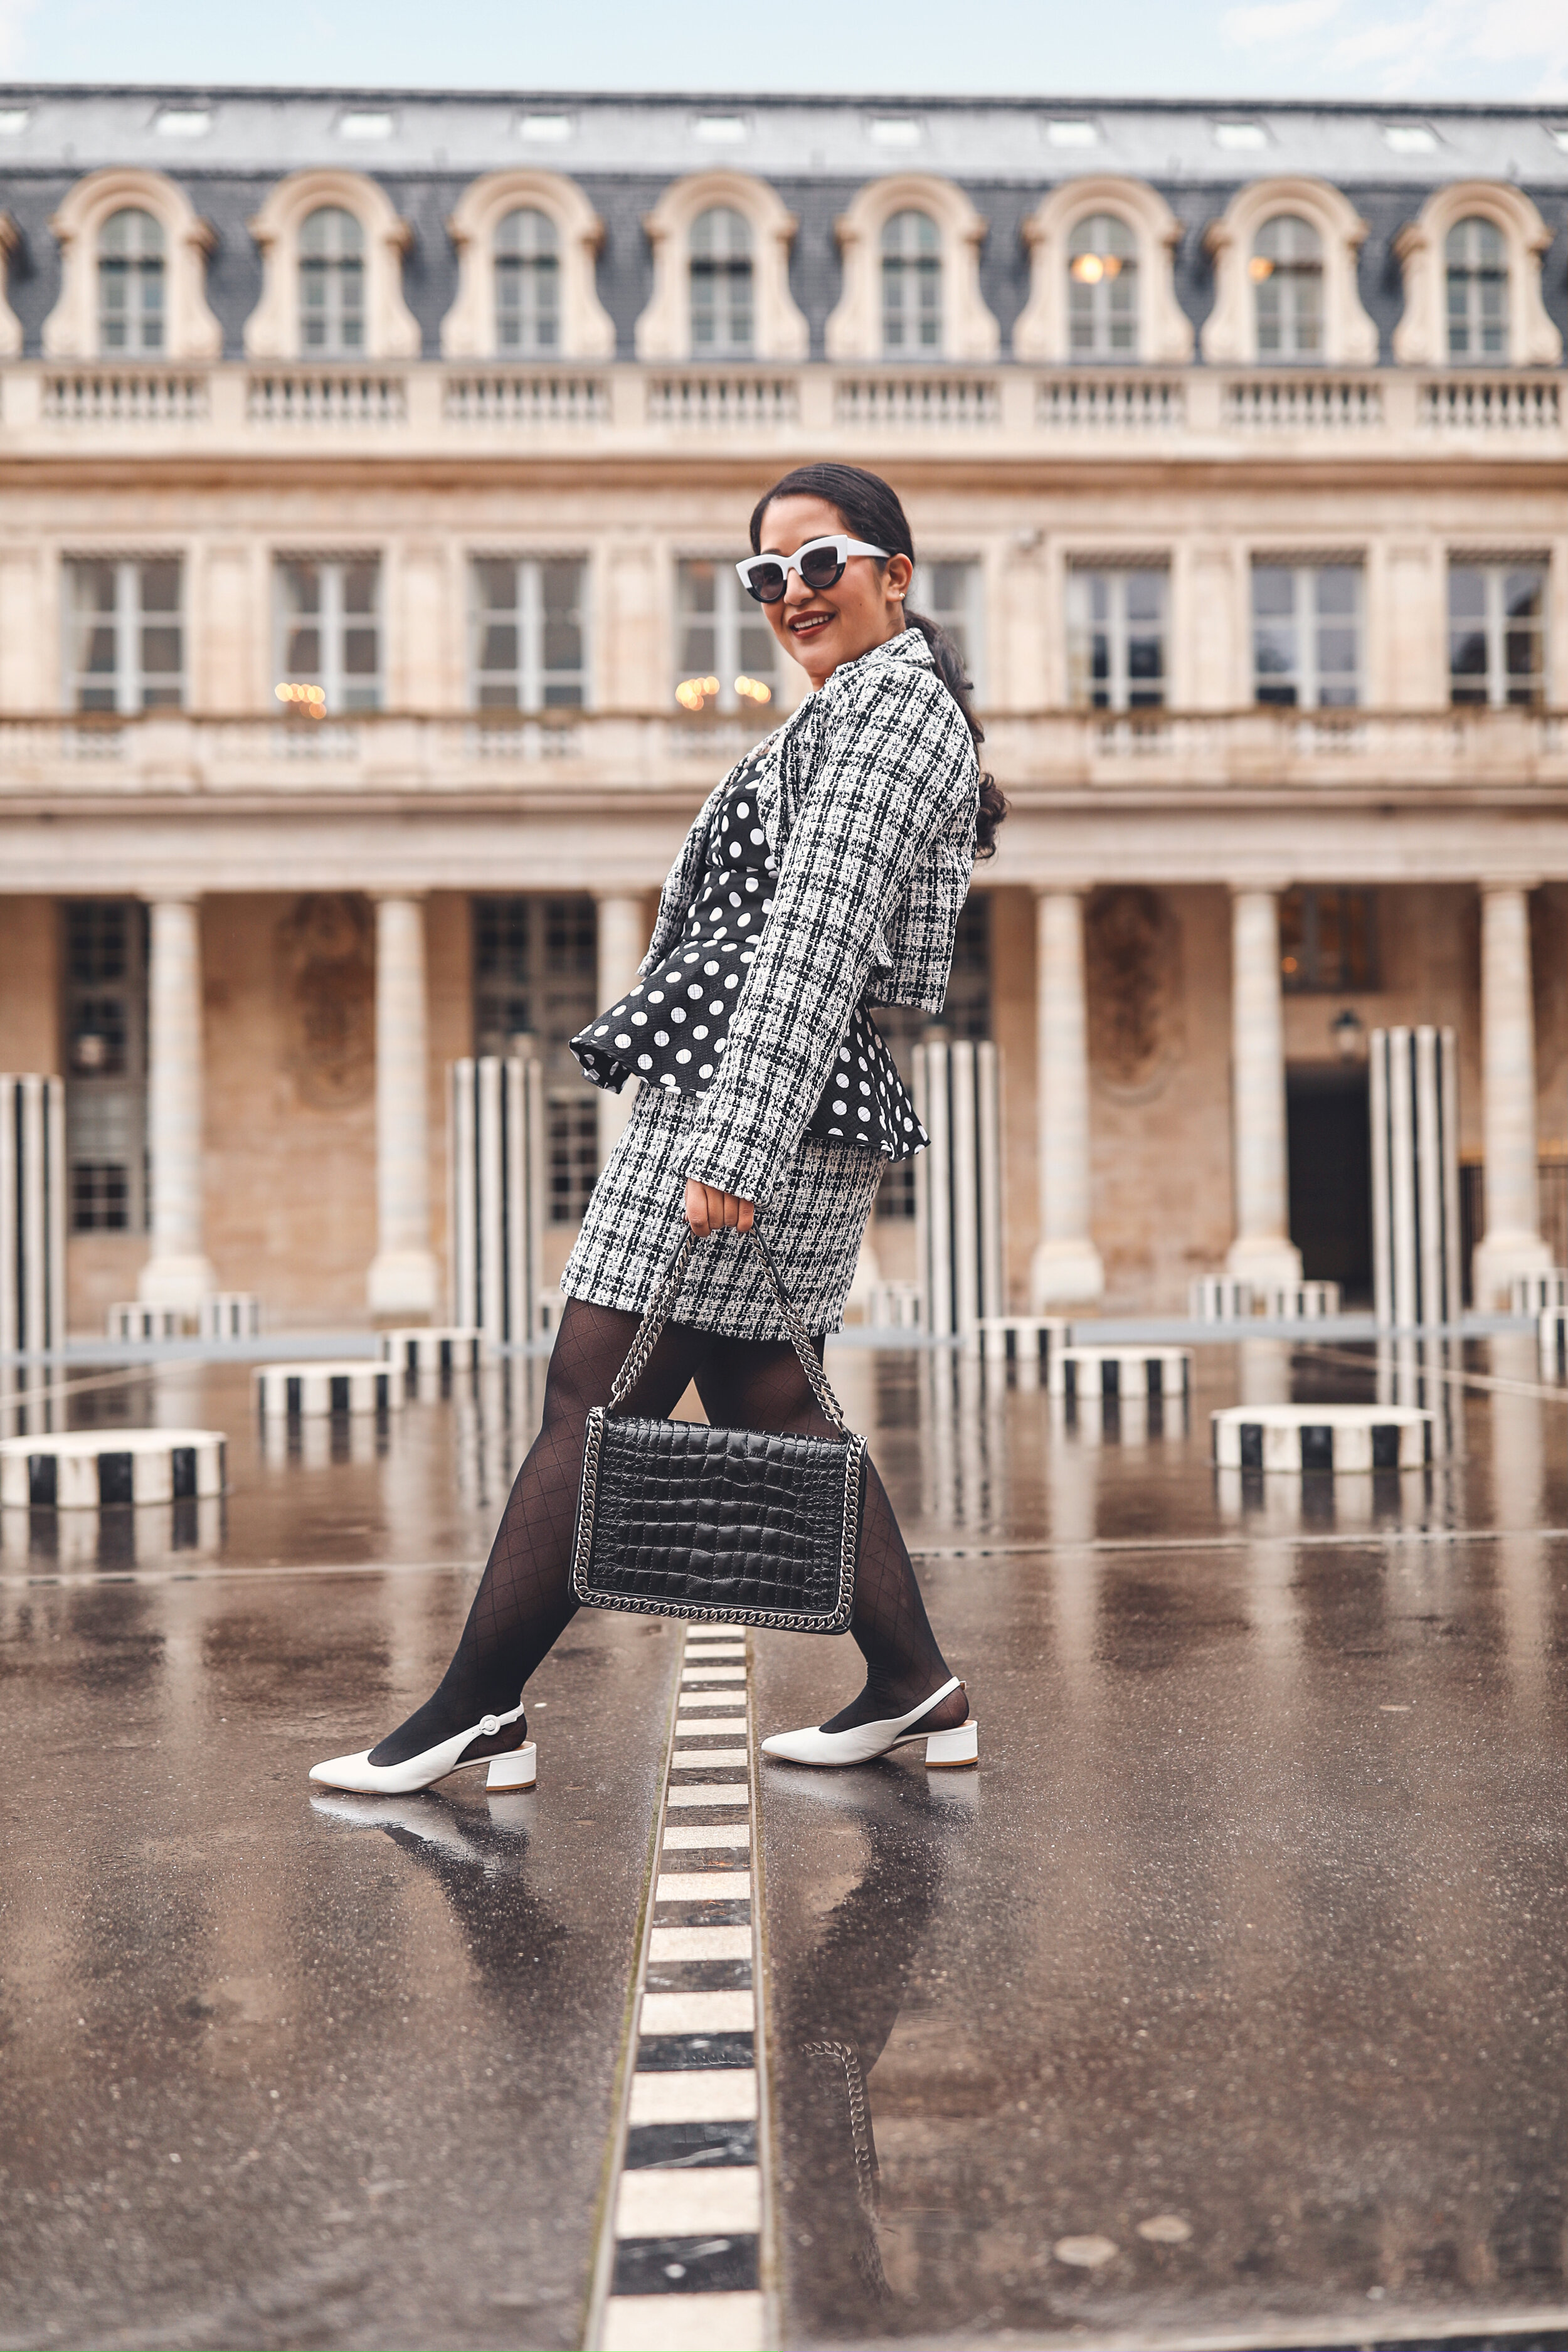
Le Palais Royal
This location is probably my favorite location I went to visit in Paris and took photos at! I loved the architecture and all the interesting black and white pillars. I highly recommend wearing black and white while shooting here because it just elevates the images and makes it very cohesive. There are a ton of different ways you can shoot here- from standing against the pillars, along the ‘X’ mark on the floor, or under the arches. The possibilities are endless! I also loved how quiet and secluded this location was! There weren’t any tourists and the security guards did not give a hard time at all!
Map Location HERE

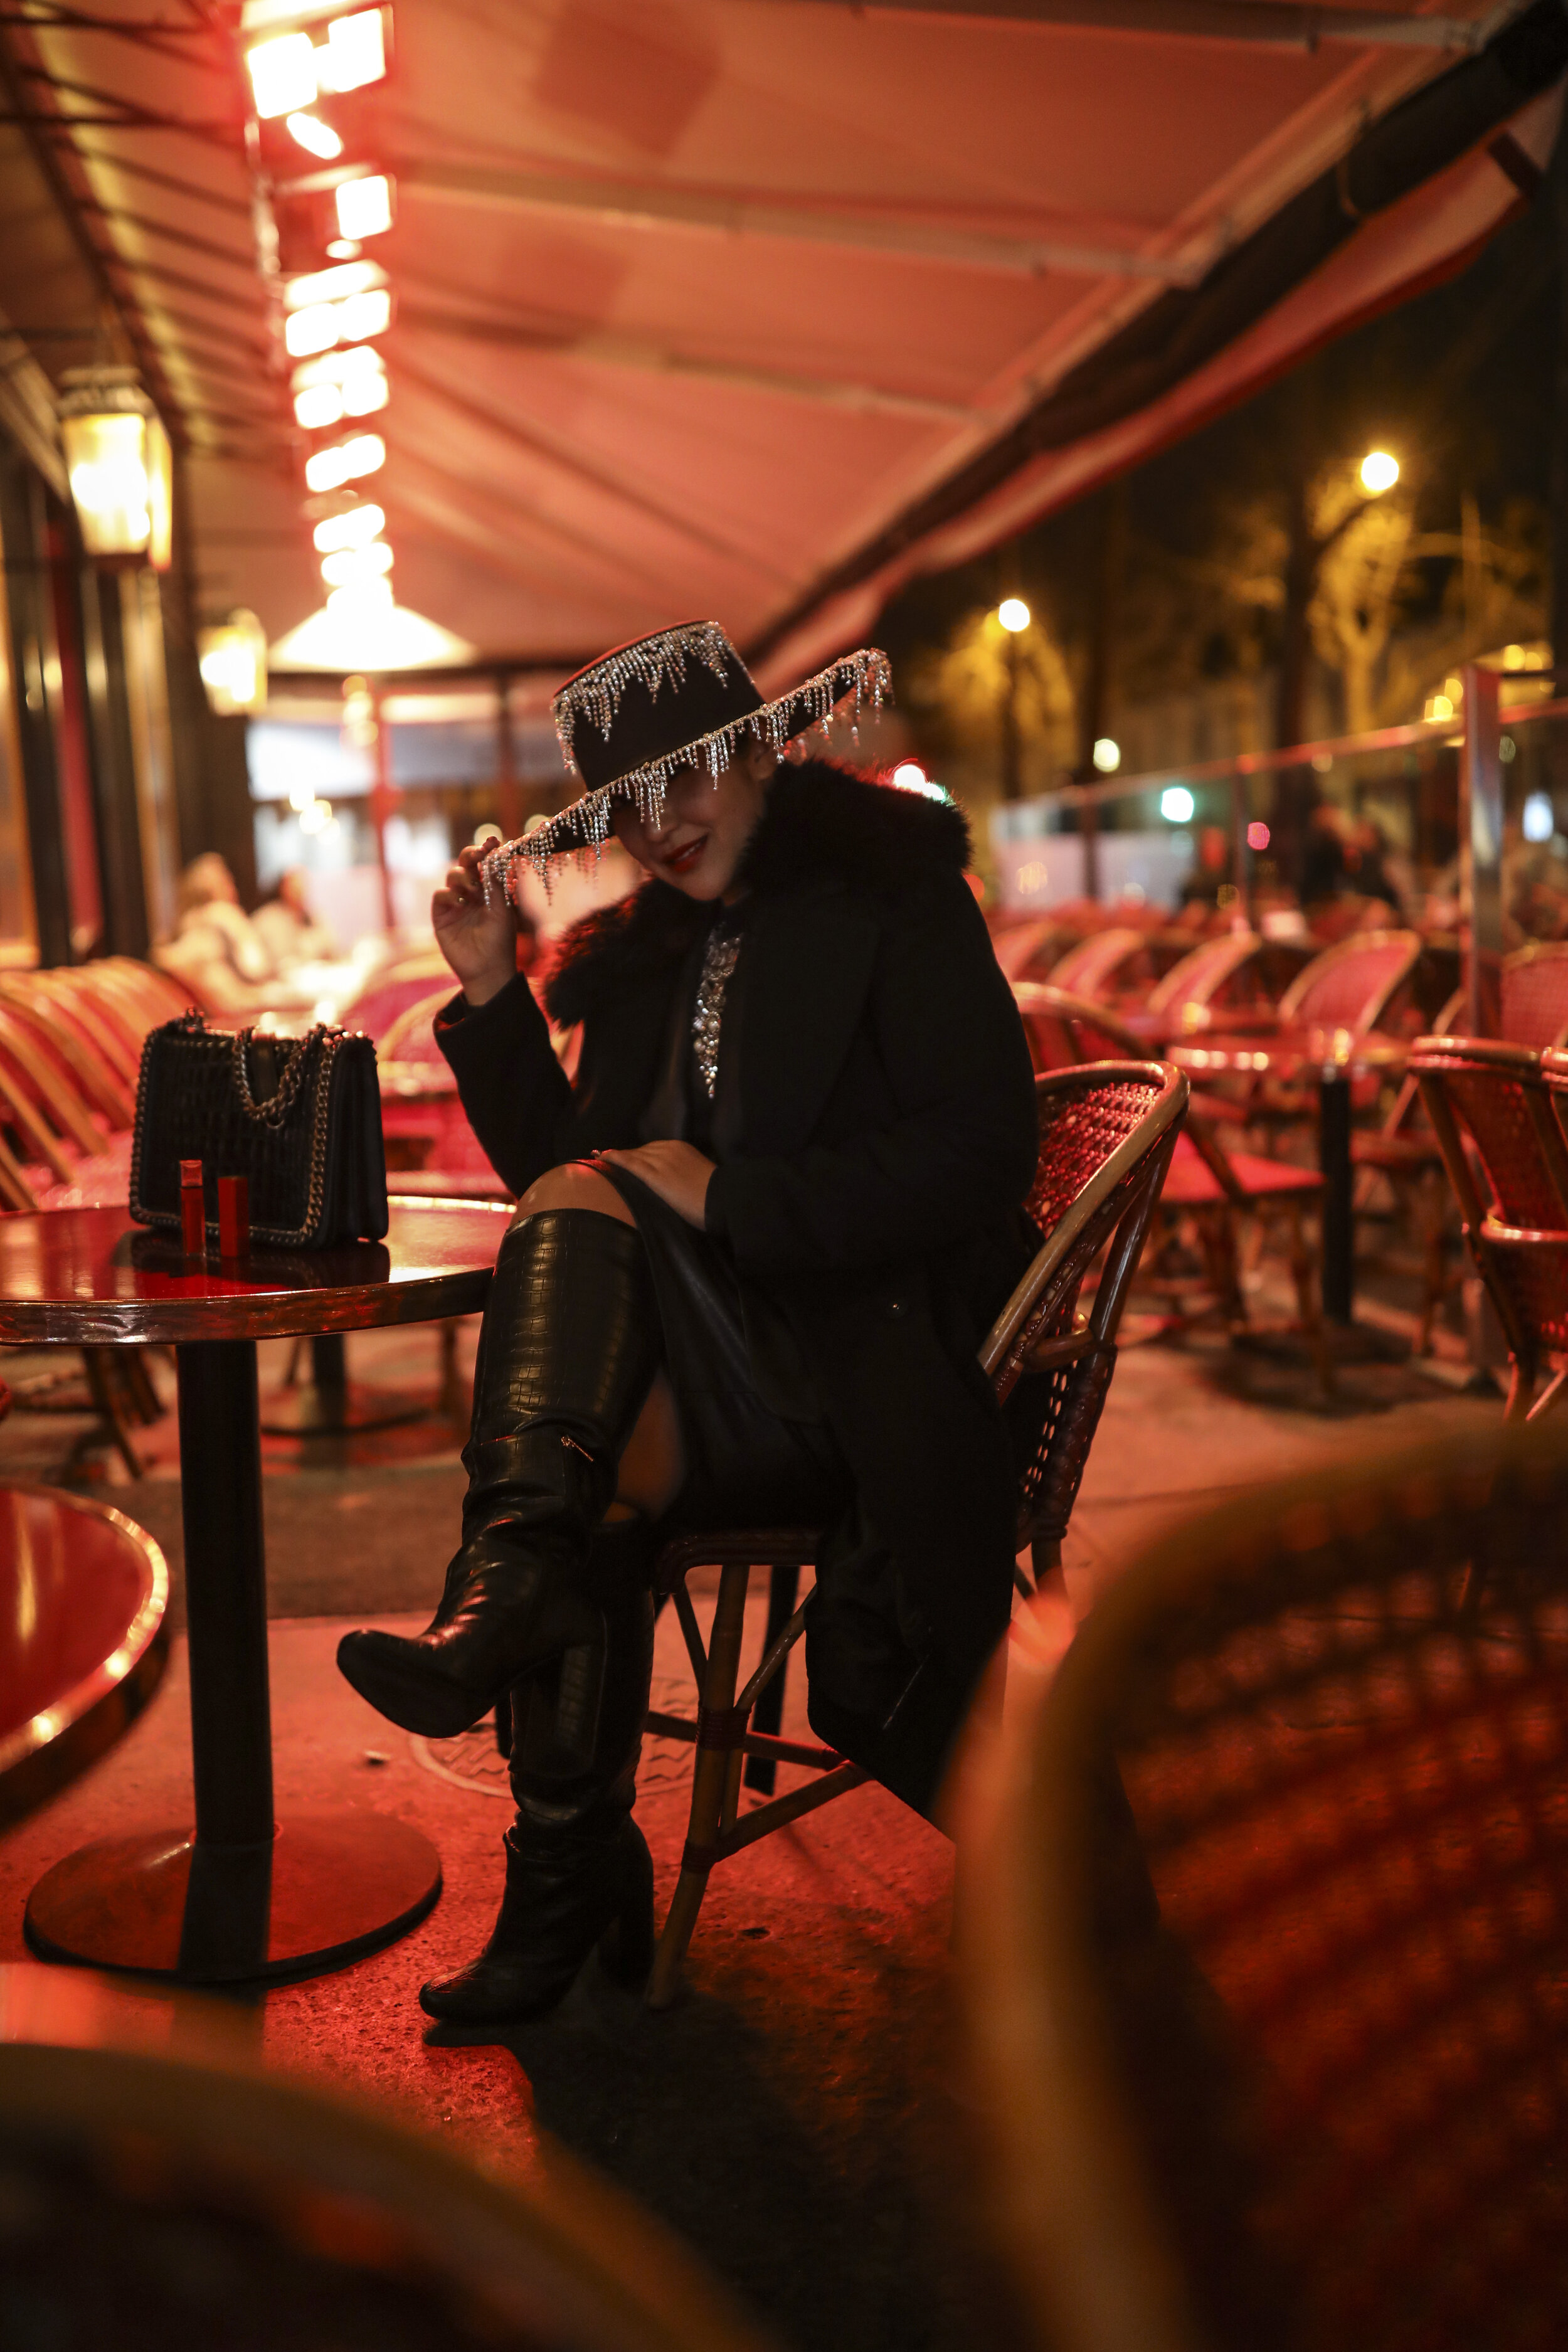
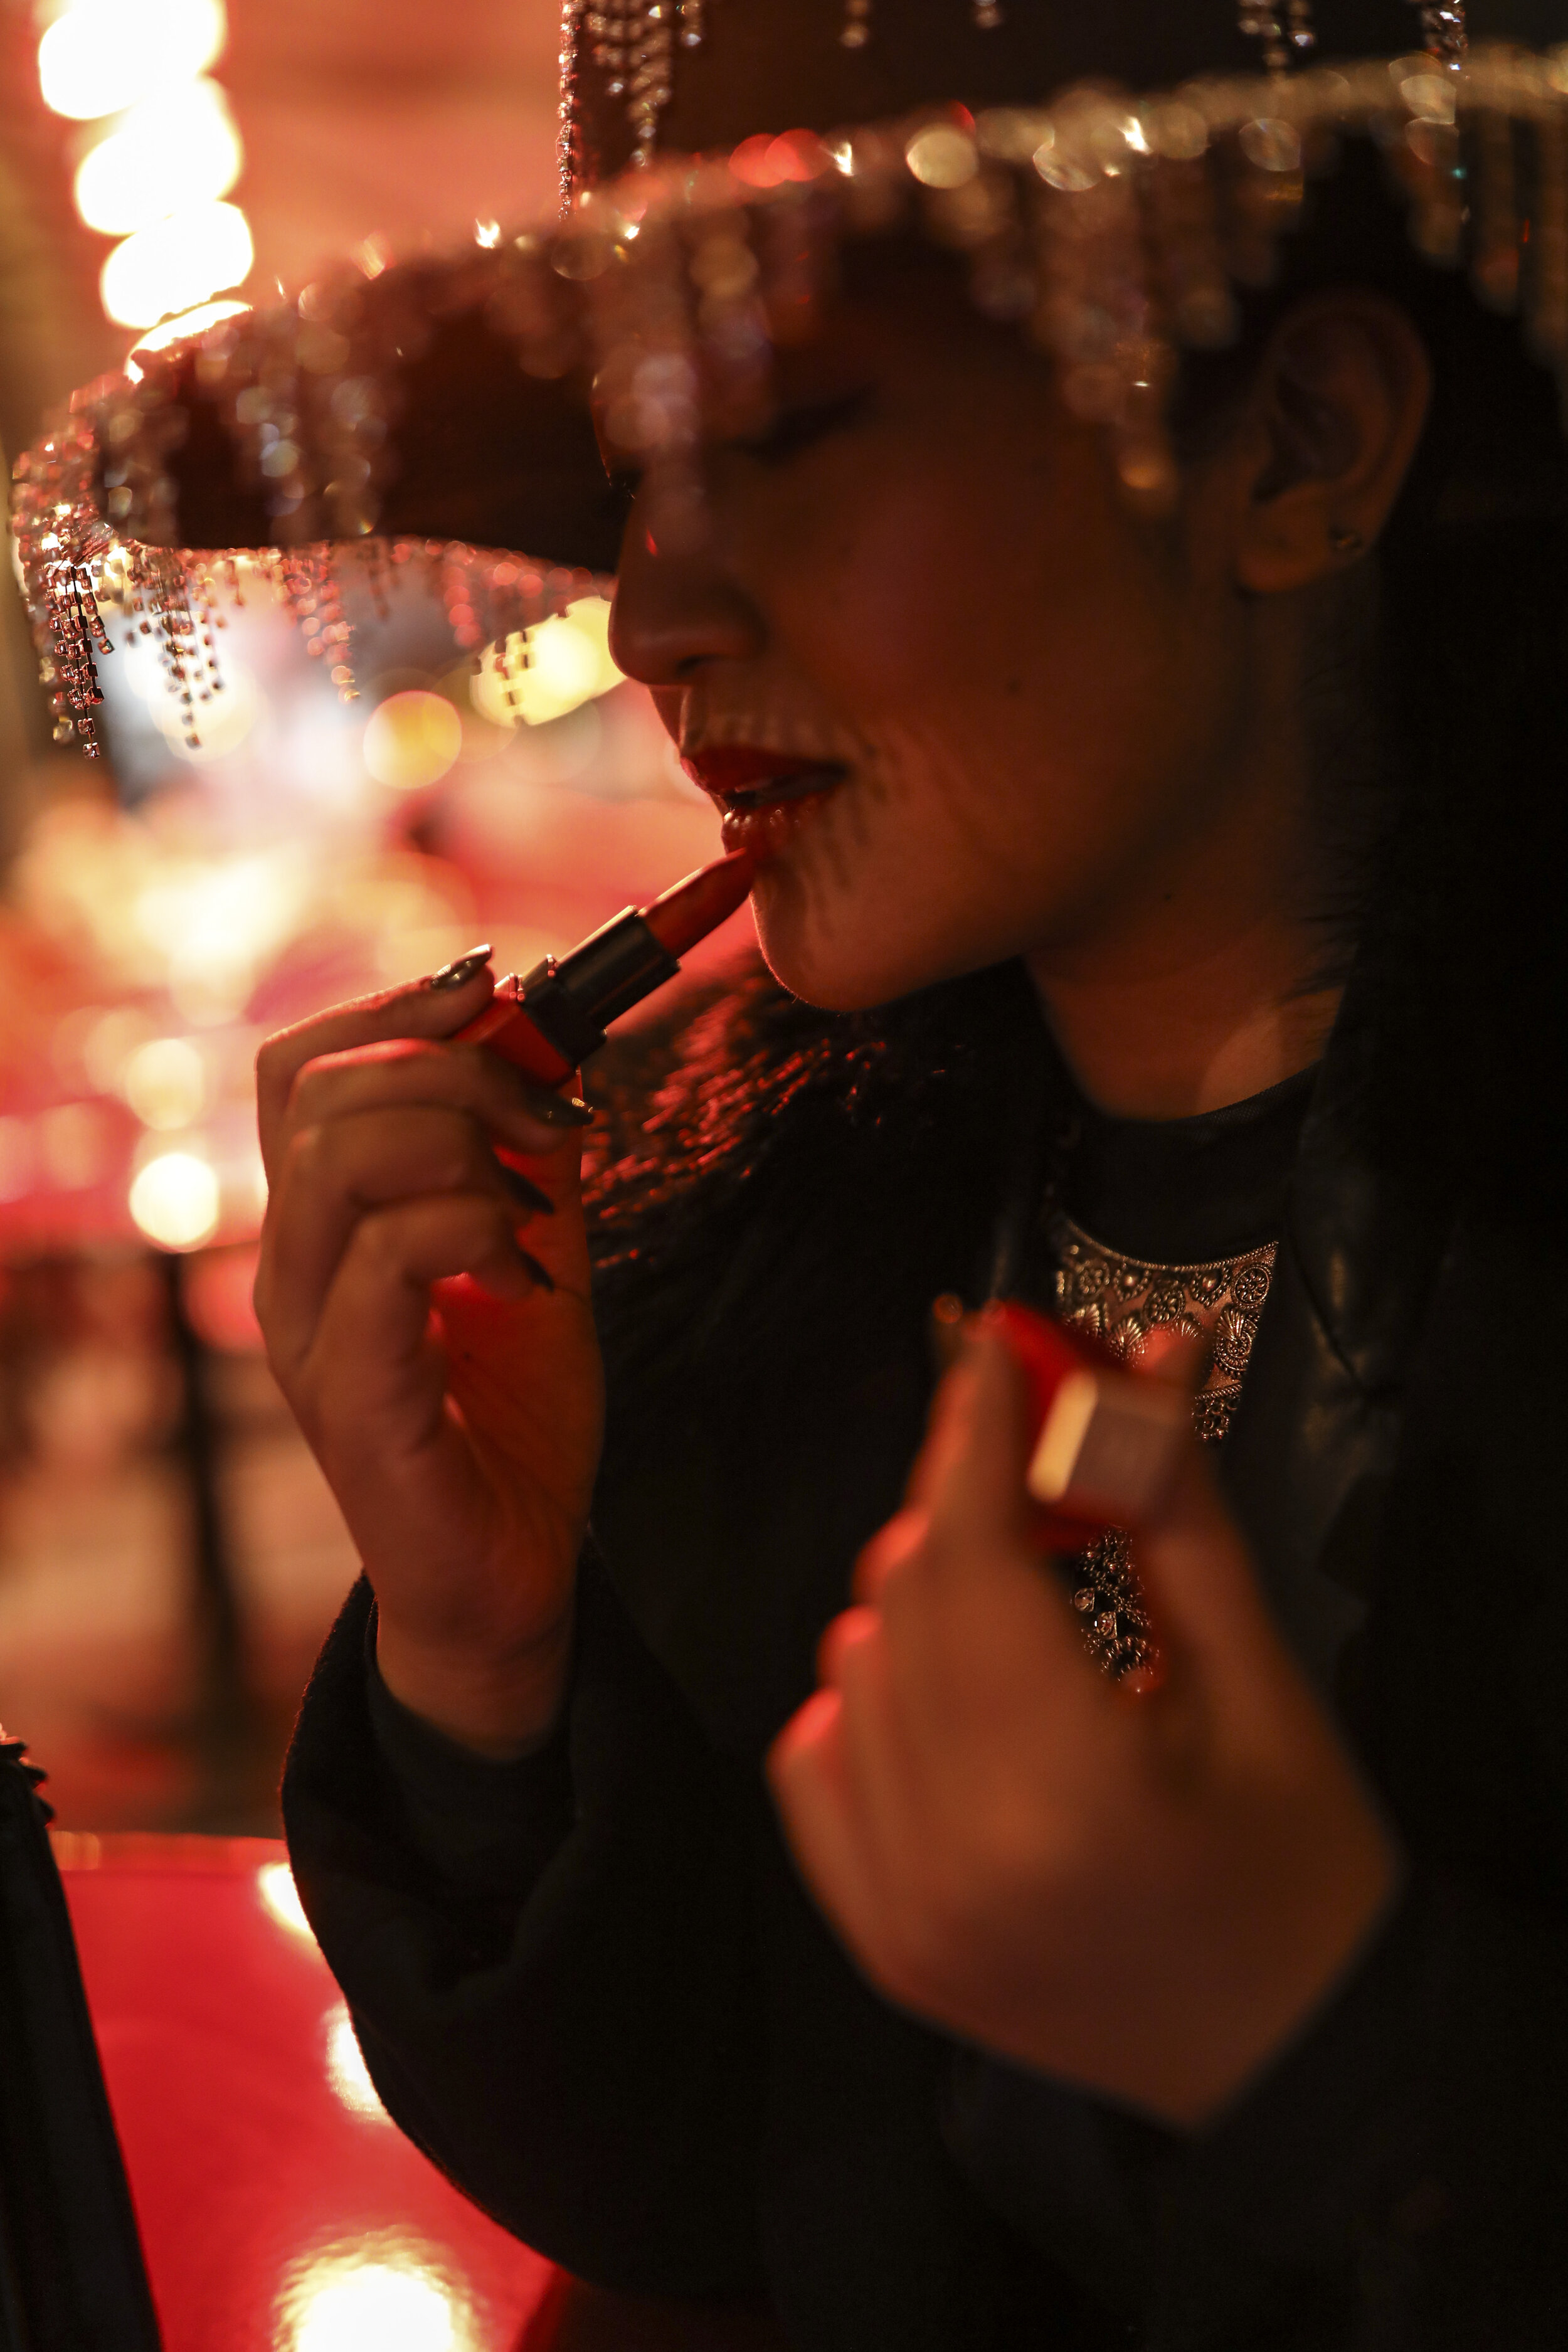
Café - This exact one shot at Le Tourville
You have to capture a shot at a café in Paris! All of them have a super cute charm to them and they just photograph beautiful- day or night! I personally preferred the cafes that were on the corner- giving you a great view to people watch after shooting. I recommend using the chairs and tables to your advantage to create depth. Also, play with the lighting to give your images a moody feel! Make sure to enjoy a coffee or a glass of wine after the shoot!
Map Location HERE


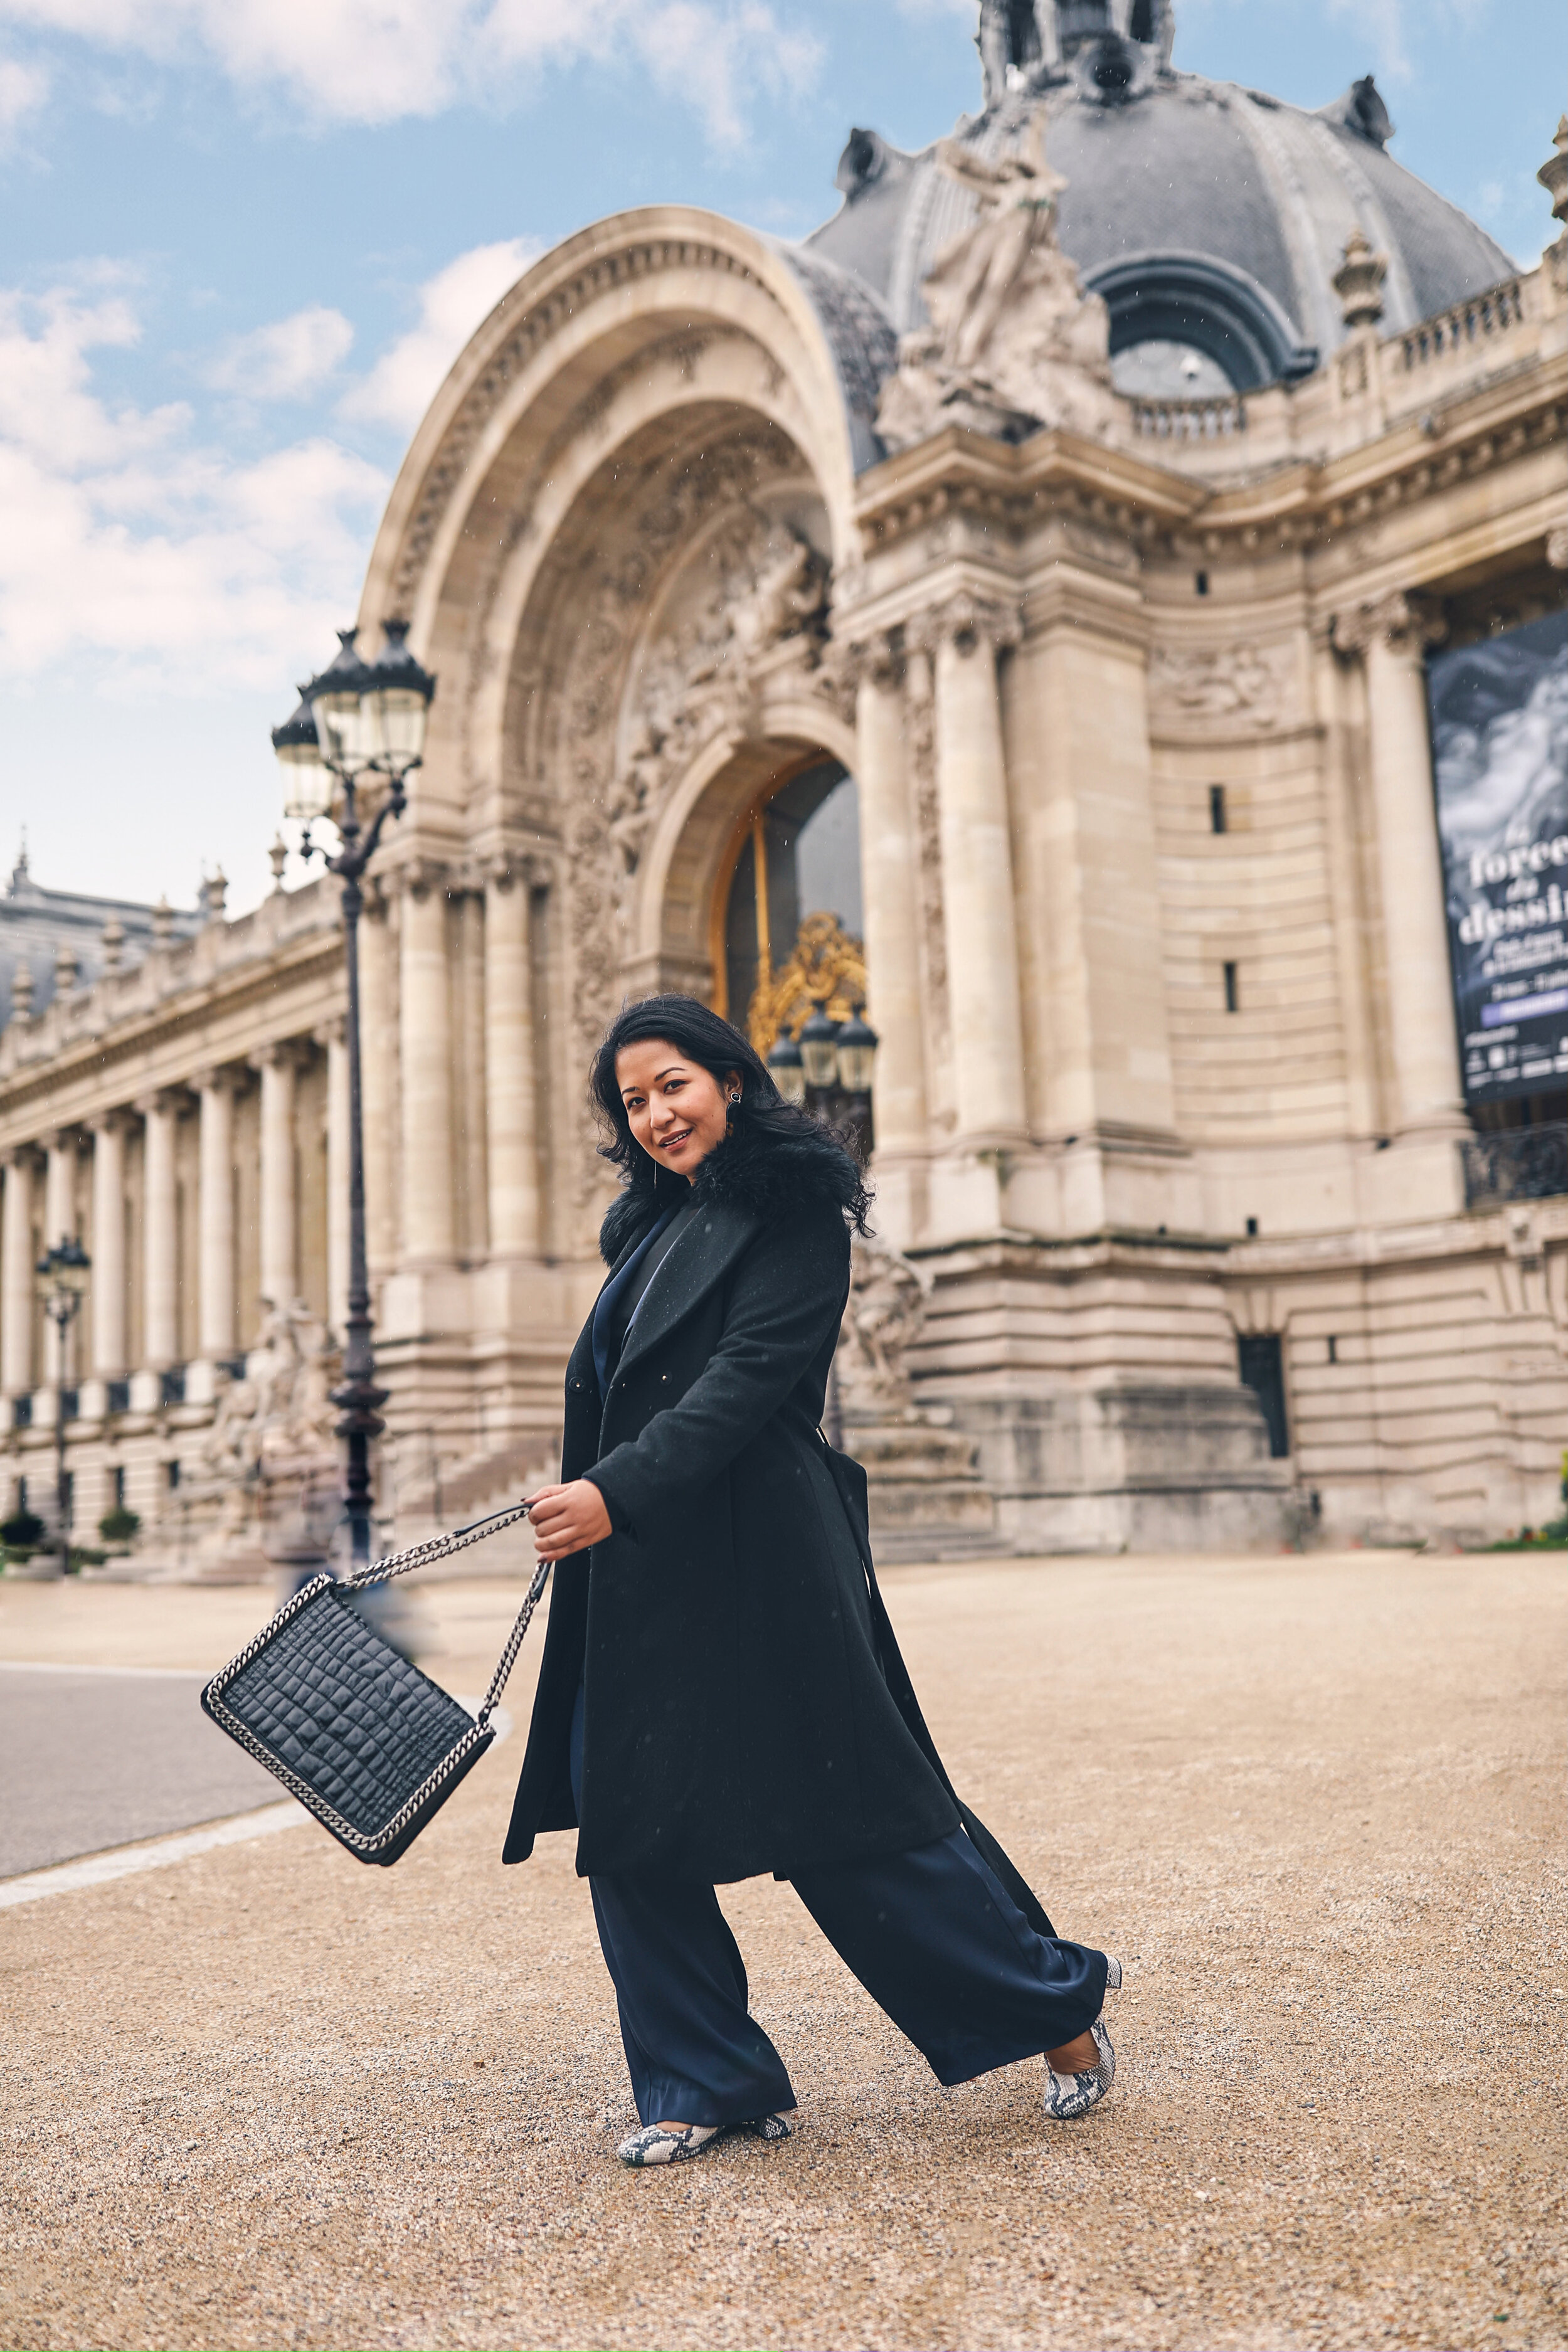
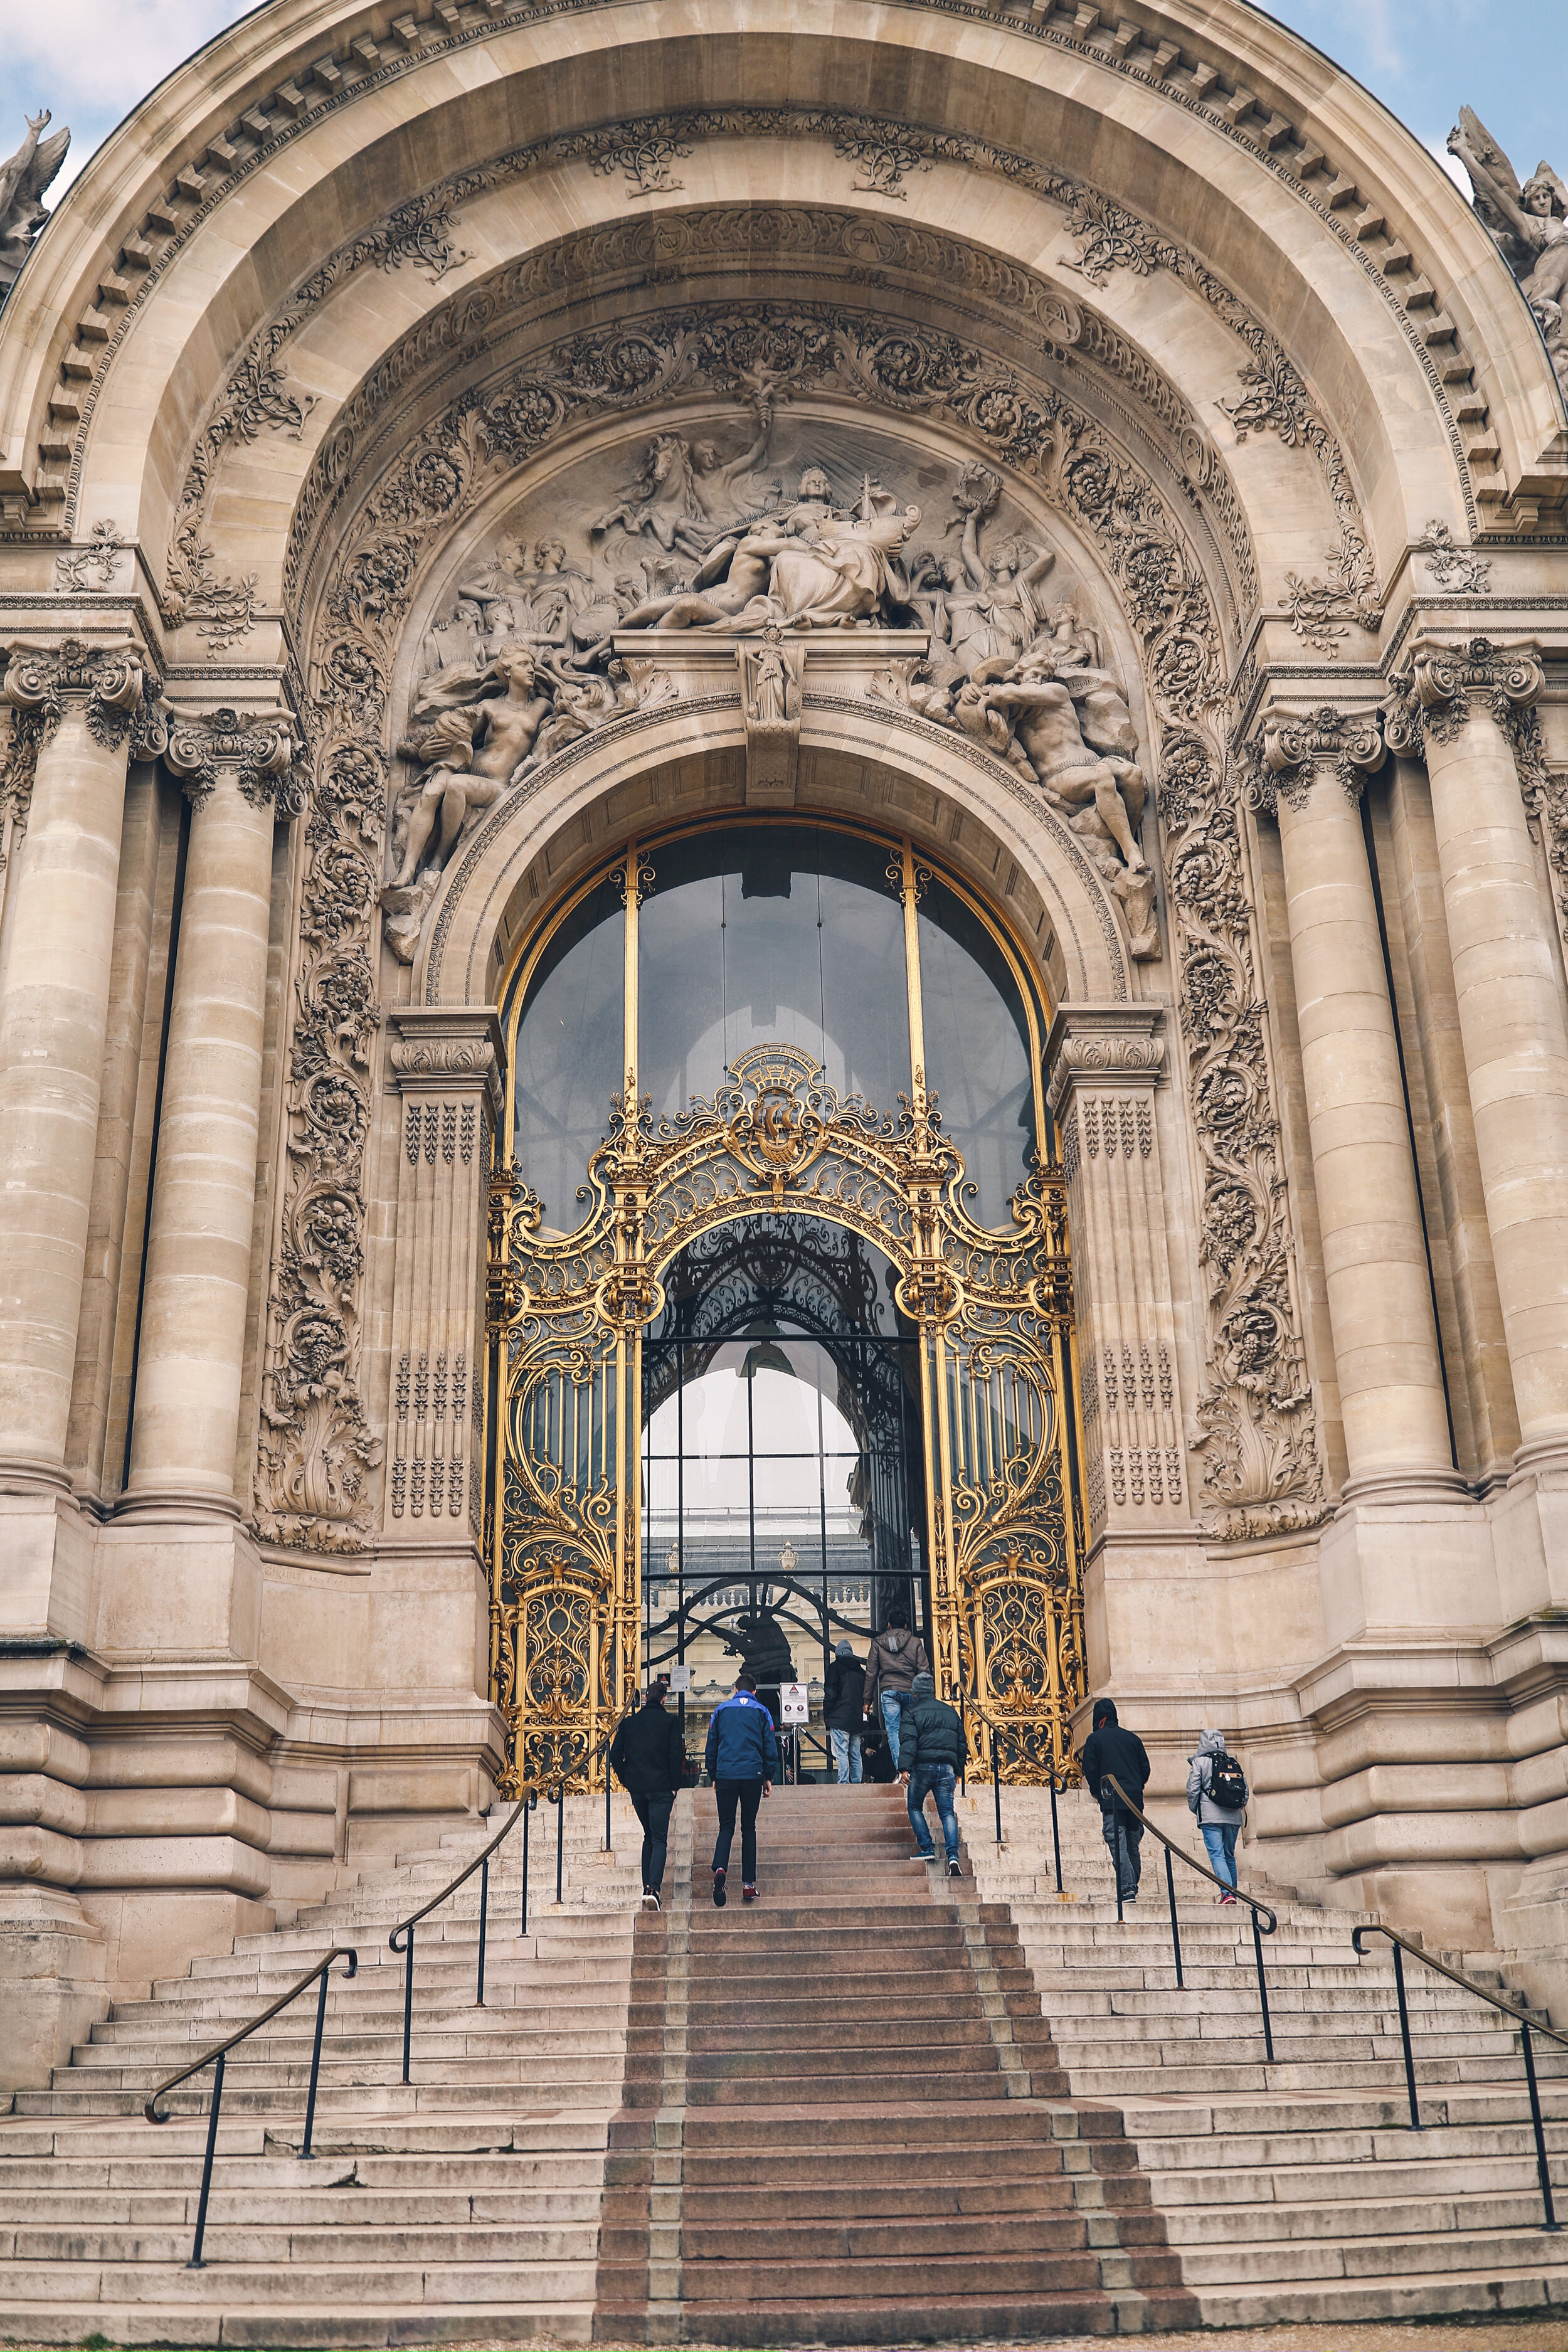
Petit Palais
The mini palace across the grand palace is absolutely stunning. The golden gates and huge dome architecture are definitely a sight you must see! It is challenging to capture the whole building but I recommend getting the main gate in the shot. You will have to stand pretty far away to fit in the whole building. Stand closer to the camera than to the building!
Map Location HERE
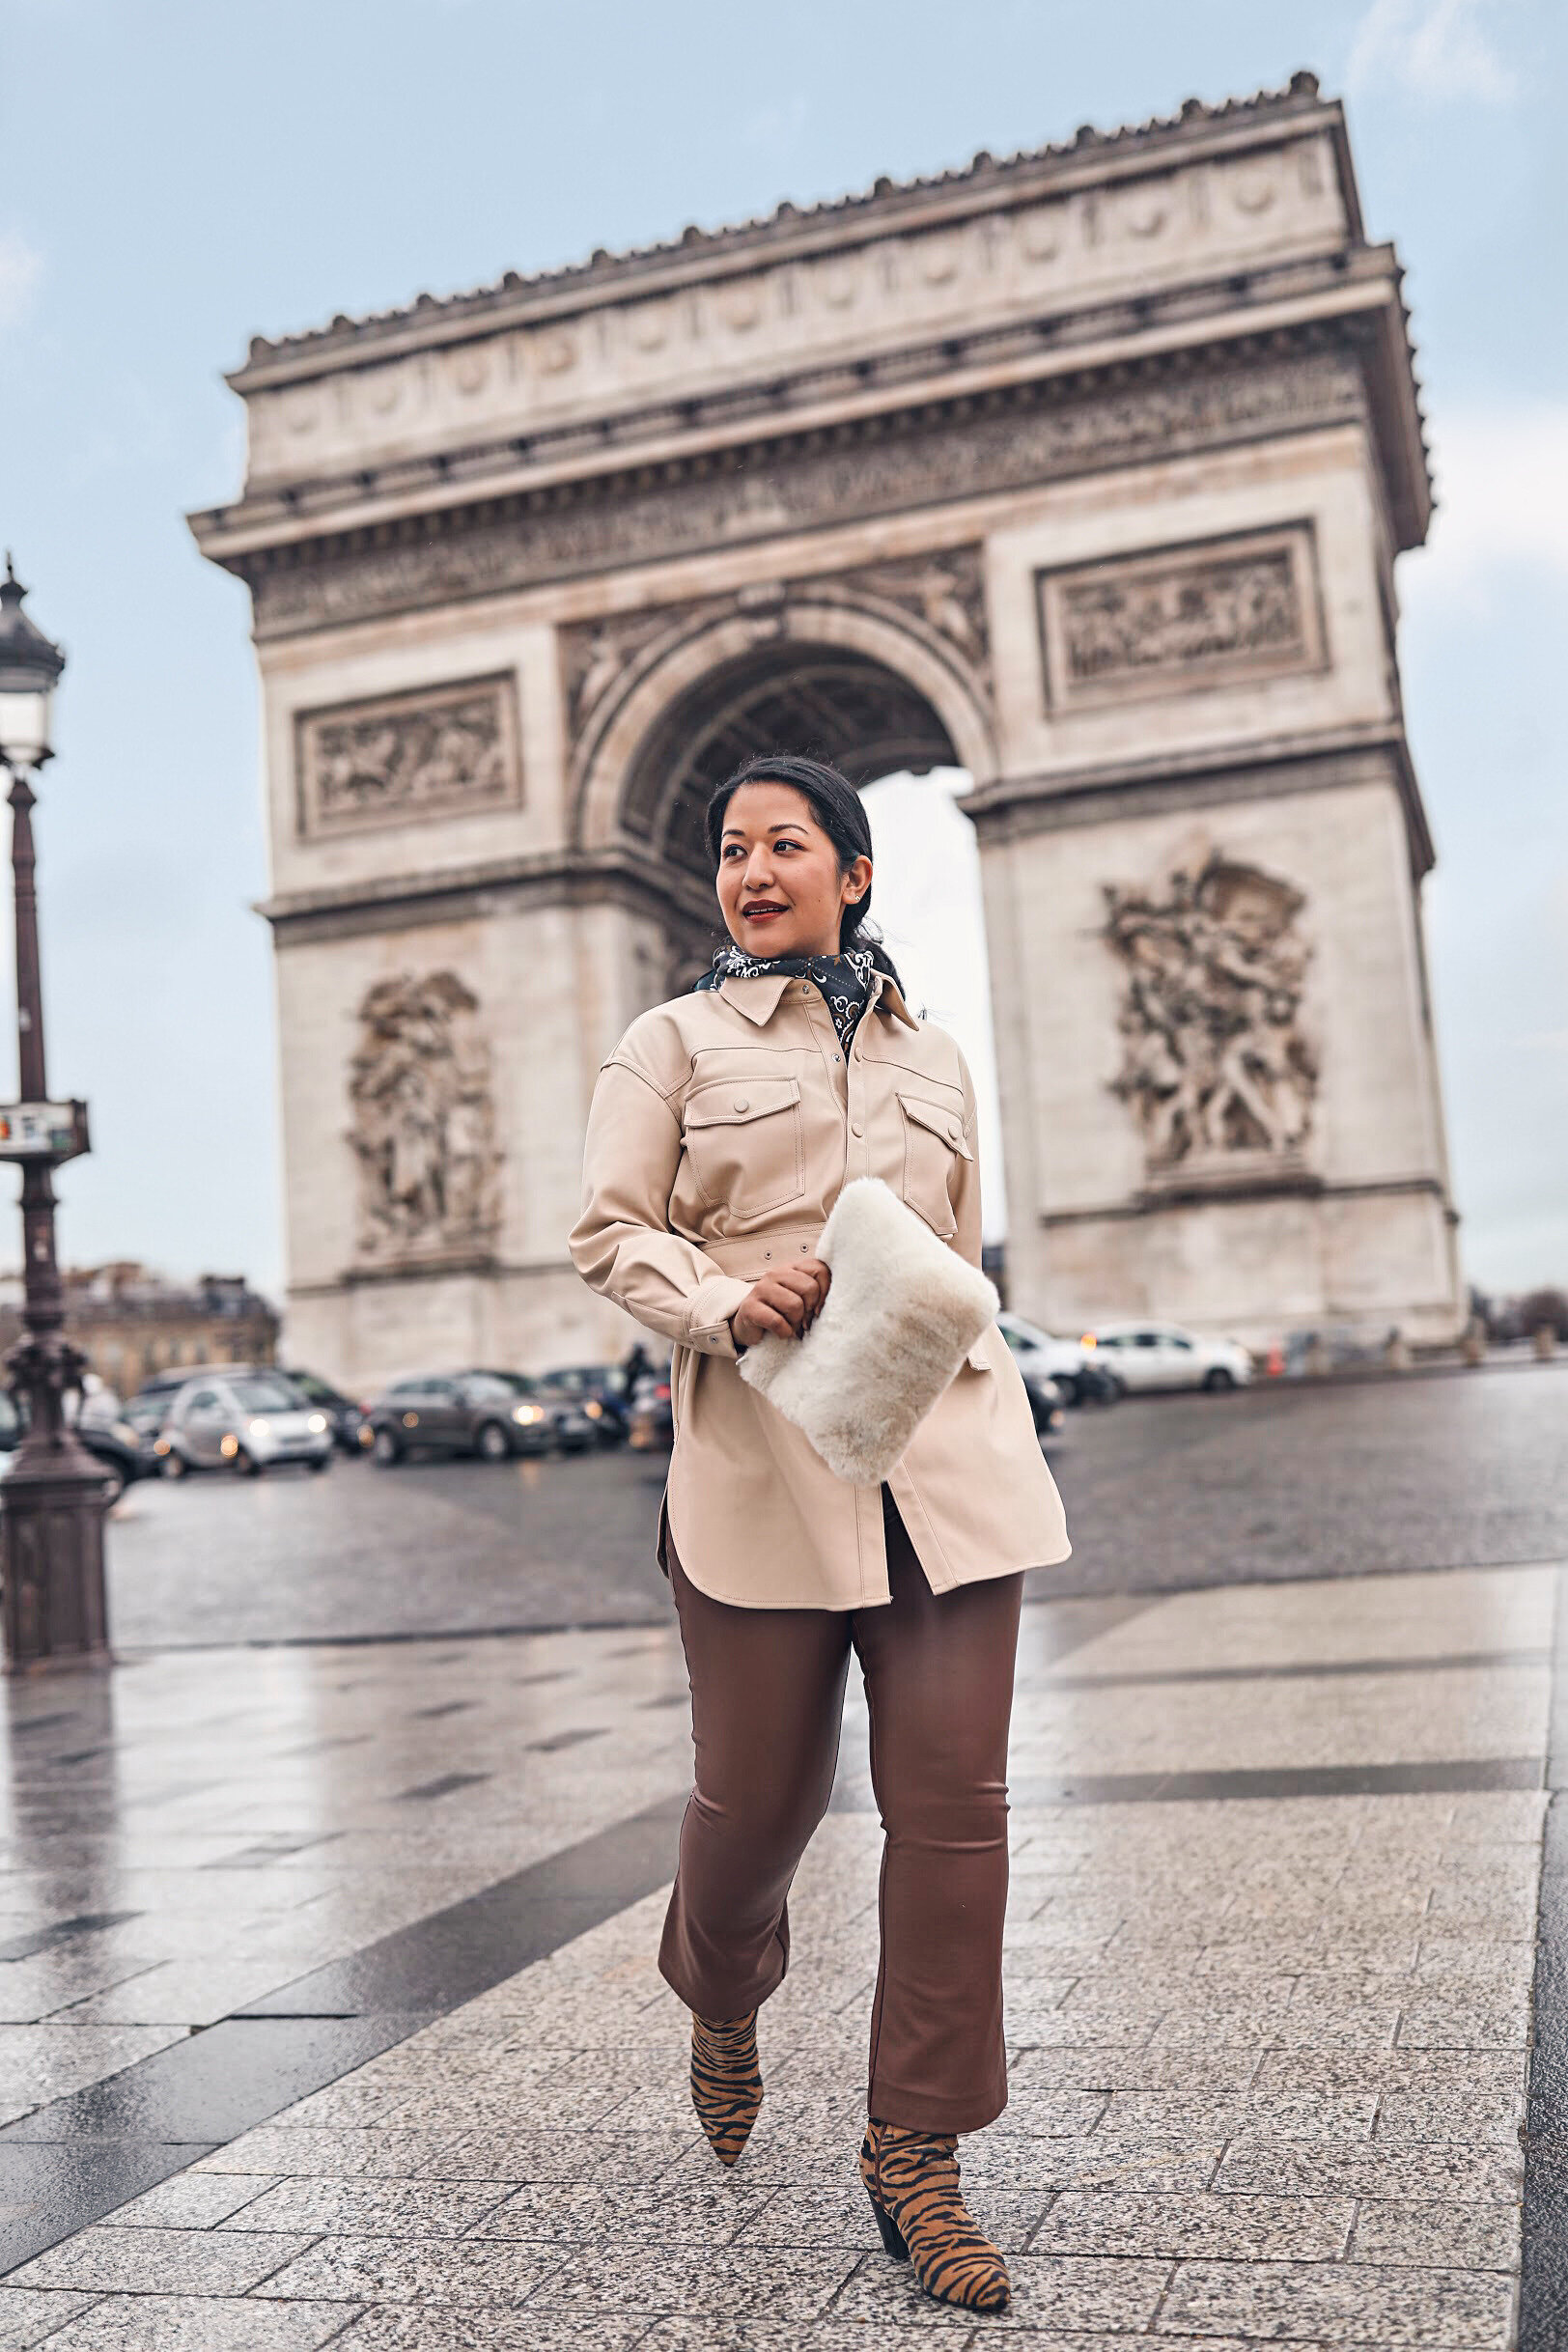
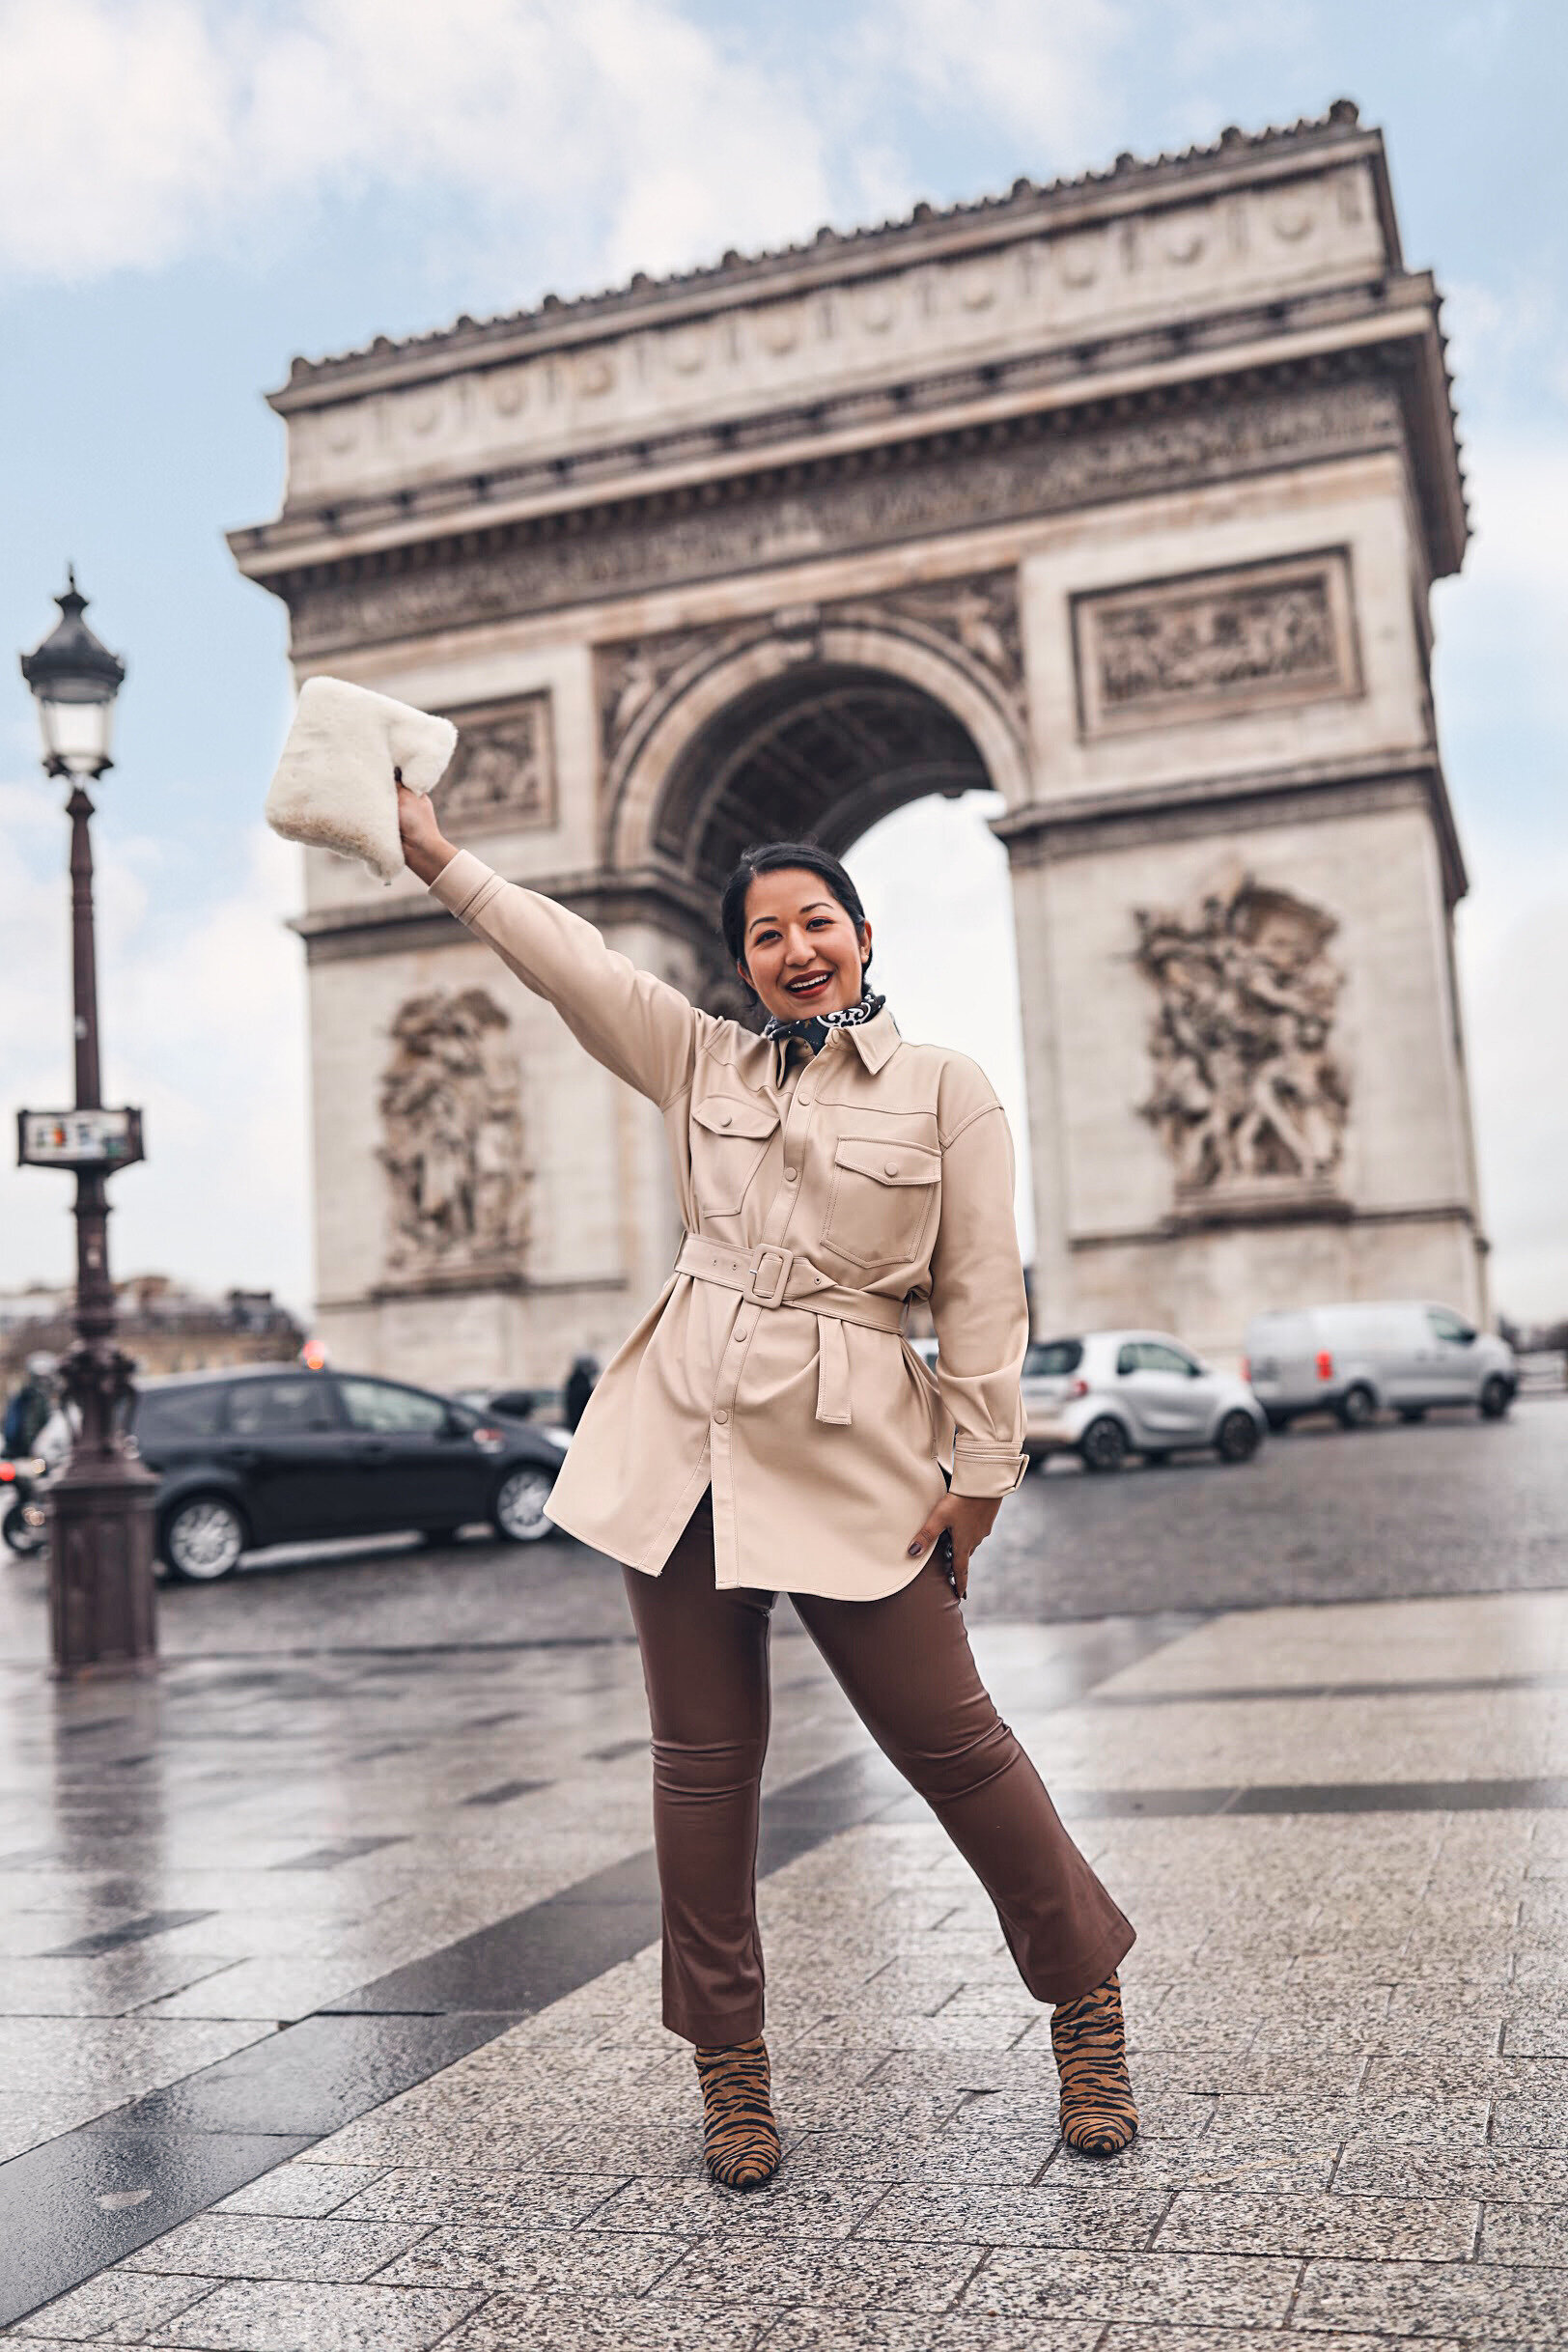
Arc de Triomphe
This is one of the most well-known locations in Paris. This is also the location which feels like a super city to me because of the constant traffic that surrounds it. You can capture this location from across the street to get the full grand effect. It is also easier to place yourself inside the arc from across the street. If you want to get up close, take the underground staircase. Super low angle shots here are great to get the beautiful decoration under the arc.
I was doing some shopping along Avenue des Champs-Élysées (which is a main street leading to the Arc) on a Sunday and the street was closed to cars. I don’t know if that is a weekly occurrence or if it was an out of blue thing. However, it is worth checking this street out on a Sunday to see if it is shut down. If so, you will be able to get the most epic shot.
Map Location HERE


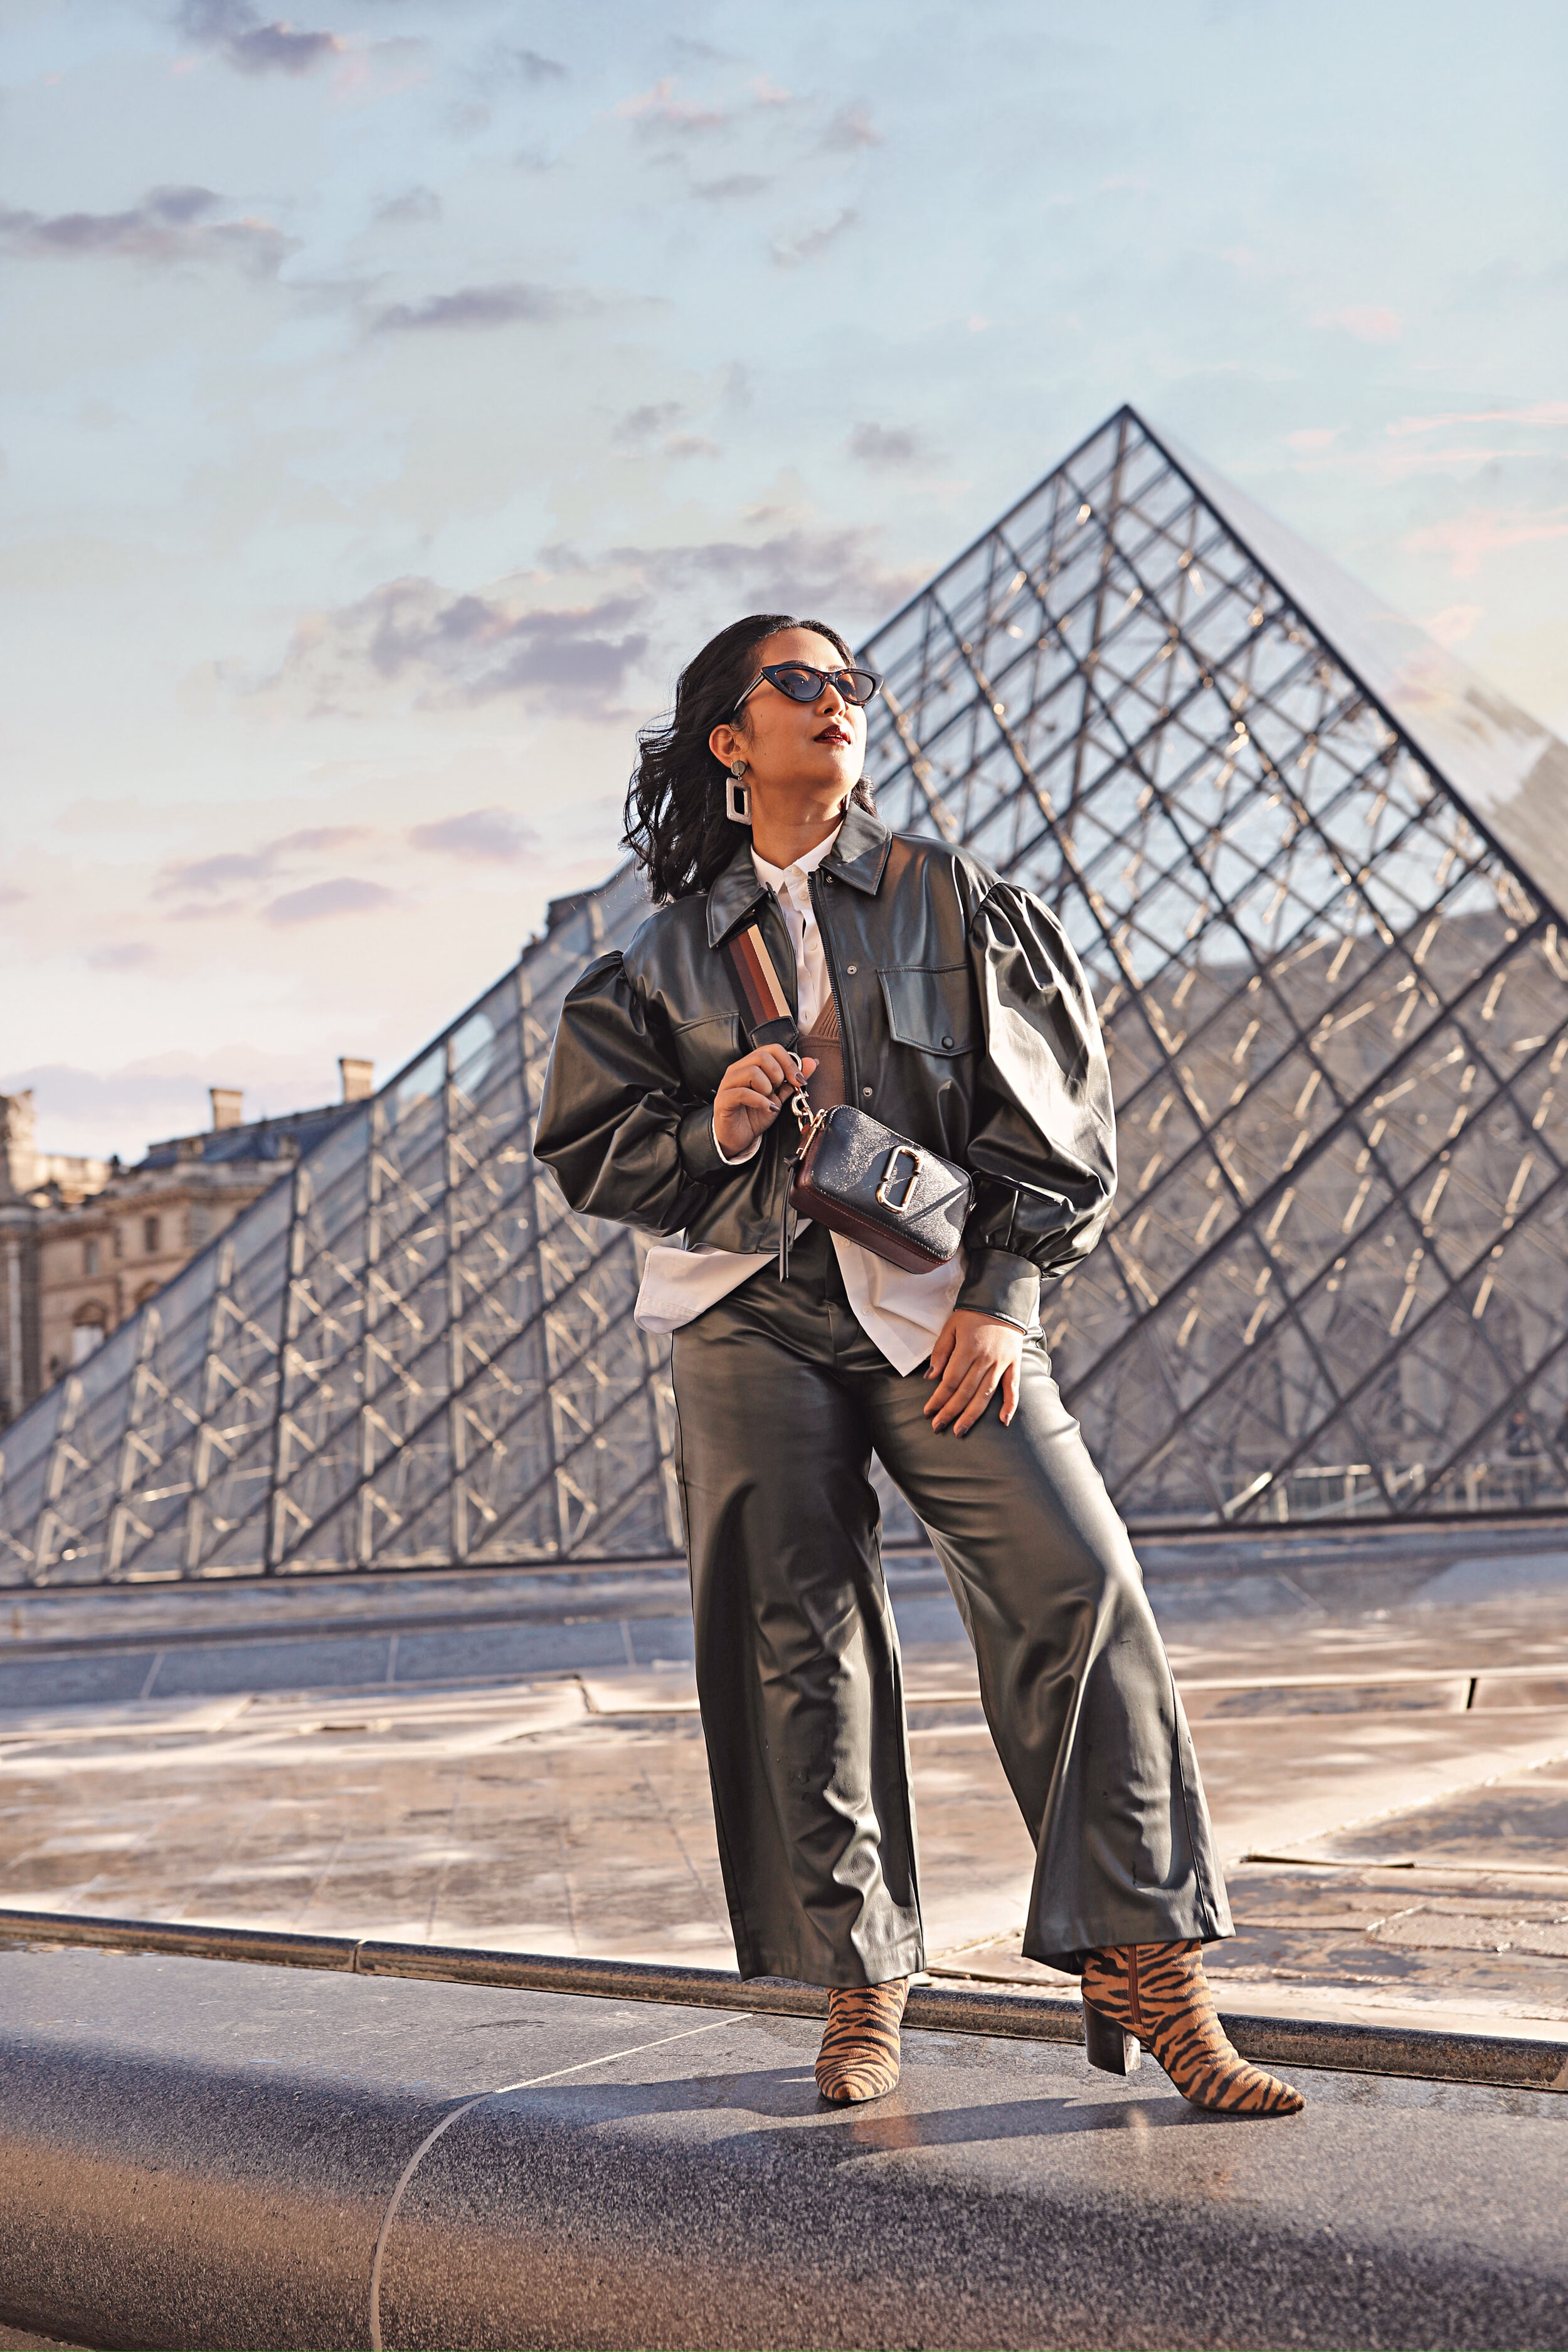
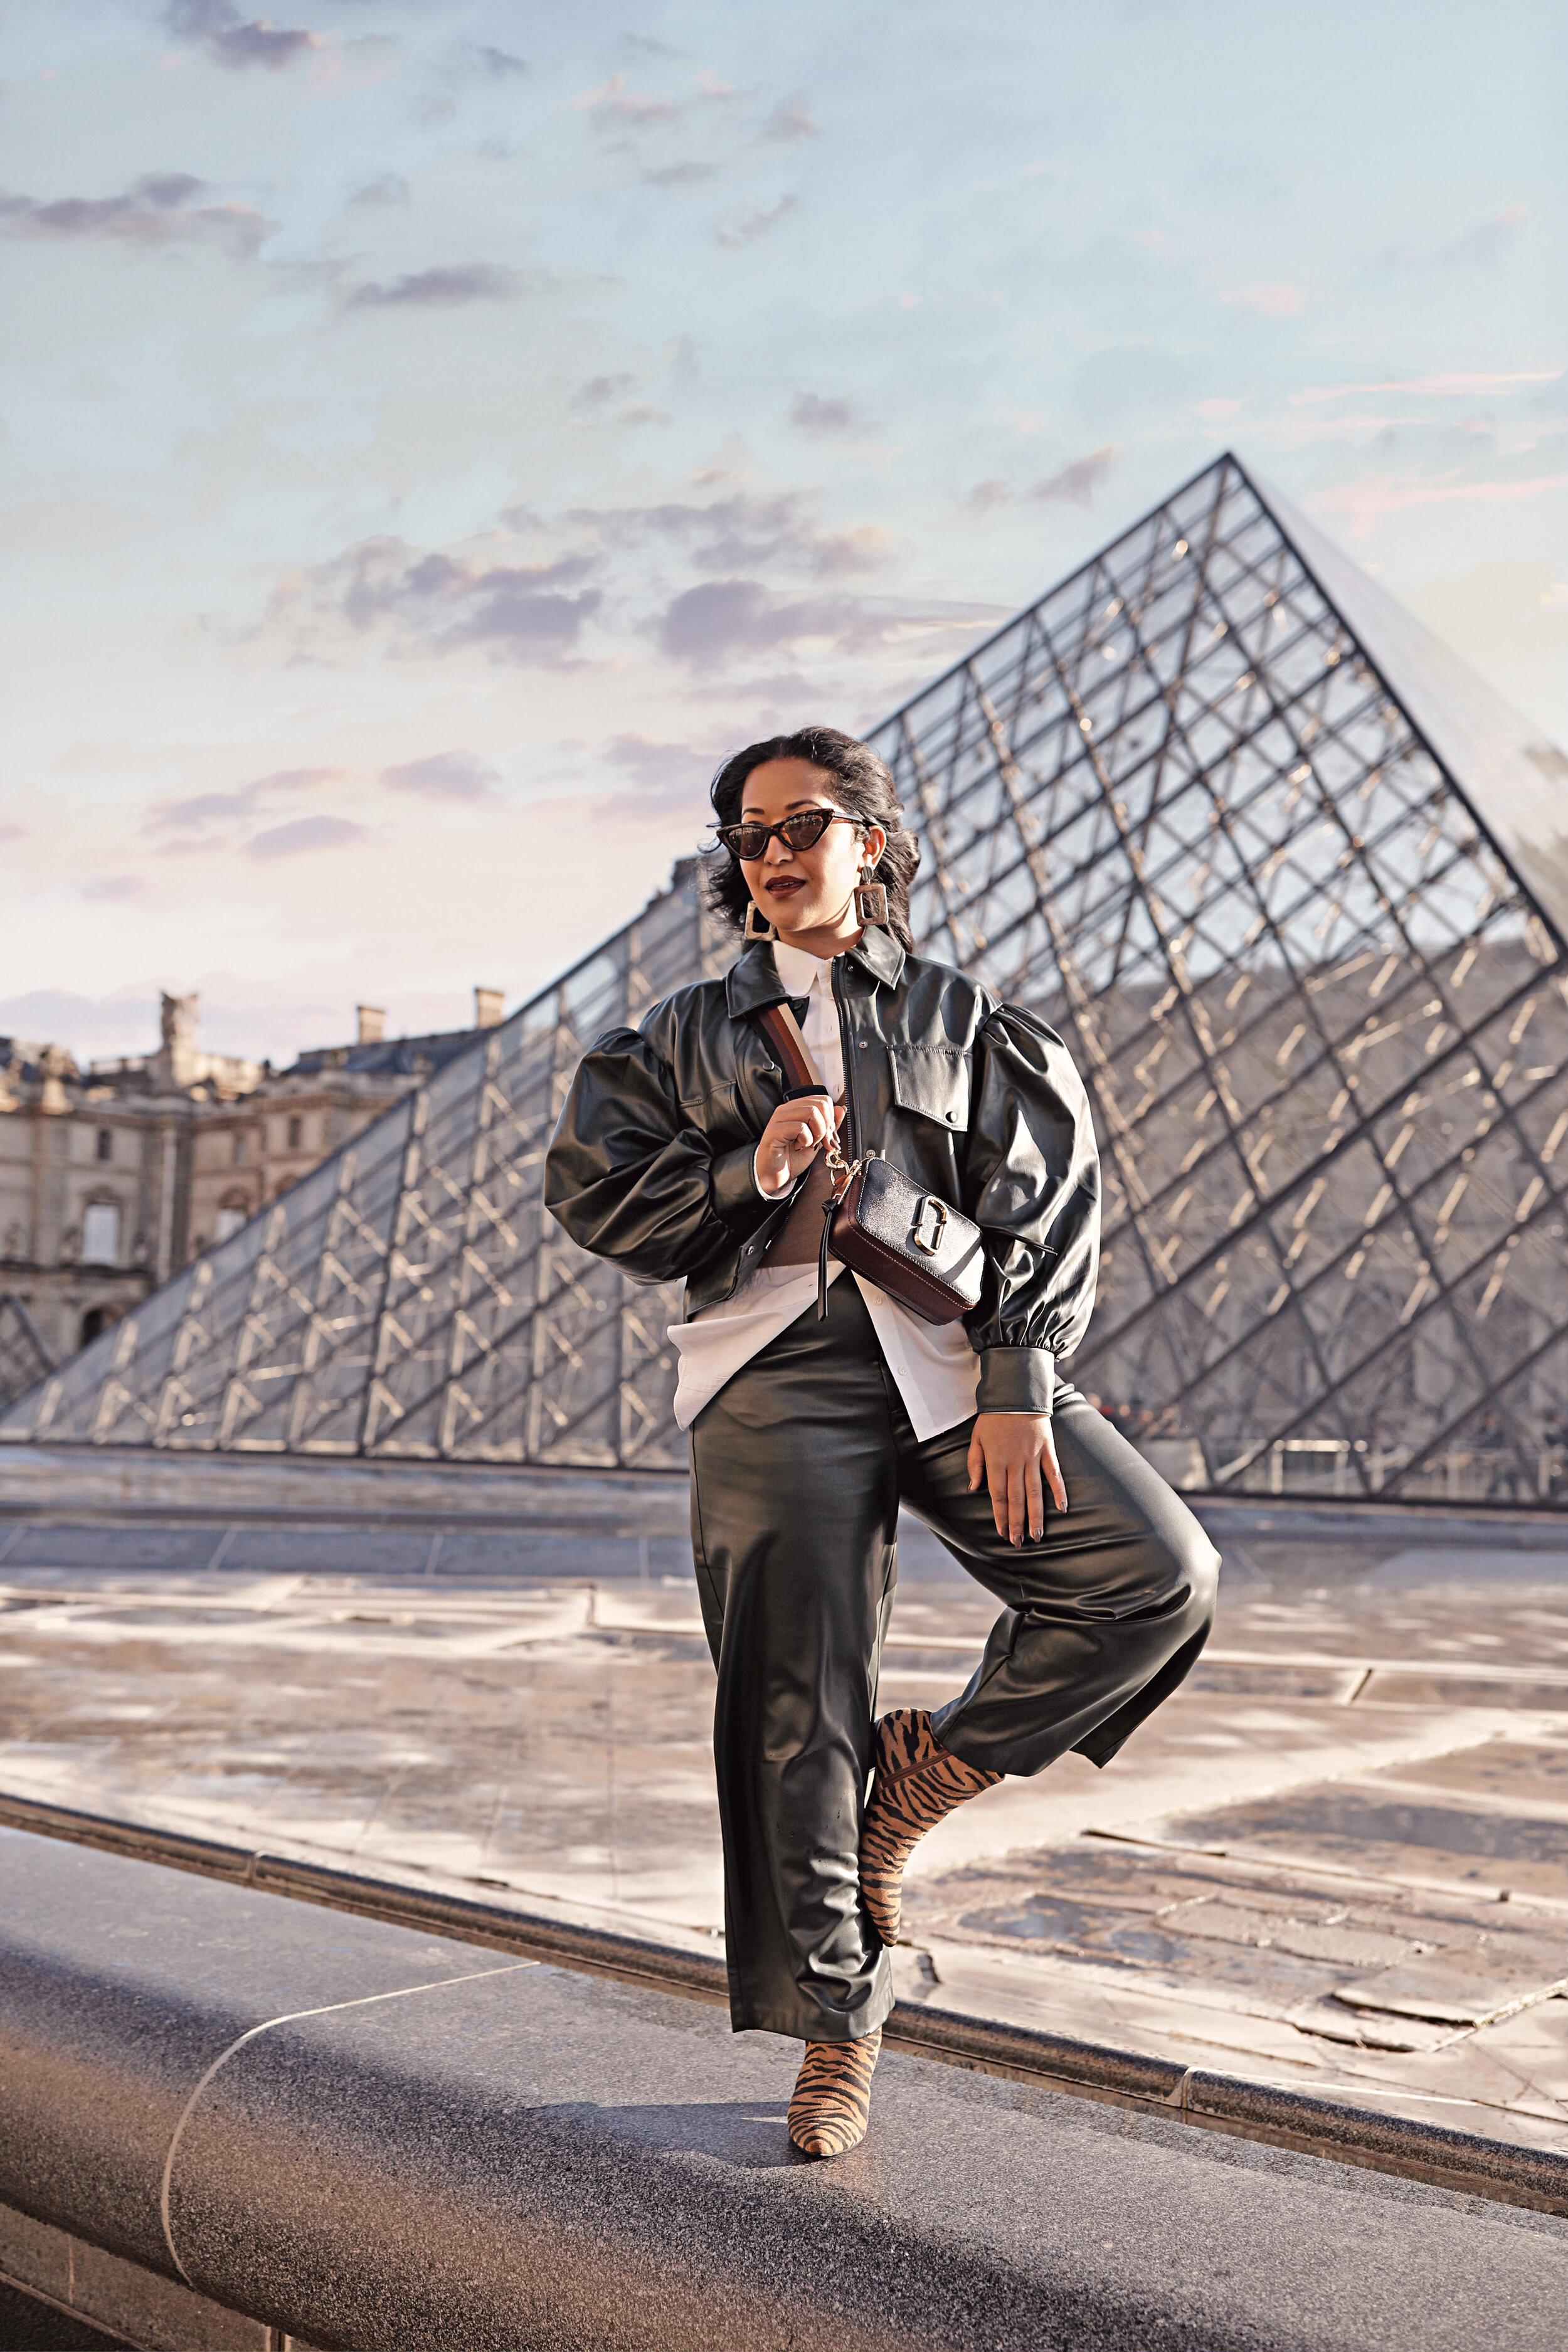
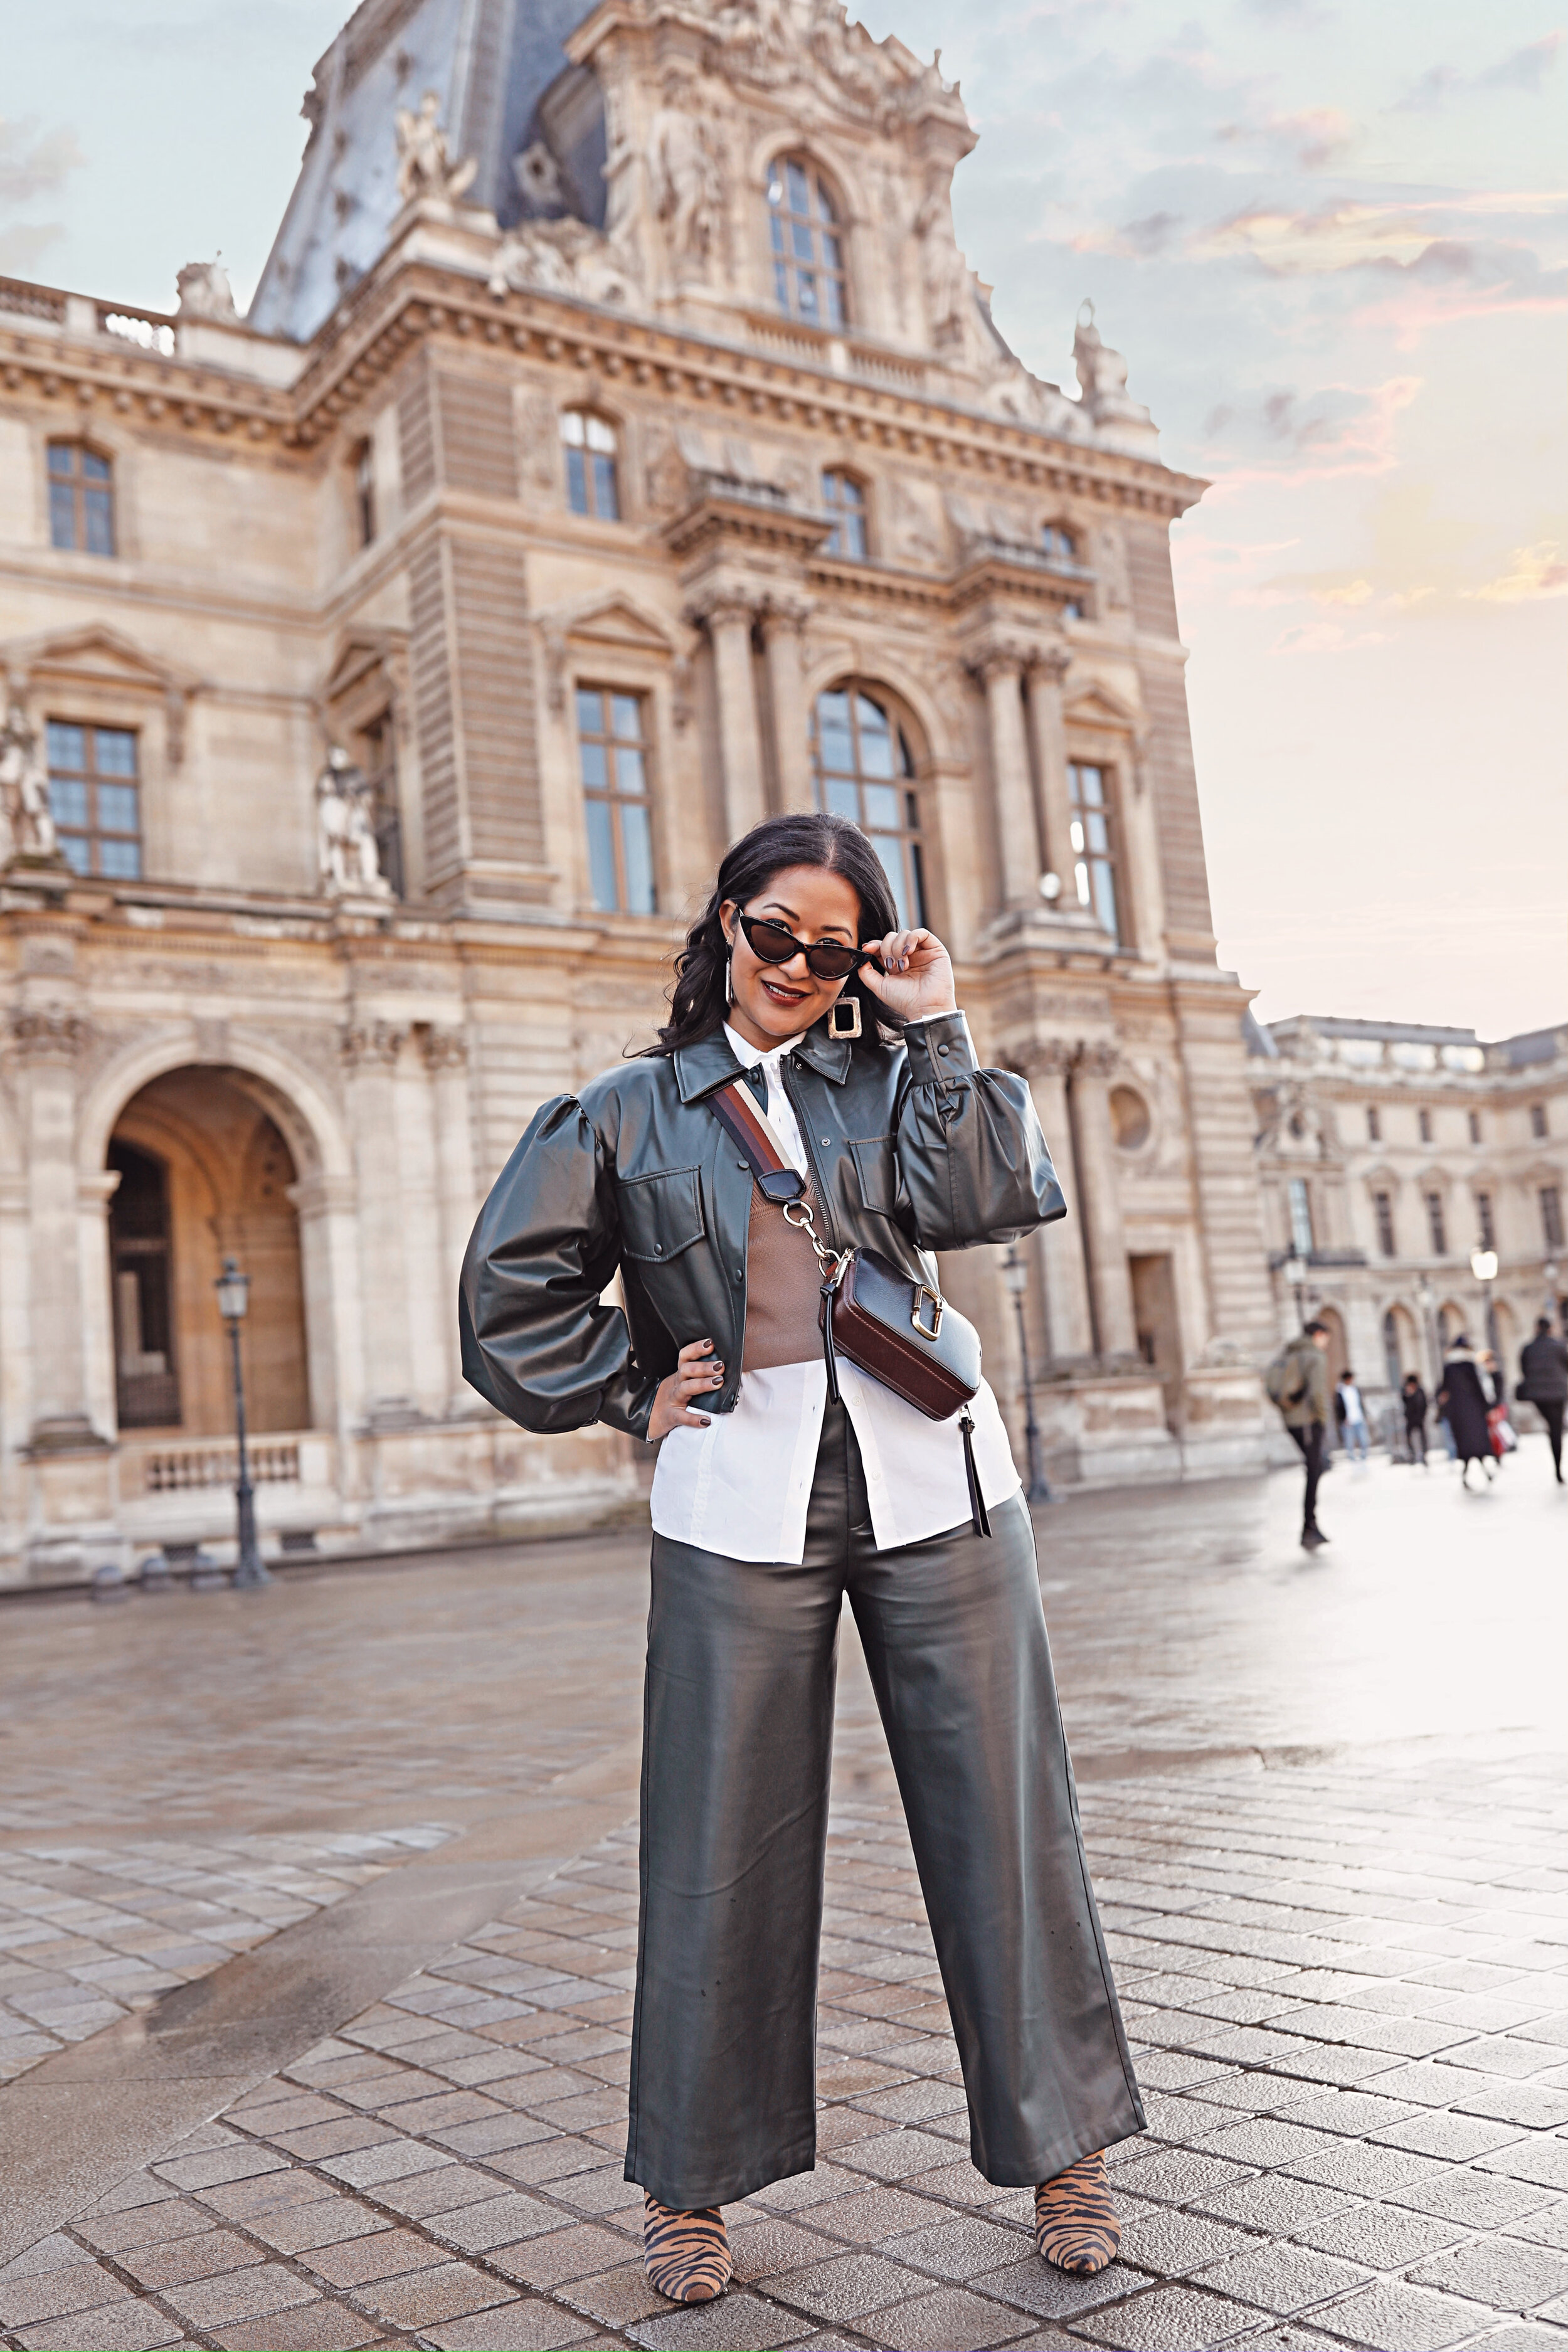
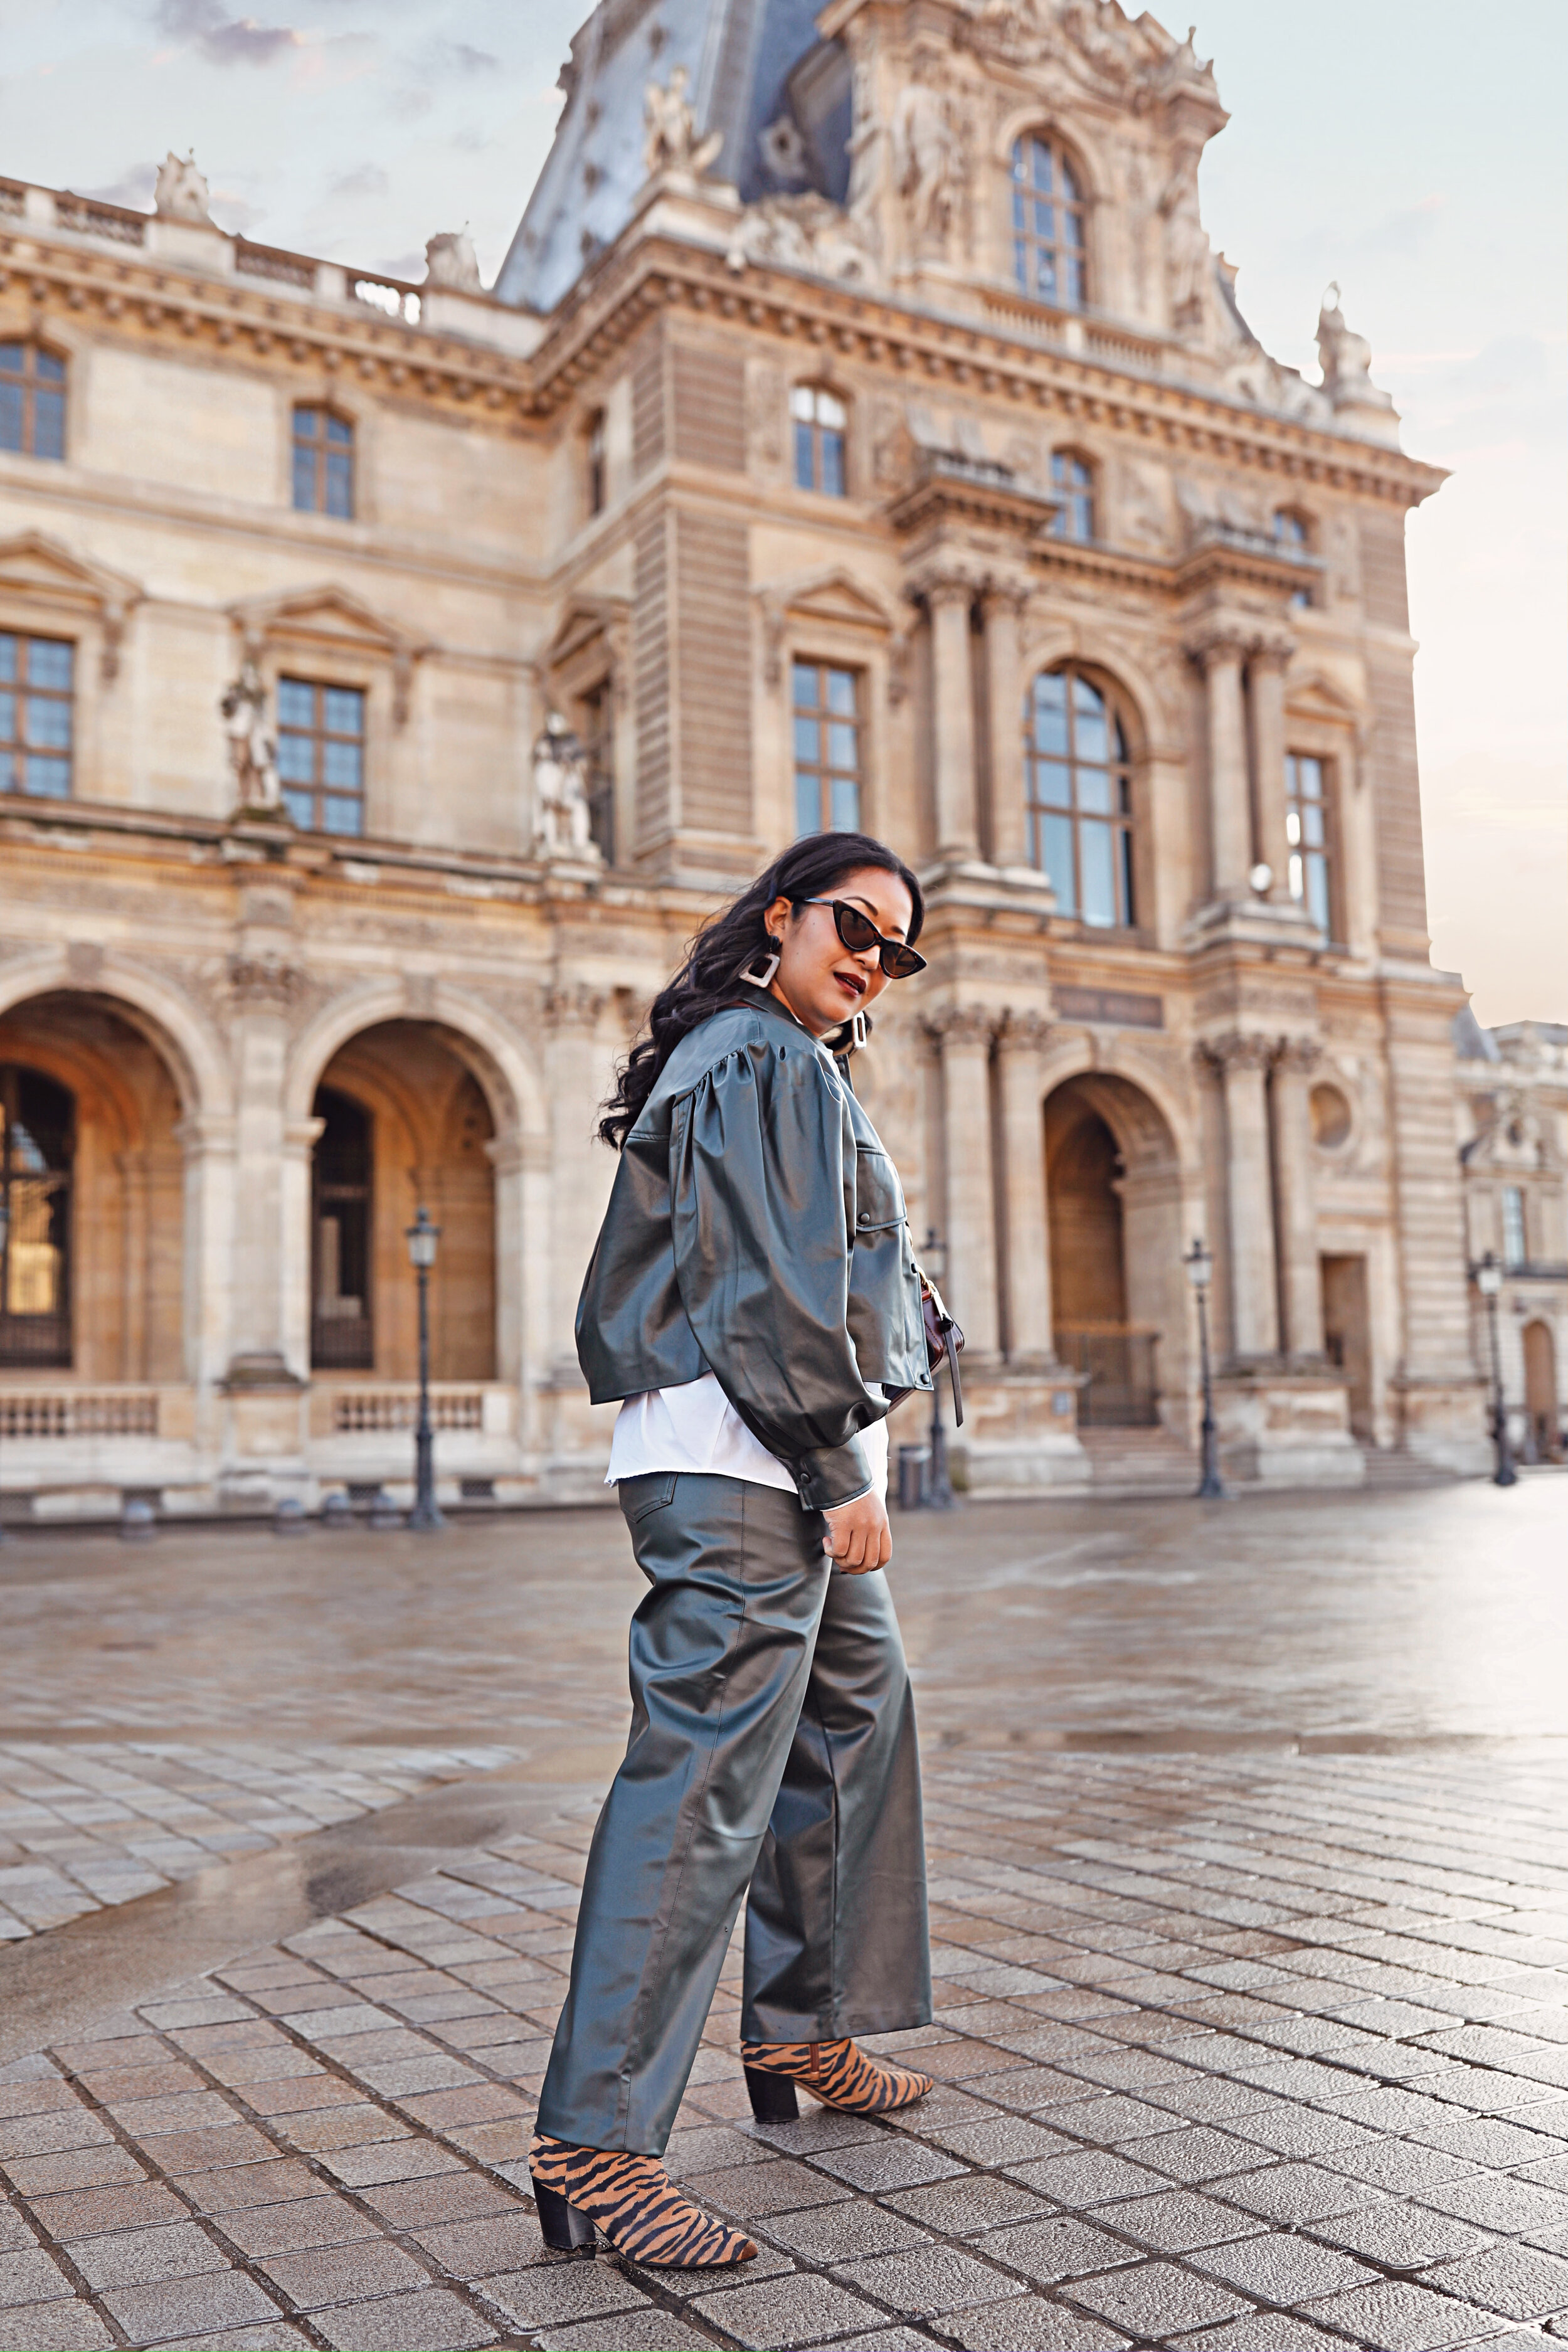
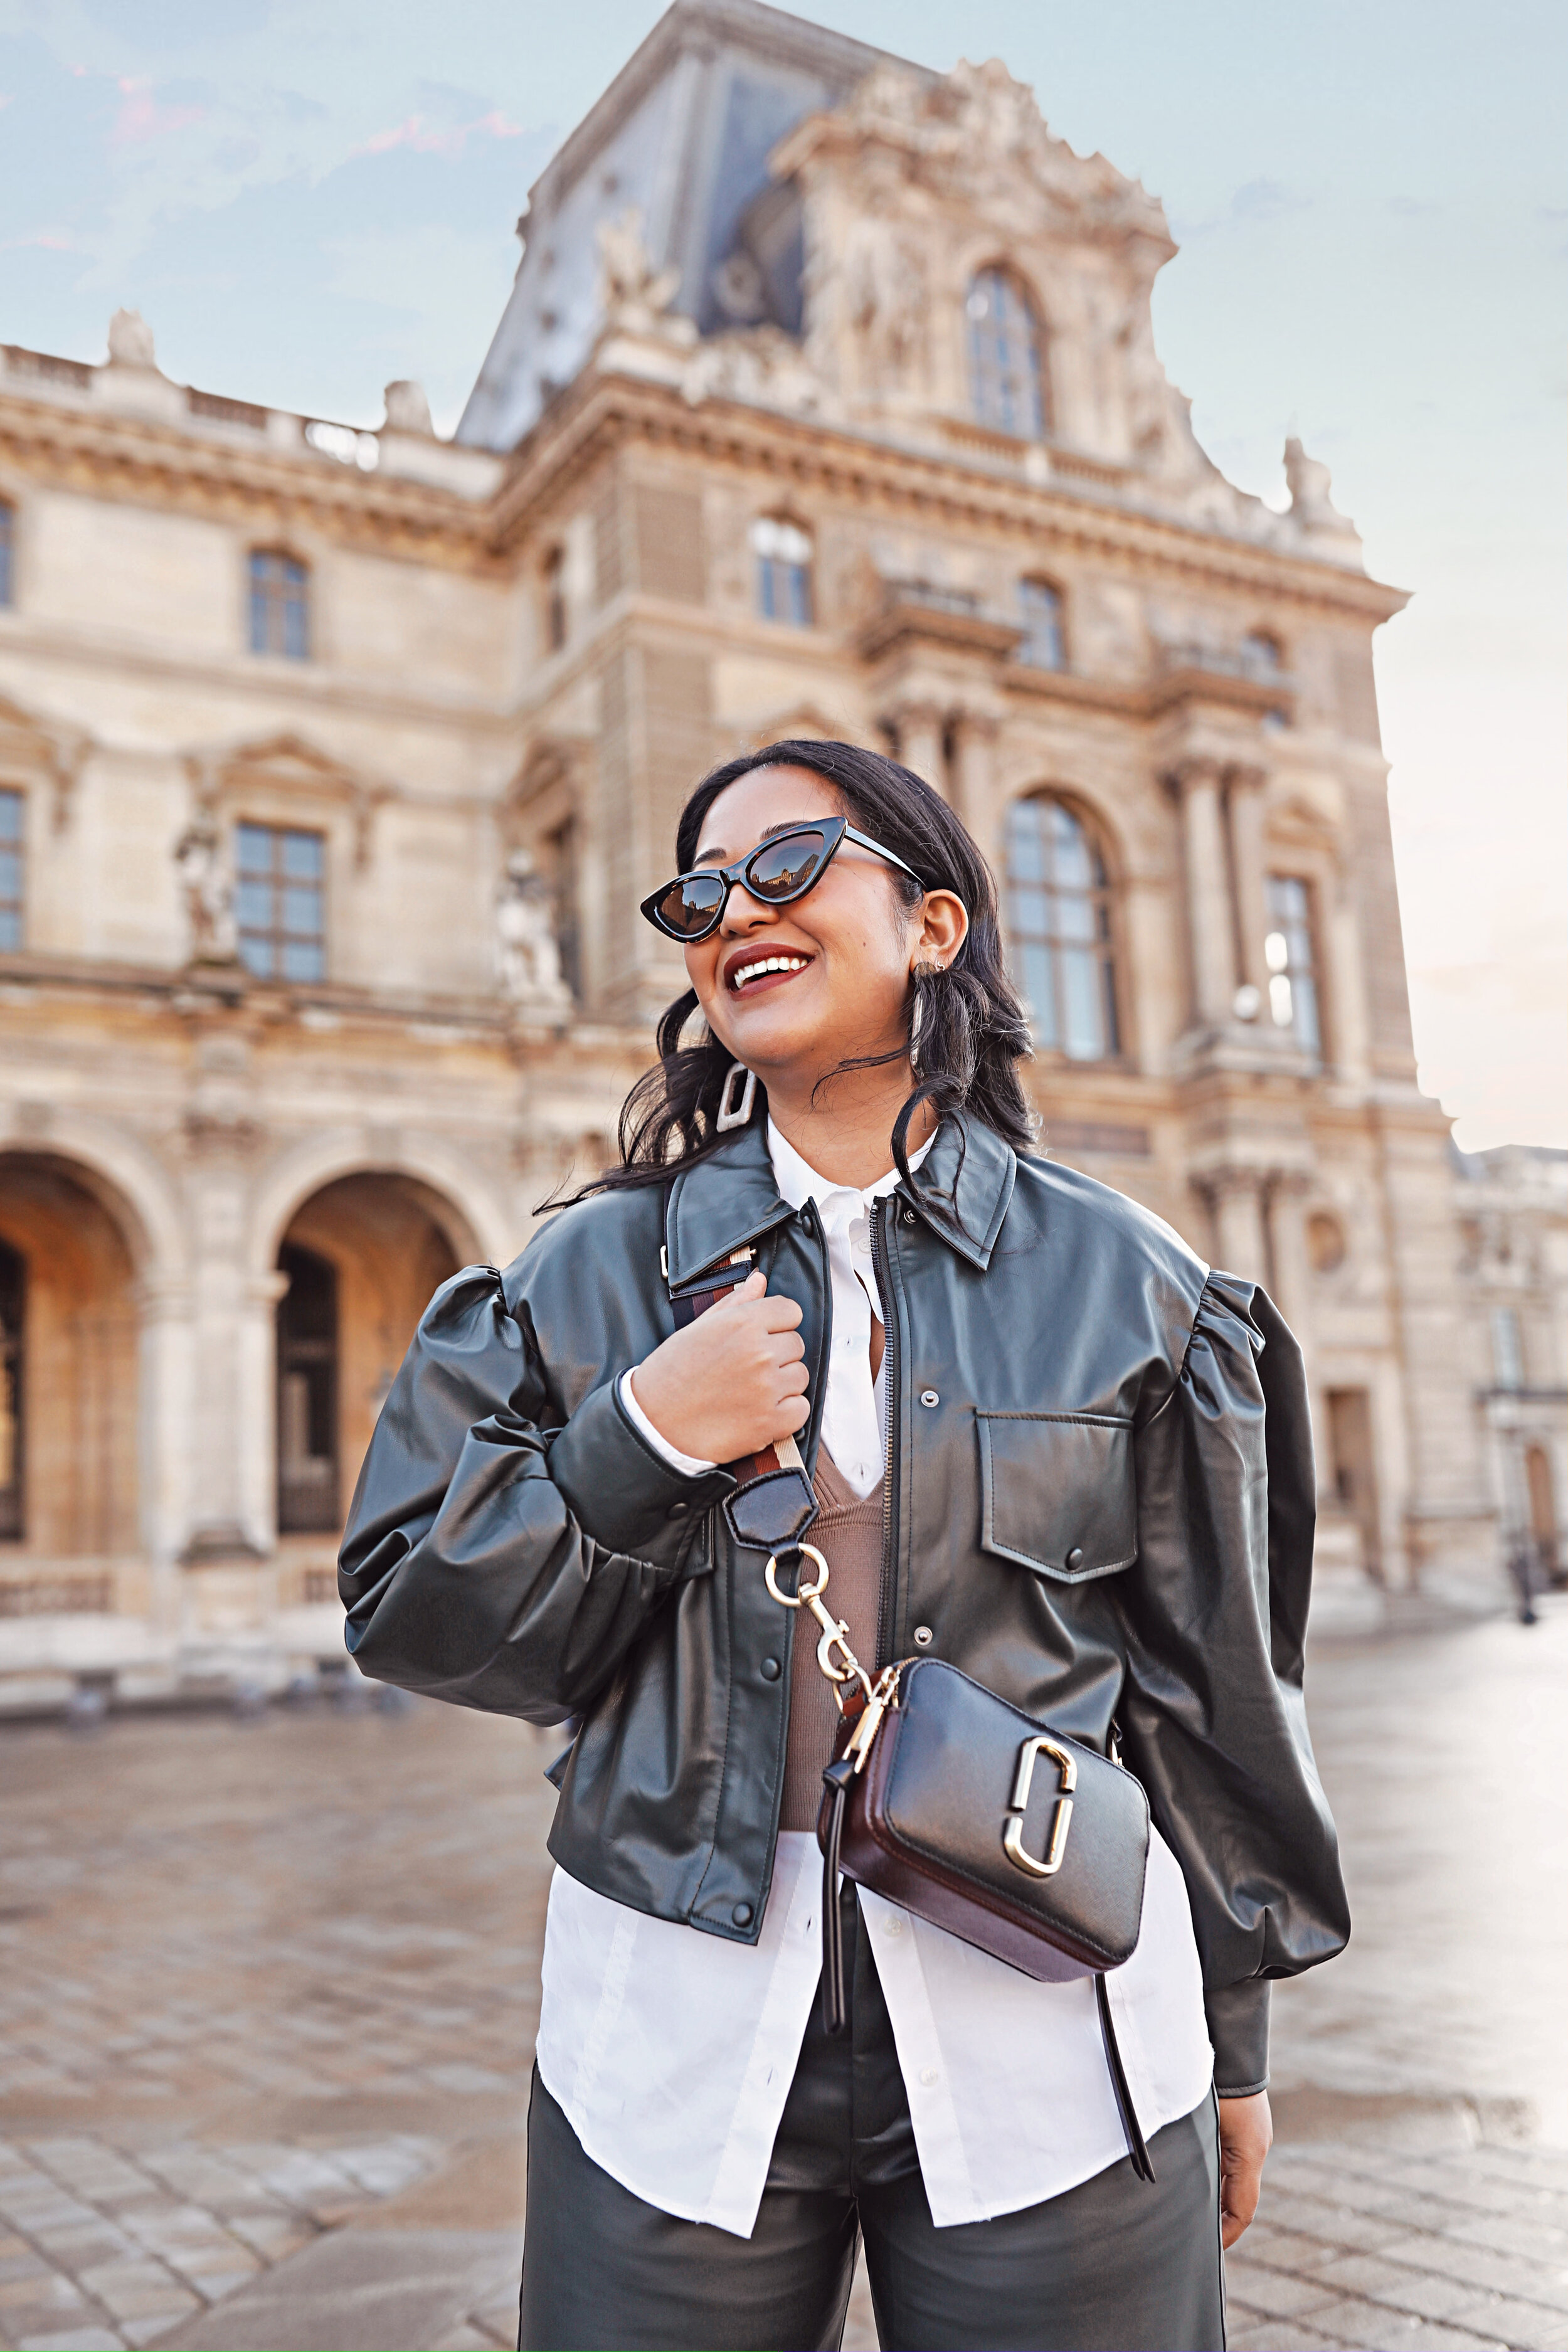
Louvre
I love the location of the Louvre! Everything in the area is absolutely stunning! I love the juxtaposition of the old architecture that surrounds the modern pyramid.
To capture the shot here, I recommend going during an off hour first thing in the morning. You can sit or stand on the edge around the Louvre (this will show off you and your look along with the backdrop). Lower angles work well here to capture the background. Lighting can be a bit tricky when shooting here depending on how sunny it is. I recommend trying it two ways.
1. Let the light hit you directly and play up the shadows
2. Find a shaded area and use one of the mini pyramids or another building as the backdrop
PS- be VERY careful in this area for pickpockets. People are very slick and you won’t even feel them coming. Also, do not sign anything or take coins/ bracelets that are for sale. This a scam and while you are using your hands, they will reach into your belongings. But don’t fear- just be aware and use common sense.
Map Location HERE
Thank you for reading!!
XOXO,
Krity
Photography by Ashley Gallerani
*I get a commission for purchases made through links in this post*